11/29/2008
Embellishments for vintage pages
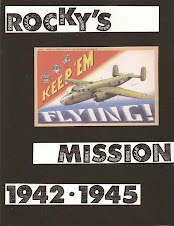
Internet auction sites like e-bay often have their images scrambled or distorted so the image cannot be printed, but I find a e-shop with several items I can use, then I buy them. Fair for the seller, and usually a bargain for me. An average postcard costs from 50 cents to 4 dollars, well within the range of a "new" vintage decoration, and are often a bargain. Ads range from 2 dollars to quite expensive.
On Google, I often type what I am looking for, and sometimes a public domain website pops up, for example "B-25 postcard" or "vintage B-25 ad."
11/09/2008
Pages with just my existing supplies (OMG !)
In my spirit of practical scrapbooking, I try to avoid buying "too much" of "just in case" special supplies, because the case never occurs. Avoiding those temptations still leaves me with quite a cache of basic colors of paper and stickers, plus lots of left-over bits.
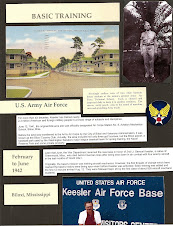
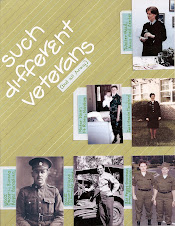
I re-discovered some paper and used the remaining sticker letters in my current favorite font for my "Such Different Veterans" page. The letter "e's" are totally gone now. I had to use an upside-down 3 for my final e. I hate using numbers because they are so scarce, but could not think of a fewer e title -- my first thought was "Three Different Veterans" -- impossible. I wrote my captions by hand rather than using Microsoft Word in a fancy font.
My second page was "What A Difference 3 Years Makes" in a graffiti style using rub-on letters of mixed fonts. My daughter had bought (convinced me to buy) a big set and used exactly one "H." I like the page, and still have plenty of rub-on letters for some future unknown project.
It seems odd that I used Different/ Difference in two titles in one day -- perhaps because it was so different to actually use my supplies ! OMG my daughter would say (Oh MY Gawd) Enjoy !
11/02/2008
Don't buy a set of six (or 12 or 16) decorative scissors because you'll only use two or three of them.
My favorite scissor is the small jagged / deckle / crinkle edge that really softens the edges of a photo or a mat.
I use my zig-zig / pinking ( I don't know why it's called that) scissor on the least important or boring edge of a photo. Zig-zagging all around looks too much like a school-project for my taste and causes stress because it's impossible to make the corners neat.
I have a perforated / stamp edge scissor that I use to cut white margins or mats for my 1950's or 60's photo copies. Those vintage photos usually have white margins with crinkle edges that I can reproduce with these scissors because I never put originals in my scrapbooks.
I kept the lacey edge scissor because I am sure that I will successfully use it someday on a vintage or princess page. I can't cut a mat on all four sides and get the corners right, and I have not created a one edge design yet. Time will tell if it should have gone to the school too.
9/27/2008
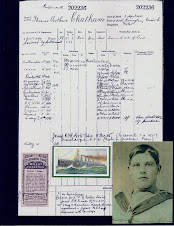
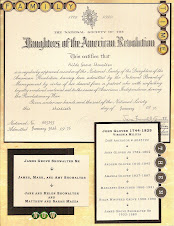
"Historic" Family Documents
We have some small (2x3) B&W photos, a few newspaper clippings, and his discharge paper.
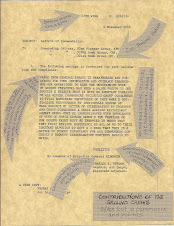
Through the wonderful internet, I have found old Stars and Stripes and New York Times newspaper articles and several documents relating to his service in 1942 to 1943. I found his disabled father's draft card from 1942. Similarly, I have found the census record for my husband's grandfather (as a boy)'s family, my grandfather's Canadian Army discharge paperwork, and other really interesting family documents. www.ancestor.com has been worth the $19.95 for one month's worth of searching (maybe two months).
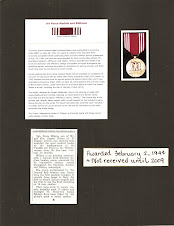
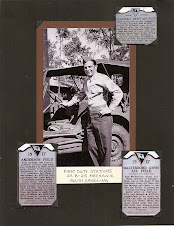
I want to scrapbook these original and downloaded "documents" in a vintage style. I started by printing or copying them on different shades light tan, beige, or parchment cardstock. Although the original paper may have been white, now the originals (if I had them) would be aged, and all the documents would not be the same color paper. I tried to size the document so I could trim it smaller than 8 1/2 x 11 to mount on black cardstock because vintage scrap books are almost always black.
No pages are totally complete yet, but many are in progress................
8/31/2008
Pre-packaged titles and borders -- another product I wish that I didn't buy.
The titles never "fit" in theme, color, or size on a page I was assembling. I finally (a year or two later) decided to design a few pages around them.
Then I realized that the borders and titles were printed on white paper, and I don't use white background paper. I cut away as much white as I could, and used them, creating some mediocre pages that "someday" I will re-do.
I decided never to design a page around one embellishment because I prefer to have my photos be the focus. To confirm that decision I bought a package of lovely pastel Victorian borders that at least were not printed on white.
All the borders are now donated to a local school program. Beware of cure products.
I now tend to think about products and buy them when I have thought of way to use them in a page design I love. I do buy products that I love that I use a lot.
8/12/2008
Brads -- a product I wish I only bought once.
To use a brad, you first punch a hole (with a large darning needle or a specialty tool) for the brad because just pushing the brad through will rip the paper in an unattractive way. Spreading the wings on the back of the paper to fasten the brad makes the page lumpy.
After using eight brads on one page, I have at least 98 more to go. I should knew not to buy supplies "just in case" it get inspired to use them. I knew not to buy the eyelets. I did buy colored staples, but I feel optimistic that I will find a use for them.
7/12/2008
Collages and Mosaics
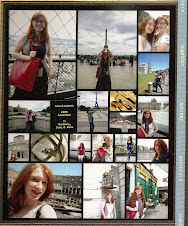
Making a mosaic is very similar to assembling a jigsaw puzzle or a patchwork quilt. I need a stack of photos to move around the page and select those that "fit" together. Trimming has to be done very carefully. Too much trimming and the photo is too small for its space. Any text can fit in its own rectangle, but I often skip the text box and just use a title box.
Almost all my mosaics are composed of different size rectangles with an occassional square. I made a few with different sized curved pieces. I have seen some mosiac pages in scrapbook magazines that are composed of one inch (or two inch) squares of different photographs. I have yet to figure out how to get my photos to fit into those patterns, but I am watching.
7/06/2008
Six months of blogging, six years of scrapbooking
Do I have more experiences to share ? Oh yes, I do. Out of my six years of scrapbooks, some of my favorite aspects of scrapbooking that I will describe next include:
- pages that feature mosaics of photographs.
- reworking and updating lay-outs.
- pages and scrapbooks of vintage photographs and "family trees." My mother's family and my husband's mother's family have photographs that date back into the 1880's for me to organize and scrapbook. We also have photos from our parents' pre-children lives.
- starting a scrapbook of my own "pre-children" life.
- scrapbooking our postage stamp collections.
- deciding what to scrapbook and when
- my topics for a 8x8 scrapbook rather than my usual 8 1/2 x 11 size.
As I spent this three day week-end cleaning and organizing my craft half of the laundry room, I also have given quite a bit of thought recently on these topics:
- tools that I bought and never used (or used once and twice and never again)
- organizing my paper supply
I'll post again soon as soon as I decide which topic to discuss next.
6/15/2008
Layouts with One Large Photo
Then I discovered that for most pages, the enlarged photocopy was perfect enough even for my final page. I like a soft resolution, but if the original photo is not in focus, the large photo becomes "too soft." I now have a photocopier that makes great copies, but ink prices are an issue, so I usually still head to Staples.
6/08/2008
Copying Scrapbook Pages
I do not want to totally re-make the page, so what to do ? Scanning and printing is one option, but it can get expensive. I have found great results with the color photocopier service at Staples or Kinkos. I especially like the self-service centers. Usually there is heavier weight acid-free paper available. The quality is excellent.
If I know in advance that I will be copying the page, I will buy and extra set of embellishments to put on the copy for the "3D" look that I like.
Copying someone's design is "scrap-lifting," an entirely different process. Most magazines have a section with design suggestions.
5/30/2008
I love my sharp little scissors.
I have my favorite pair of "Bumblebee" brand cutting scissors. To cut an image out, it is best to keep the scissors relatively still and move and turn the photo. Practice makes perferct. Hair is really hard.
I do not totally cut people out of the photo, but leave some of one side or the bottom of the photo. Otherwise the people seem to be floating on the page, and I have not had a page layout yet for floating people.
I photgraph and cut out a lot of signs for titles and embellishments.
5/12/2008
"Through the years" pages
I love assembling a page of my daughters cuddling together as infants, toddlers, tweens, and young adults. I made several pages.
Other photos to group for a "through the ages" page:
- Girls of all ages in increasingly stylish Easter dresses.
- Girls curled up with a good book as they grew up.
- Girls napping in interesting places from high chairs to airports.
- Girls on amusement park kiddie rides to roller coasters.
- Girls on the first day of school, increasingly tall and "cool."
- Girls on increasingly large and fast horses.
4/30/2008
Evolving Scrapbook Pages
Part of my fun with my scrapbook hobby is that my scrapbook pages usually evolve over time, a little or a lot. As I look over my pages, I can have new ideas for titles, captions, text, and journaling.
I may have found a new embellishment or another photo to work into the layout.
Inspiration for the text often eludes me, and my pages often have room in their layouts to work in some journaling when (if) inspiration does occur.
A page that seems dated or "off" becomes a target for renovation. Many of my old alphabet sticker captions are being replaced with printed Word titles throughout my scrapbooks.
While I fuss over most pages until they are "good enough" to put in the scrapbook, some pages I just know will be re-done "someday" when I find a better background paper ........or a better idea.
4/26/2008
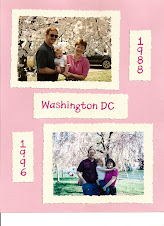
"Then and Now" pages
These photos could be taken intentionally (that my daughters have learned to tolerate) or total surprises while sorting photos.
I love making these scrapbook pages. In looking at my collection, I discovered that I use three basic layouts:
- two photos the same size
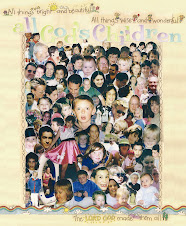
- a collage of several photos
- one larger photo and a second accent photo -- either the older or the more recent photo works well as the larger photo -- sometimes the quality of the photos.
Great topics for "then and now" comparisons include people:
- at the same vacation spot at the beach, Disney, cottage, skiing
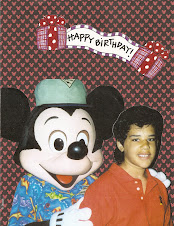
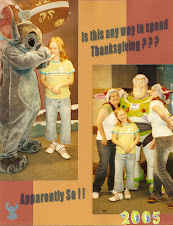
- with the same Disney character -- even Mickey changes over the years
- on the first day of school, especially the same school
- visiting Santa -- one child through the year -- or several children at the same age
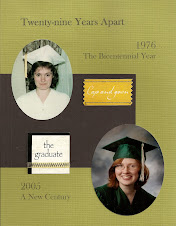
- graduation photos of gramma, mom, and daughter
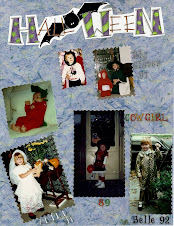
- in their Halloween costumes through the years
- in different hairstyles
- returning to a childhood home or neighborhood
- with all the babies who used a family highchair or baby bouncer.
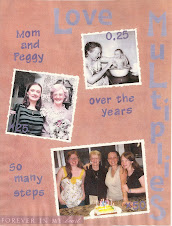
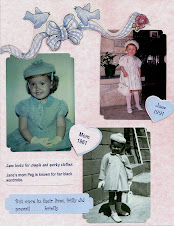
My absolutely favorite scrapbook pages are those that highlight family similarities. I matched childhood photos of my daughters to childhood photos of me that my mother gave me. We are doing almost the same thing in the same pose at almost the same age, but thirty-ish years apart. Total co-incidence !
4/13/2008
Organizing photos
Keeping my photos organized -- in the camera, the computer, and print envelopes neatly filed in my photo box files -- keeps production of my scrapbooks smooth and fun.
- I try to download my photos soon after every event, do basic edits, and make prints to share and put in my future pages file.
- I use Picassa, downloaded free from Google, for my basic editing and filing, and I use Photoshop Elements, not free but worth the money, for my serious photo restoring and artistic manipulation.
- I send my prints to my nearby Walgreens and can pick up a batch in an hour.
- I keep files organized by event in my PC and my photo boxes. I also put original and print copies in files for special subjects -- great photos of each of my daughters get their own file, my favorite Disney photos have a file, and cousin shots, best Christmas, cake shots, Halloween costumes, grandparent shots have .
While assembling a collage of my daughter Anna at Disney, I spent most of my time looking in files and places that were not my Disney, Anna, or best Disney files. "Summer 2004" was not the best label.
So, my past two weeks have been devoted to photo organizaiton. I have been looking at three years of files, renaming some, and dividing some others on my PC. Plus I did a back-up !
I enjoyed sorting and filing many envelopes of prints that had migrated through-out my house.
Rumaging through several years of photos was fun. I enjoyed reviewing some very happy memories, and I thought of some brand new page ideas.
3/22/2008
My Favorite Fonts
I spent time working for my father in his typesetting business that set the type for advertisements and brochures. I was fascinated by the choice of different styles of typefaces with different ads.
Besides the fonts that come with my Word program, I browse http://www.fontface.com/ and the shopping section of http://www.creativekeepsakes.com/ for ideas and downloads. Fontface has the most free fonts. The variety on both sites can be both fun and overwhelming.
Although I have some favorite fonts for titles and captions, I try to use a very wide variety of fonts, some used only once to fit a specific page.
While many scrapbookers handwrite their text boxes and journaling, I prefer to type. I have several favorite fonts that I use frequently because they are readable and resemble hand lettering. I probably use "Bradley Hand" most frequently. "Comic Sans" and "Andy" are good for informal and children's pages. "Papyrus" is a little exotic but quite readable. Two or three yers ago I bought a Creative Keepsakes CD of 30 elegant fonts "for special occassion" that work well for many narratives.
3/10/2008
Using panoramic photos
A panoramic setting is the best way to get a large image of an entire people (head to toe) within some of the surroundings. With regular settings, an image of an entire person is dwarfed by the surroundings.
2/25/2008
Practical is not Always Simple
Most of my scrapbook pages have a solid background, three or four matted photos or elements that flow from upper left to lower right, with geometric borders, captions that work as titles and few embellishments. I buy lots of embellishments, but use a strategic few to avoid looking cluttered or fussy, From that simple formula, I have created many different scrapbook pages that do not look simple.
Some energetic photos and events, however just demand busier layouts. I have no formula for my busy pages; they are all different, but in general if I use a brightly patterned background scrapbook paper, I try to use double mats and fewer photos.
I have fun making these busy pages, but not too often.
2/22/2008
Greeting Cards in Scrapbook Pages
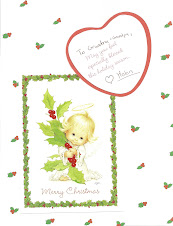
Putting my favorite greeting cards in a scrapbook layout is much preferred to storing them in a drawer or a box.
Displaying both the cover and the inside is solved by cutting along the card's fold. The inside sentiment and signature can have extra way be cropped smaller. If there is print on the inside cover, then the photocopier comes to the rescue.
Photocopying the back of postcards and gift tags also makes them good scrapbook elements.
- All the pieces of the deconstructed greeting card can be used as elements in a scrapbook layout.
- Remember to use matting, especially for the white inside sentiment.
- It works well to include a photo of the person who gave the card, especially for holiday, birthday, christening, or graduation parties.
- Titles and captions seem less necessary on greeting card pages.
Finally, images or quotes from greeting cards can be used as embellishments without including personalization or signatures.
2/10/2008
Creating Titles with Word
- Most of my titles are phrases or captions that fit somewhere within the layout. Some cute titles are stickers or die-cut designs I purchased and worked into the design.
- I have created some titles by using sticker letters. Sticker alphabets limit letter choices (can't use too many a's or e's) and aligning the stickers is pretty work intense, so using stickers keeps the titles short. Now I use stickers only for unique letters.
- Most of my titles and captions (well, and journalling too) are created with my Microsoft Word program that I use for my "regular" word processing. Word has features that I never used for my "regular" typing but are great for scrapbooking. I have seen and bought scrapbooking software, but for my text I always return to Word.
Word has great versatility in typeface (font), size, and color. The word toolbar shows the choices. Specialty fonts can be downloaded for free or purchase. My daughters introduced me to http://www.fontface.com/ that has its own free fonts (many of which are "look-alikes" of famous brands or logos) and has links to other sites. With so many free fonts, I have never bought a font. - After typing the title, then I try difficult sizes and fonts to match the style of the font to the style or mood of the page. A font size of 28 to 48 is a good start. Dividing the title into two or three lines often fits on the page better than one lone line. The top line can be in a bigger (or smaller) font size for emphasis. Some words can be bold, italics, or both for effect.
Other features to try
- The "Word Art" feature (found under insert, picture, word art) can produce some very weird or attractive titles, and it takes some practice.
- The border feature (found under format) can be put a border around a title, text, or caption.
- The title can be printed in black or color on cardstock or clear sticker paper and then attached to a scrapbook page. Sometimes I print directly on the scrapbook page, but alignment can be tough.
Experimentation is easy with Word, and my first choices of font, color, size are rarely my final choice.
2/07/2008
Buying Paper
I know that if I buy pretty or dramatic patterned paper with a specific project in mind, the paper gets used in a layout. When I buy the pretty or dramatic patterned paper without a specific plan, I get to admire the paper for months or years in my paper filing cabinet (yes I have a filing cabinet for paper) without ever finding the inspiration. in my photos to actually use the paper on layouts.
At Joann's I found padded "Stacks" of Christmas paper at a large discount. Pads of solid cardstock are a great bargain because the colors are useable year and theme round. I can cut the 12x12 to 8 1/2 x 11 and use the extra for trim and mats. Pads of 4x6 cardstock is a great bargain too. Two easy purchases. My struggle is "The Stack" of assorted solids and prints, with solids and subtle prints, a few some prints I would never use, and so many adorable printed papers that I have no idea how to use as background for a layout. Does my filing cabinet need more paper ? But it's cute paper.........to buy or not to buy.......I'll decide during my lunch walk tomorrow.
1/30/2008
Text for travel scrapbook pages
It's also boring to identify every person on every page, especially when it's the same family group, but I have been surprised at how I have later misidentified a child in an unlabeled photo. Using people's names in titles and captions is helpful and less monotaneous than listing everyone.
Some people like to write about their experiences while travelling. They can write (save, and not lose) descriptive paragraphs while travelling or later write recollections or insightful summaries. Their handwritten, typed, or e-mailed travelogues can be copied or printed onto cardstock for inclusion into the scrapbook, either as a textbox or the main page itself with an embellishment.
There are some techniques to help those like me who do not write interesting or entertaining travel descriptions:
- ask people to save the postcards you send them, photocopy the message and mount with the picture side of the postcard
- print-out e-mails you send or receive along the trip
- print the itinerary in a large interesting typeface
- compose lists and print them in large interesting types faces
- collect quotes along the way and include them in the pages
- write down your impressions on menus, bills, programs, tickets as you collect them for later use on your pages
- assign children to write about their day, save their writings to include in pieces or whole.
- fill-out customer satisfaction forms in great detail, then don't turn the forms in.
There are many ways to fill in the details of a trip that are not told by the photos !
1/25/2008
What can I do with these photos ?
A practical scrapbooker can always put four cropped photos on a page with captions and mats to make a pretty page, but even a practical scrapbooker sometimes may want to put a little more drama or with their photos on a page.
Flipping through the pages of an actual scrapbooking magazine is a pleasant pastime that has given me ideas, inspiration, and some help. I enjoy magazines that have layouts and suggestions that are plausible to do if I had the time, supplies, and interest.
My two favorite scrapbooking magazines are Simple Scrapbooks and Scrapbooks Etc. I prefer the paper magazines to their websites that are very full and busy and a little overhwelming with ideas; but their websites are my favorite websites.
1/23/2008
Assembling the scrapbook into an album
After creating some pages, the scrapbook can be assembled.
- The pages need to be put in order and slipped "back to back" into page protectors. Facing pages need to be compatible but not matching. Often shuffling is necessary. I leave some blank colored cardstock for "future pages" that I may have in mind.
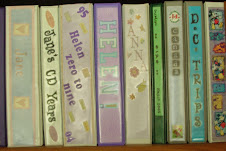
- Most of my scrapbooks are kept in 3-ring binders. The cover of the binder is larger than 8 1/2 x 12, so I trim a 12 x 12 piece of paper that will slip into the front "clear view" pocket. I create the cover and decorate the spines of the scrapbook.
You can buy 8 1/2 x 11 scrapbook albums of an expandable "post style" with pre-printed, fabric, or leather covers. I find shuffling and adding pages more difficult, so I use the post style scrapbook albums for completed projects that I do not expect to modify much in the future (but I could, and have, and will). I only did one scrapbook that was spiral bound -- too much pressure to have the pages and order correct from the start !
1/21/2008
What is matting photos ?
- usually 1/8 or 1/16 of an inch looks good to my eye. Wider margins are good for writing a caption. Much wider margins can be very artistic. A slightly wider bottom margin helps "ground" the photo.
- Mat colors of white, grey, light blue, cream, and black seem to work best. 4x6 pads of neutral color cardstock papers are good staples. After cropping photos and selecting the background page color, try different colors to see which color seems to complement the photos and the background color.
- To actually mat the photo, adhere the photo (I use one photo adhesive square on the back of each corner) to the lower left of the mat, keeping the left and the lower margins equal. Then only the right and top margins need to be actually trimmed.
I use special matting is used less frequently to keep it "special:"
- Double matting a stacking a neutral color close in a thin margin close to the photo and a more vibrant wide color on the bottom.
- Asymmetrical matting of the left and top margins thinner than the wider right and bottom margins really frames photos that you want to be the center of attention.
- Very bright mat colors work with very bright photos and subject such as children's parties or Disney theme parks.
- Cropping photos square, matting in white, then trimming with "perforated edge" scissors creates the look of "vintage" 1950's and 1960's snapshots.
- Trimming mats with lacey or scalloped edge scissors creates a fantasy or princess look.
1/19/2008
What's that tool
- decorative edge scissors -- use to trim the edges of photos, mats, or borders. I am partial to my "torn edge" or "jagged" scissors. I use scalloped and other patterns on occassion.
- stickers -- highly addicting, should enhance the page, not clutter it. it is ok to use just two off of a page.
- die cuts -- decorative paper shapes that you have to adhere yourself.
- ribbon -- for a border or a decoration. Some is self stick, others needs two sided tape to adhere it.
- corner punches -- my favorite is used rounds the corners, create dovetail corners, or intricate lacey patterns for paper corners.
- shape punches -- for decorations -- I often find use a specific punch for a specific page once, then never again.
- equipment that cuts photos into ovals and circles should be tested first to see if you find it as easy as advertised. After lots of searching, I love my Creative Memories brand cutting system. The only shape I use with any frequency is the oval. I find circles hard to use.
Only use the tools and techniques that are simple and fun for you !
1/18/2008
Text -- Titles, captions, and "journalling"
Text can be created by hand writing, word processing, applying alphabet letters, using stickers or die cuts, photocopying or downloading descriptions, photocopying the message sections of postcards, printing out e-mail, copying letters, painting, embossing, and probably more ways.
My handwriting is almost never lovely enough for me when I use a marker to write a caption. I prefer word processing, especially the ability to try different fonts, colors, wording, spacing, and sizes before I adhere the final version to my scrapbook page.
I use my standard Microsoft Office Word program -- it has so many features useful for scrapbooking -- few of which I ever used while typing my reports for work or school. With word and my color printer I happily can create most of my text.
I use alphabet stickers to create titles or captions only when the stickers are so unique that I can't resist or when I can't easily re-create the style or patterns with Word. My daughter loves Photoshop Elements for creating elaborate titles, but so far I only use it for special photo editing projects.
Scrapbook stores have abundant supplies of cute, touching, witty, elegant, historical, whimsical, and topical captions with matching graphics. Each store often has a different selection. Browsing the selection for inspiration is a favorite pastime.
1/16/2008
Mixing photos and souvenirs
- A collage of tickets or a large menu on a scrapbook page may include only one photo to help personalize the otherwise impersonal paper items.
- A logo can be cut from a photocopied brochure or even a paper napkin (they often have cute logos printed on them) to use as an embellishment or decoration.
- Postcards often show views that the average tourist or traveller cannot take. A postcard can be cropped and used as one photo on a layout.
1/13/2008
Arranging photos on the scrapbook page
Some pages may need a lot of space for a lot of explanation or story. For some pages brief captions or dates are enough. The more text, the fewer photos will fit comfortably on the page. I rarely write long journal entries and prefer to "stick to the facts," often from a humerous perspective. Only a few pages of my pages seem to need a big title across the top. Here are some of my favorite layout basics:
- In general a layout looks "correct" when photos seem to flow on a diagonal along the page from the upper left to the lower right. That leaves space in the upper right (and sometimes lower left) for text.
- Many photos look better against the edge of the scrapbook page, and others look better with the scrapbook page serving as a border.
- If you have a photo with sky, it often looks best flush against the top edge of the scrapbook page, so no color shows between the edge of the sky and the edge of the page.
- Similarly, if you have a photo with half a head, tree, or building on one side, put it flush against the page edge.
- Some photos look better "grounded" against the bottom edge.
- You may need to crop some more (small slices at a time !) so the photos fit on the page and the areas around the photos be uniformly spaced.
1/12/2008
Selecting a page color
If there is a small interesting item with a distinctive color in the photos, try that distinctive color as the page color. The color of a shirt, sign, flower or sneakers may be a color choice. Try a page color that is complementary to the main color in your photos. Complentary (or contrasting) color pairs include shades of green/red, yellow/blue, green/purple, and blue/orange. You can search for a "color wheel" of 12 colors ito download to use as a guide.
1/09/2008
Cropping / trimming existing photos
To crop / trim a photo, position it against the top of the paper cutter / trimmer to trim a thin slice off the selected side with the blade. Reposition and take thin slices off any other sides. Taking several thin slices gives you more ability to adjust your result.
While arranging the photos on their page, some additional trims can be made.
It is very easy to get too enthusiastic about cropping photos and take out too much background, chop off an important person or item, or make the photo too small. It's essential to enjoy cropping, but not get carried away.
1/08/2008
Cropping is cutting or trimming photos
- remove patches of bad lighting
- eliminate unnecessary clutter
- remove a distracting building, head, sign, or pedestrian at the side or corner
- remove sky, grass, beach, or pavement that overwhelms the subject
- put horizons at a line one third or two thirds across the photo (never across the middle)
- make several photos small enough to all fit on a page.
Sometimes I group photos for a page, then crop them. Sometimes I crop a whole stack of photos and then select the groups for each page. Sometimes I flip between the two strategies.
1/06/2008
From a stack of photos to first draft
- Cropping each photo with the paper cutter / trimmer: your photos will end up different sized rectangles and squares. That’s quite fine. More about cropping later on.
- Placing the photos in chronological order for the "story" that the scrapbook will tell.
- Grouping photos that belong together on each page.
- Selecting a background color for each set of photos for each page.
- Placing the photos into a page protector with your selected color. Don’t use both sides of the cardstock, because it becomes too hard to shuffle and re-order the pages. Don't worry about arranging the photos on the page yet.
- Putting the page protectors back in the binder in the correct order.
Now you have your photos on their pages in the correct order for your first draft. Go back and flip through the pages. Is the order correct to tell the story you want to tell?
Full page memorabilia is put in their own page protectors and inserted into the binder at the correct point to tell your story. If any memorabilia or document is priceless I make a color photocopy.
For smaller pieces of memorabilia, they and background piece of cardstock go in the proper place in the binder. I like to mix smaller photos and paper keepsakes on the same page, especially a photo that includes the item and a person.
Now the first draft of your scrapbook is done !
1/03/2008
What scrapbook supplies to buy ?
Basic "starter" supplies can be bought at large chains such as Target, Joann Fabrics, AC Moore, Michaels, some KMarts, and even some CVS stores. I do not buy basic items on-line unless I have seen the them in person first. For some items there are better selections and prices at office supply stores. Local scrapbook stores tend to be more artistic, and I use them for embellishments (decorations), unique papers, and special tools.
Scrapbookers need paper, specifically "acid-fast," so no construction paper or printer paper.
To start, buy packages of SOLID colored paper labelled "card stock" or scrapbook paper:
- one package of blues
- one package of neutrals
- one package of colors that suits your fancy and your scrapbook event or topic -- jewel tones, pastels, browns, or brights.
There is a bewildering assortment of a la cart papers. Buying and accumulating too much pretty paper for a future undefined project is a real risk. Simpler paper is easier to work than patterned paper. I usually avoid "stacks" of assorted papers because I end up not using a sizable amount. I do buy a "stack" of neutral 4 x 6 cardstock to mat photos.
A large package of 8 1/2 x 11 page protectors is necessary so each piece of paper goes into a page protector in a 3 ring binder as the "working" scrapbook. The one inch size binder is easy to handle. Some have a clear front sleeve for inserting a title page. Pages can be re-arranged very easily.
A significant and important purchase is a paper trimmer /cutter to use for paper and photos. It is almost impossible to trim straight and square with scissors. The trimmer/ cutter should be sturdy, simple, and big enough to cut 12 inch paper. I use an office style.
The final item is appropriate adhesive. I find 1/2 inch square adhesive "photo squares" the simplest to use. They come on a roll of 250 or 500 or 750, and there are several brands. Just one is good for tacking. The "repositionable" ones are handy in case you need to reposition.
I try to avoid the cute titles, stickers, letters, trims, ribbons, pens, and punches without a specific project in mind, but they can be hard to resist. The basic supply list is:
- packs of solid card stock
- page protectors
- a 3 ring binder
- adhesive squares
- a page trimmer
1/02/2008
What to scrapbook ?
It is tempting to try to organize ALL the photos and then scrapbook. That's a decision to never scrapbook, because all the photos will never be organized. Scrapbooking a pile of photos is one less pile to file away. While looking through photos, I collect all photos of a topic in its own stack: cat or car or beach house or boat or Halloween photos. Collecting photos for a topical scrapbook album is rarely an afternoon or weekend activity.
I started my first scrapbook in 2001. So far I have (in no particular order) scrapbooks of :
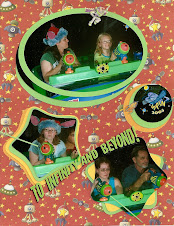
- our trips to Disney World in one scrapbook, starting with my first trip to WDW in high school in 1974. Mickey Mouse evolves and my kids grow through this scrapbook.
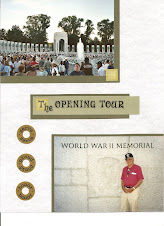
- our trip to Washington DC with our parents for the opening of the World War II Memorial includes photos, programs, articles about the opening, and some of my step-dad's WWII photos.
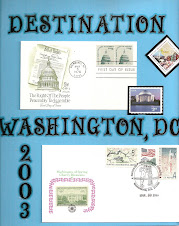
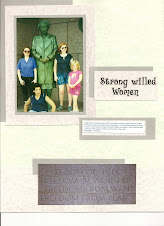
- trips to Washington DC including our 2003 family trip, some 20 year ago day trips, a 1995 Girl Scout trip, and some historic postcards I collected along the way.
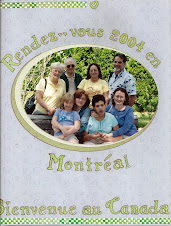
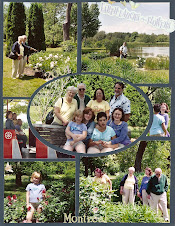
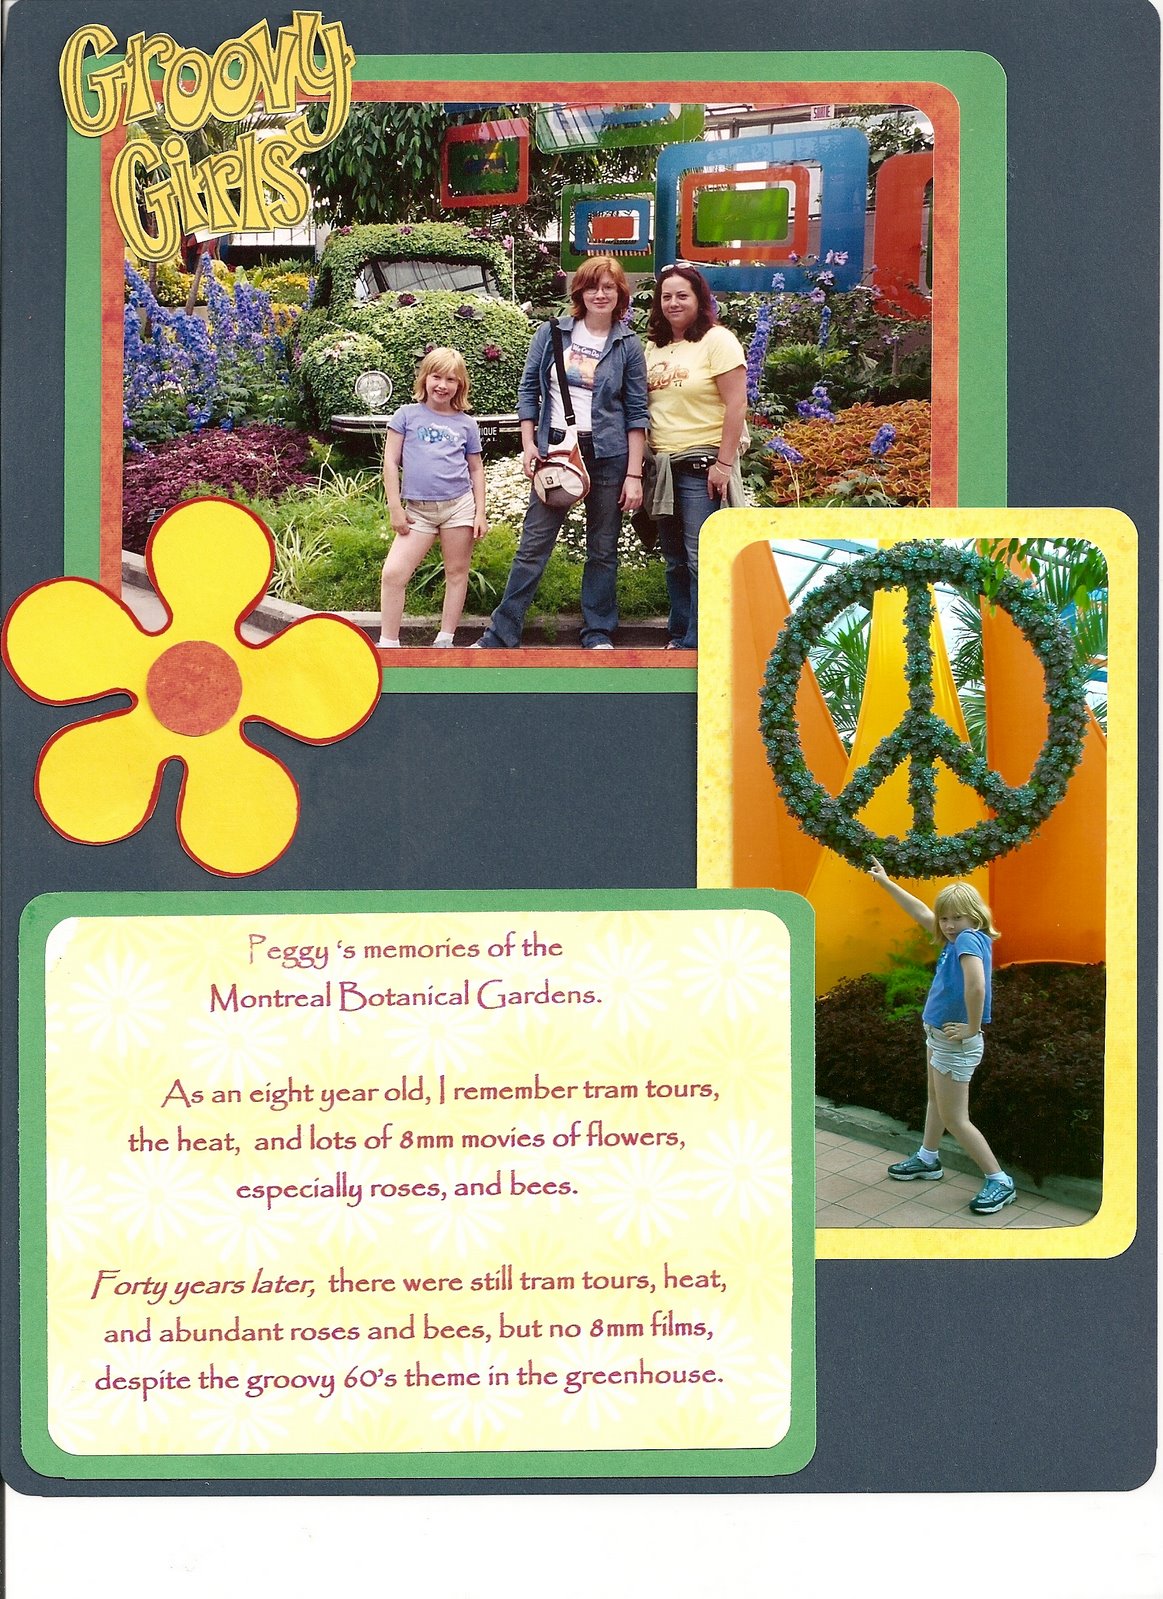
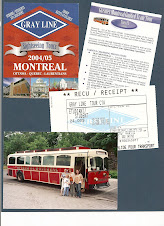
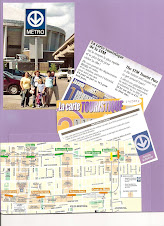
- our 2004 family trip to Montreal with my parents that includes photos from my childhood there for comparison.
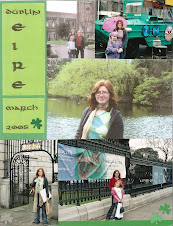
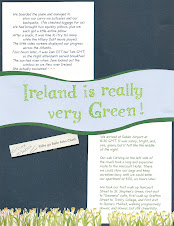
- our 2005 family trip to Ireland
- trips to California in 2005 and before.
- my college daughter's trip to Costa Rica and her trip to China. She's an artistic soul and a writer, but she cannot get herself interested in scrapbooking. She gave me her photos with post-it notes on the back and miscellaneous ticket stubs and pamphlets. I printed her e-mails on colored paper to use as her travelogue.
- birth to high school scrapbook and and then high school scrapbook for each of my daughters. These scrapbooks expand as I find photos and "stuff" and get bright ideas.
My "theme" scrapsbooks are always expanding:
- all the cat photos I find, starting with my mother's cat "Duffy" in 1950, and including all the (sarcastic) greeting cards that our house cats cats have sent me.
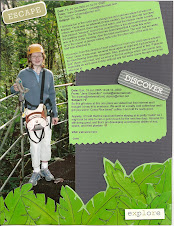
- decades of "cute animal" photos taken at parks, zoos, forests, beaches, backyards, and fairs. It's popular when kids visit.
- decades of "cake" photos from birthday parties, weddings, showers, and graduations along with photos of many people blowing out candles. My step-dad has never seen a cake that did not deserve its own photo, usually taken from above while standing on a chair.
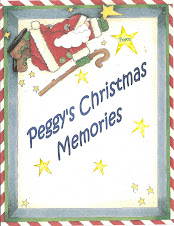
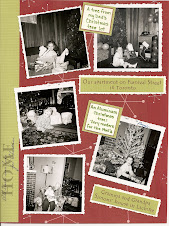
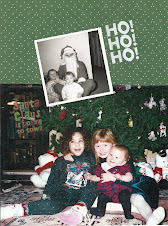
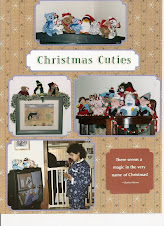
- Santa, Christmas tree, and Christmas morning photos starting with my parent's childhood with a smattering of Christmas cards over the years.
- "then-and-now" photos of different generations doing the same activity.
1/01/2008
Happy New Year
- keep a New Year's Resolution to "do something" with your photos and paper mementos ?
- use your photos to show the history of your family, relationship, children, pet, travels, events ?
- rescue photos from dreary magnetic photo albums ?
- focus on your photos and their story ?
- display photos in a visually pleasing documentary style ?
Scrapbooks help me feel creative, productive, and happy. My kids and family spontaneously pick up the albums to recall past memories and share them. My tween daughter has even shown them to her friends. I have some graphic arts experiences and talents that I like to channel through my pages, but my focus has always been on telling our stories through our photos in our scrapbooks. As I have browsed through many scrapbook stores, websites, and magazines, even I have been a little intimidated by the focus on the "art" of scrapbooking. My style of scrapbooking is good for people who don't want
- complicated artistic processes
- large investments in supplies (although there will be a shopping list)
- a close relationship with a consultant / seller of supplies
- feeling intimidated by racks of expensive paper, albulms, stickers, and tools.
I hope that you enjoy revisiting your happy memories through scrapbooks too.
