You can almost date photo snapshots by their size because they have been growing over the years. 4x6 photos are recent. In the 1980's, 3 1/2 x 5 prints were standard. In the 1970's most snapshots were 3 x 3 squares. In the 1960's the snapshots were smaller squares. 1950's snapshots were smaller. Many 1940's family snapshots are 1 1/2 squares or 1 1/2 x 2 1/2 rectangles -- truly tiny compared to today's monster prints.
These "tiny" snapshots should be copied before scrapbooking. I scan them at home, and two simple steps improve most photos. My scanner has a "restore color" option that works great even on black and white photos, and even ones that I do not think are faded. It's a check box, and so easy, so check your scanner. Most photo editing programs have a "convert to black and white" option that improves black and white photos too. I do these two steps on most photos.
For photos that are very damaged or faded, I use Photoshop Elements. My favorite book is Matt Kloskowski's "The P-S E Restoration and Retouching Book" that I bought at Barnes and Nobles. It is more useful for old photos than Barbara Brundage's "Photoshop Elements 5 The Missing Manual" that I also bought at B&N.
These little snapshots usually are not sharp enough to enlarge much at all. So it's easy to put several on a page. But what if there's only one for the event ? That leaves a lot of space to put a more recent photo of the same place / person, a vintage postcard, a photo from the internet, some remembrances or history, captions, and maybe all of it !
A Family History Collage
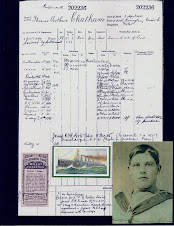
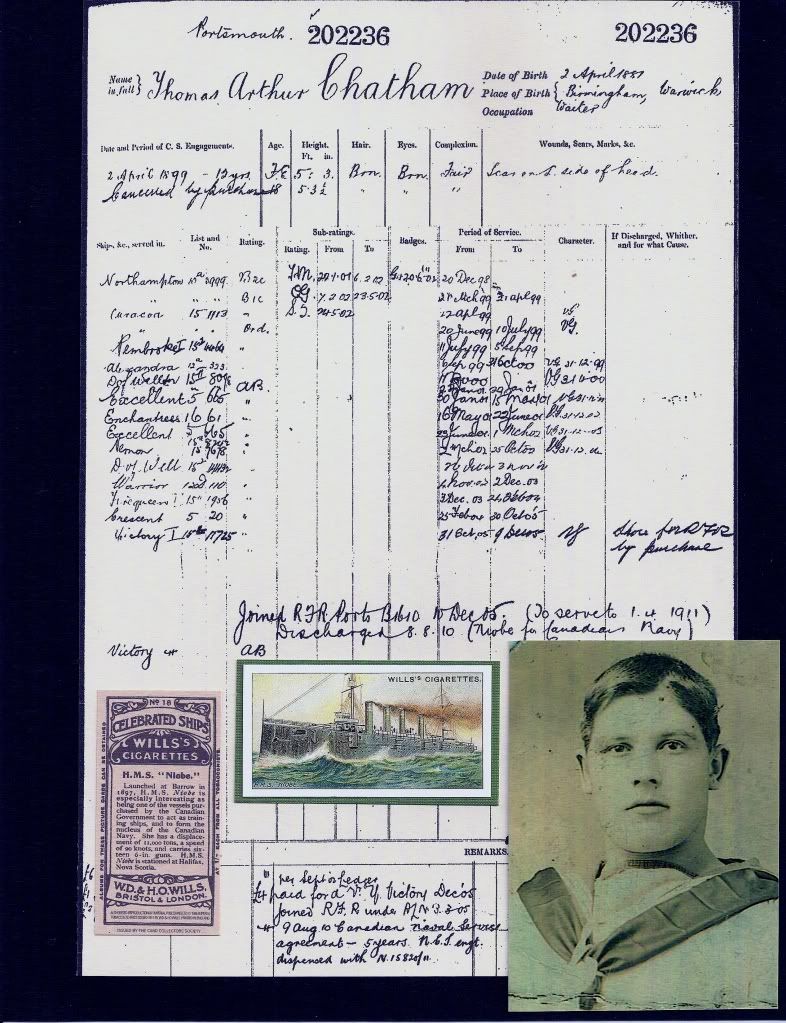
Click to enlarge Over three month's work: a copy of Grandpa Chatham's photo, his service record printed from the UK Archives on-line for a "nominal" fee, and a cigarette trading card of his ship bought from e-Bay with a scan of the reverse. TA-DA ! Instant Christmas presents
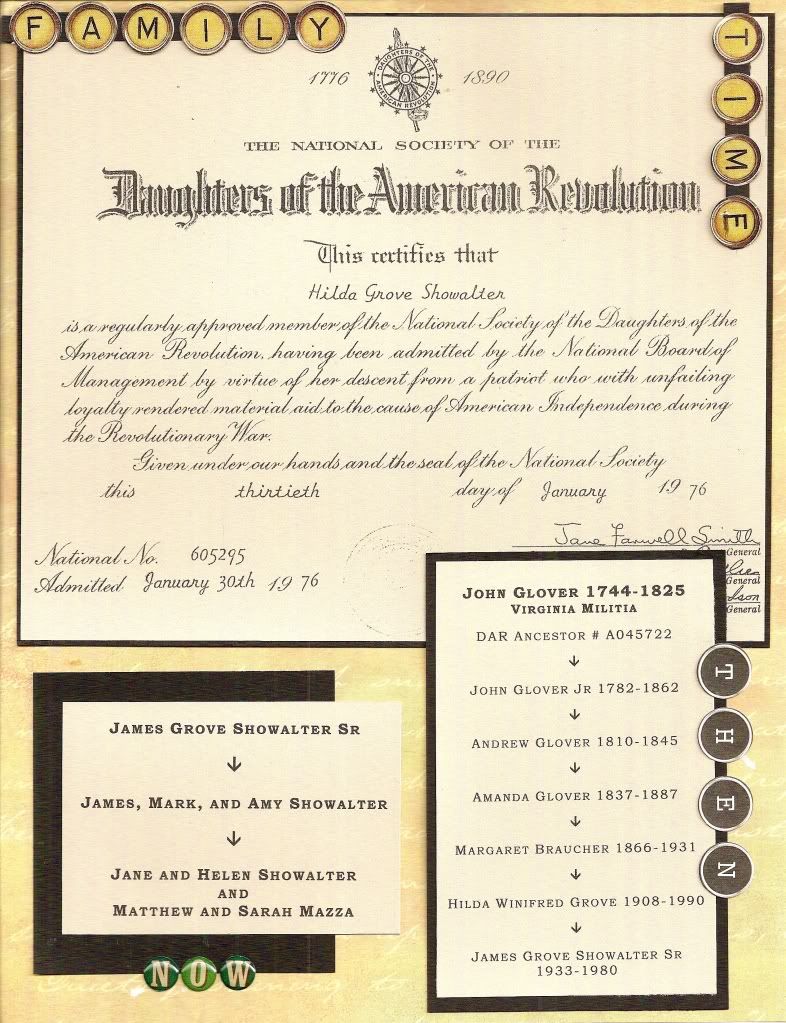
Scrapbooking a Certificate

Click to enlarge I vaguely remembered a DAR certificate on the kitchen of my daughter's father's grandmother's kitchen in the 1980's in PA. Getting a copy of the certificate was a bit of an adventure, but the challenge was turning the certificate into an interesting page. The DAR website helped with the lineage that I typed in an "old fashioned" font. I used old typewriter key stickers and modern "Now" sticker bubbles. Are the girls impressed ? interested ? Guess ! Scrapbooking is for the joy of assembling the page, not for the reaction of teenagers.
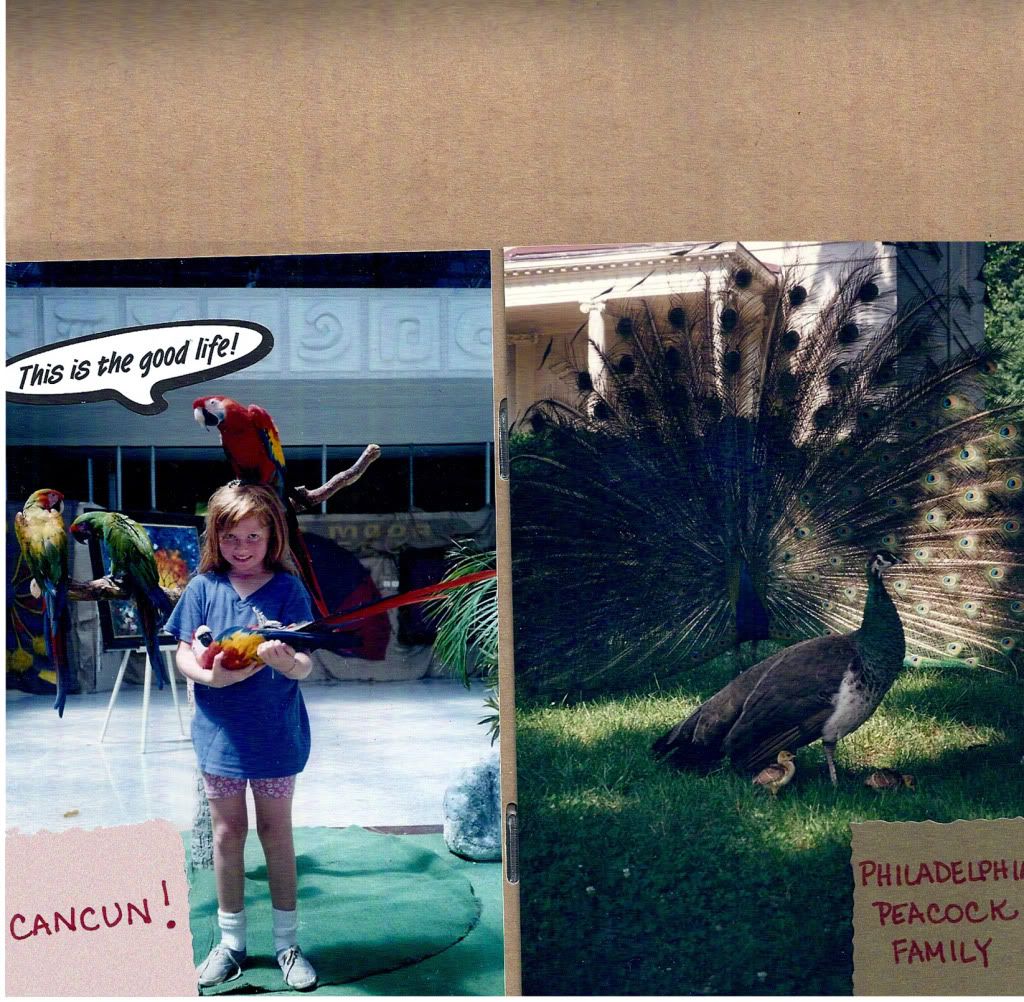
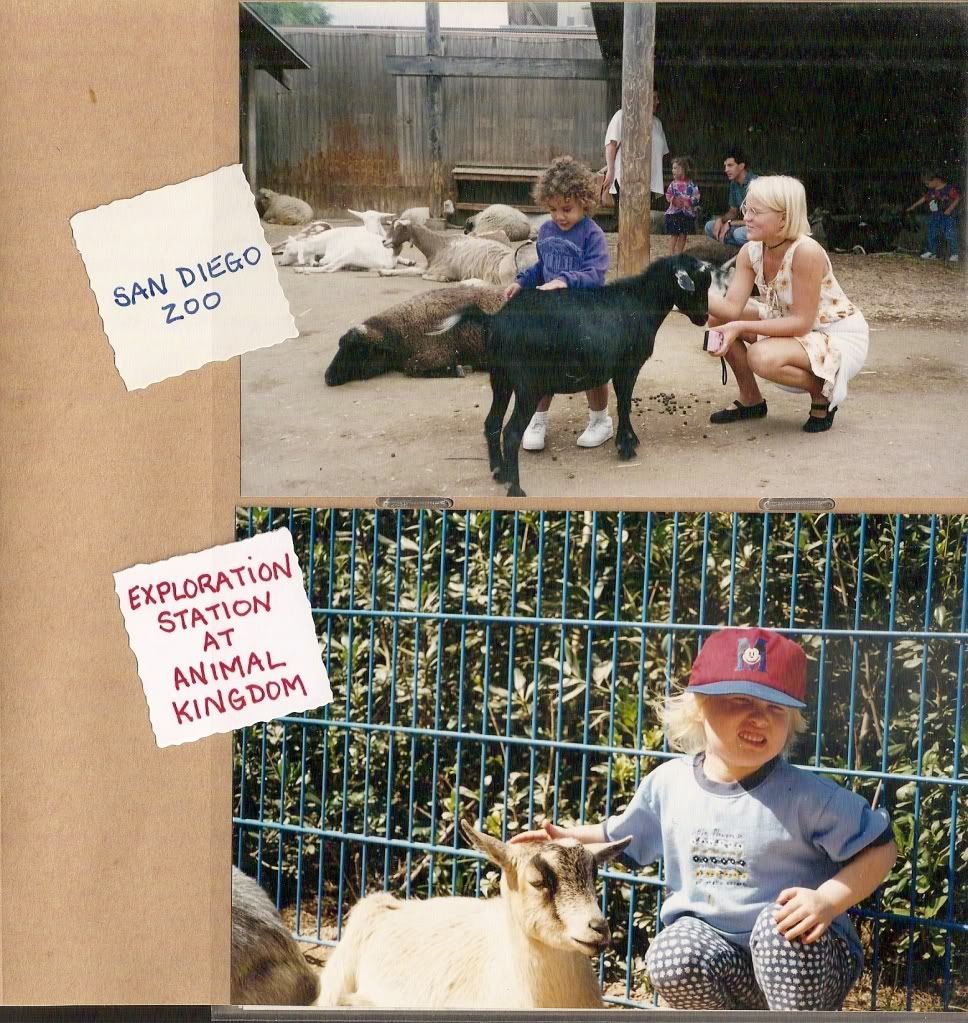
My photo album, not a scrapbook, page

Goats in my Animal Kingdom Photo Album

Journaling by post it note
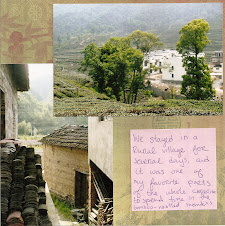
Click to enlarge My literary daughter does not scrapbook, but she travels, and I like her photos. Why re-type her descriptions ? I found paper to coordinate with the photos and the random colored post-its.
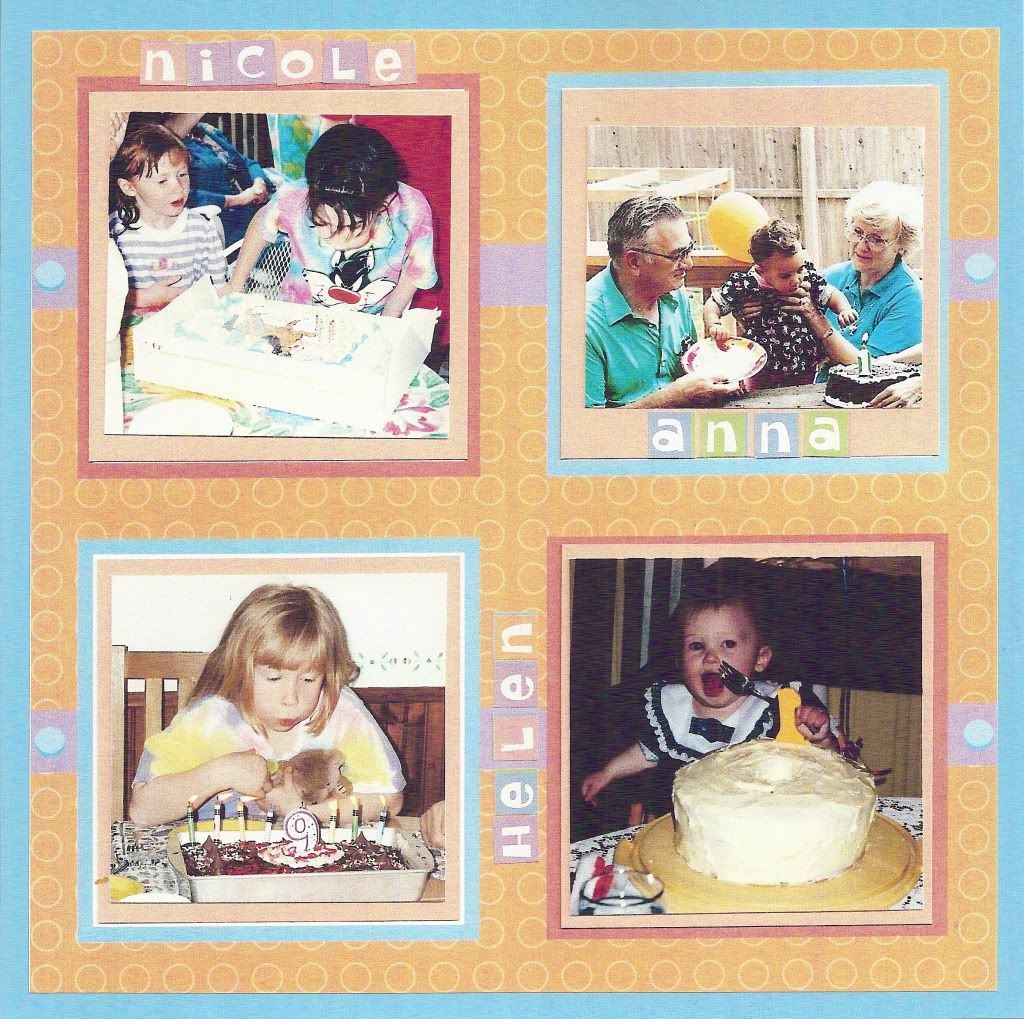
Years of Cake Photos

Click to enlarge Pre-made birthday pages are perfect for my collection of cake photos taken at festive events.
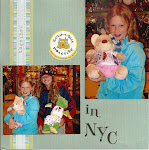
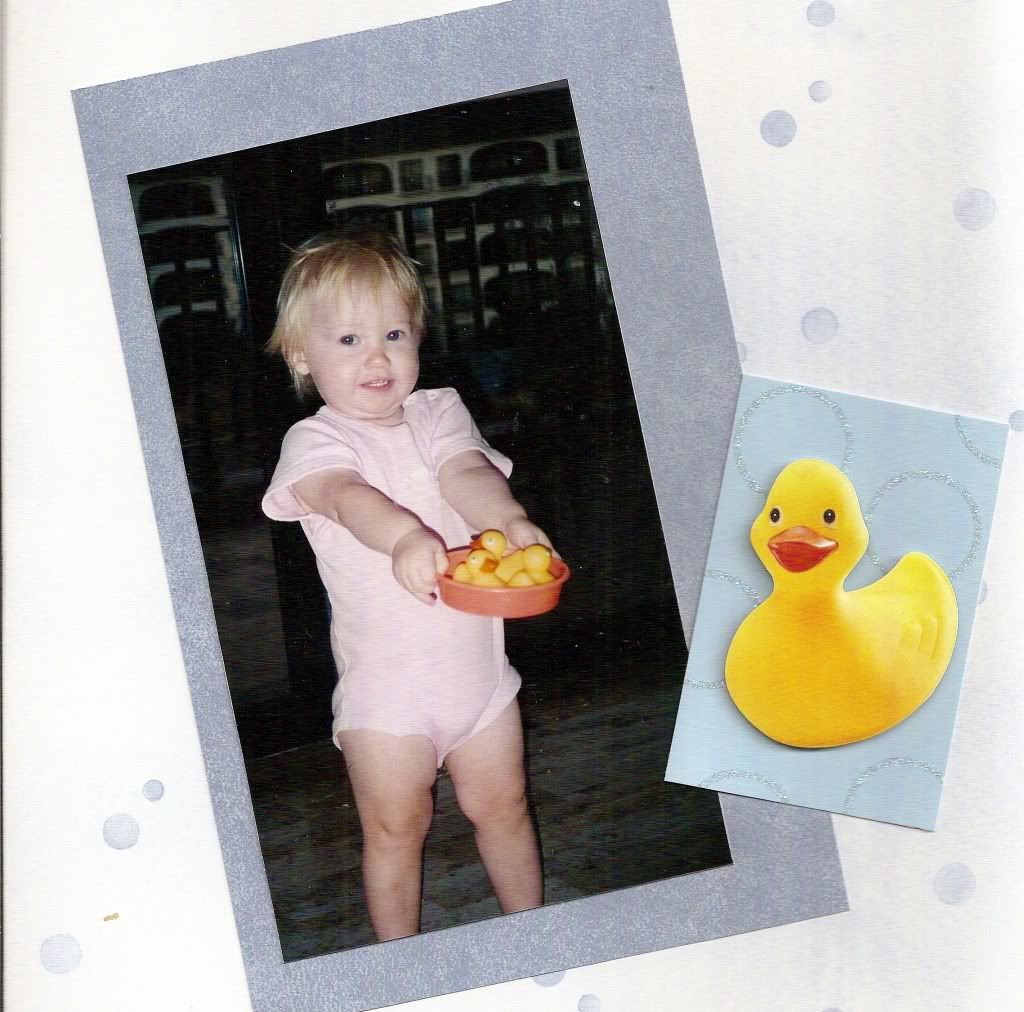
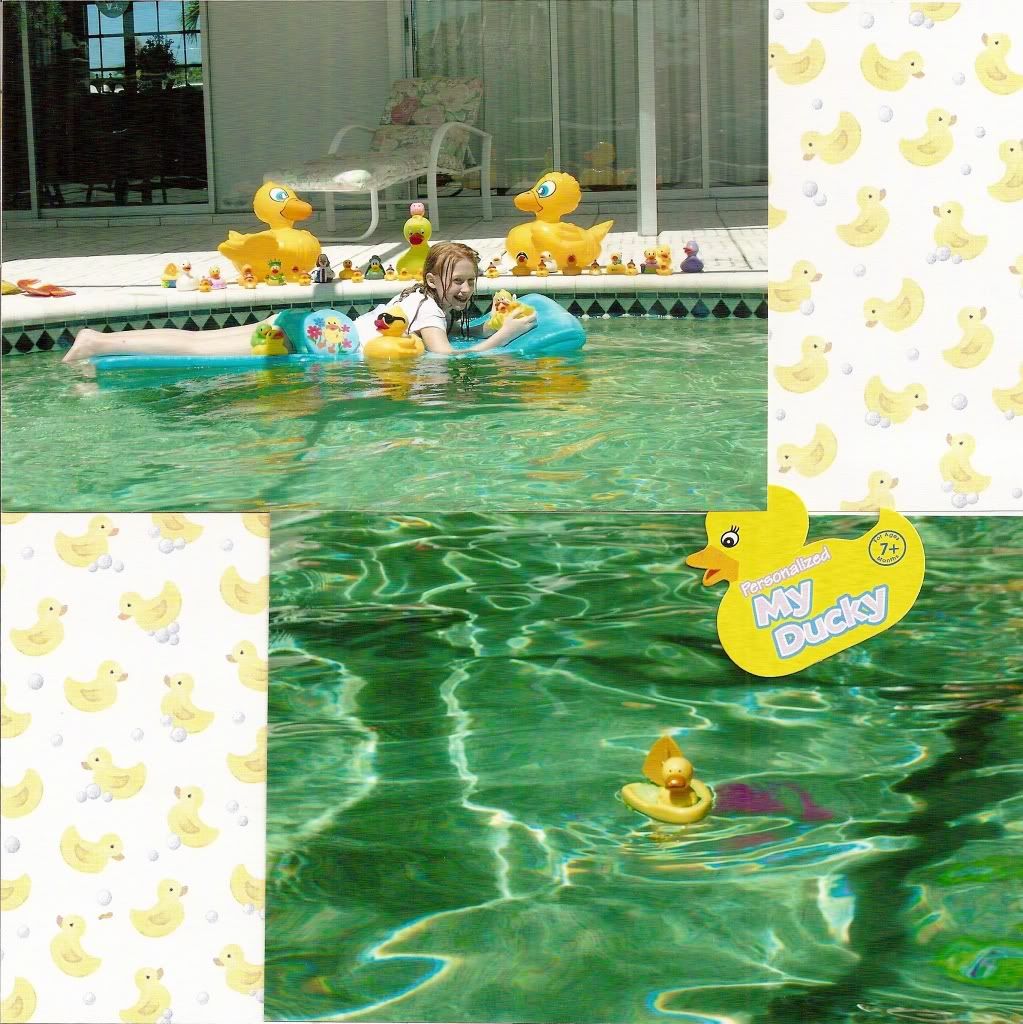
Daughter and Duckies Scrapbook

Duckies Over the Years

Click to enlarge I may add the year to the layouts, but there's not much to journal about this decade of obsession (that's slowly fading)
My favorite 8x8 album

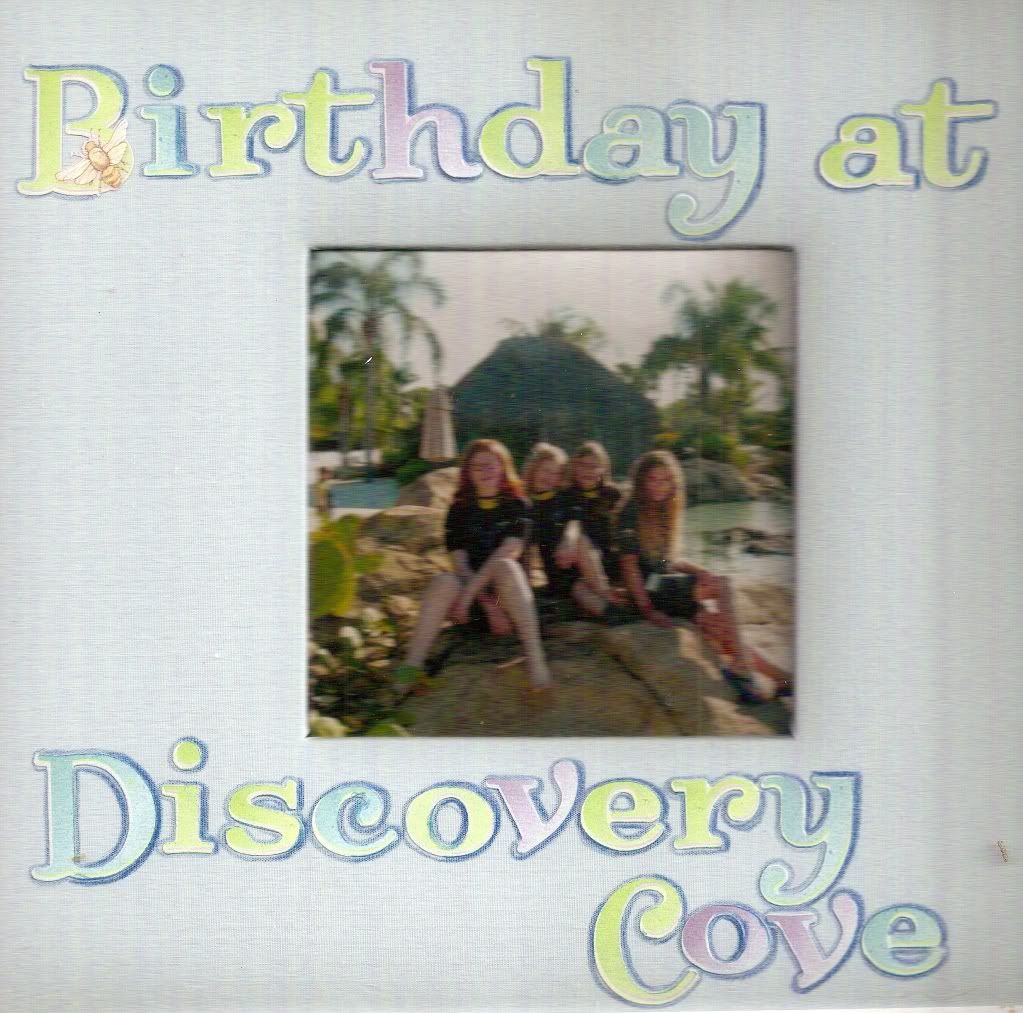
Click to enlarge I like an album with a window for a photo or title block. I used a colored pencil to trace around the letters stickers on the fabric cover that came with a clear plastic cover to keep the letters from being rubbed off.
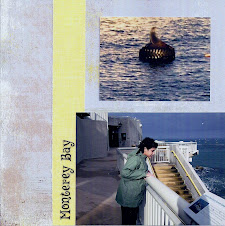
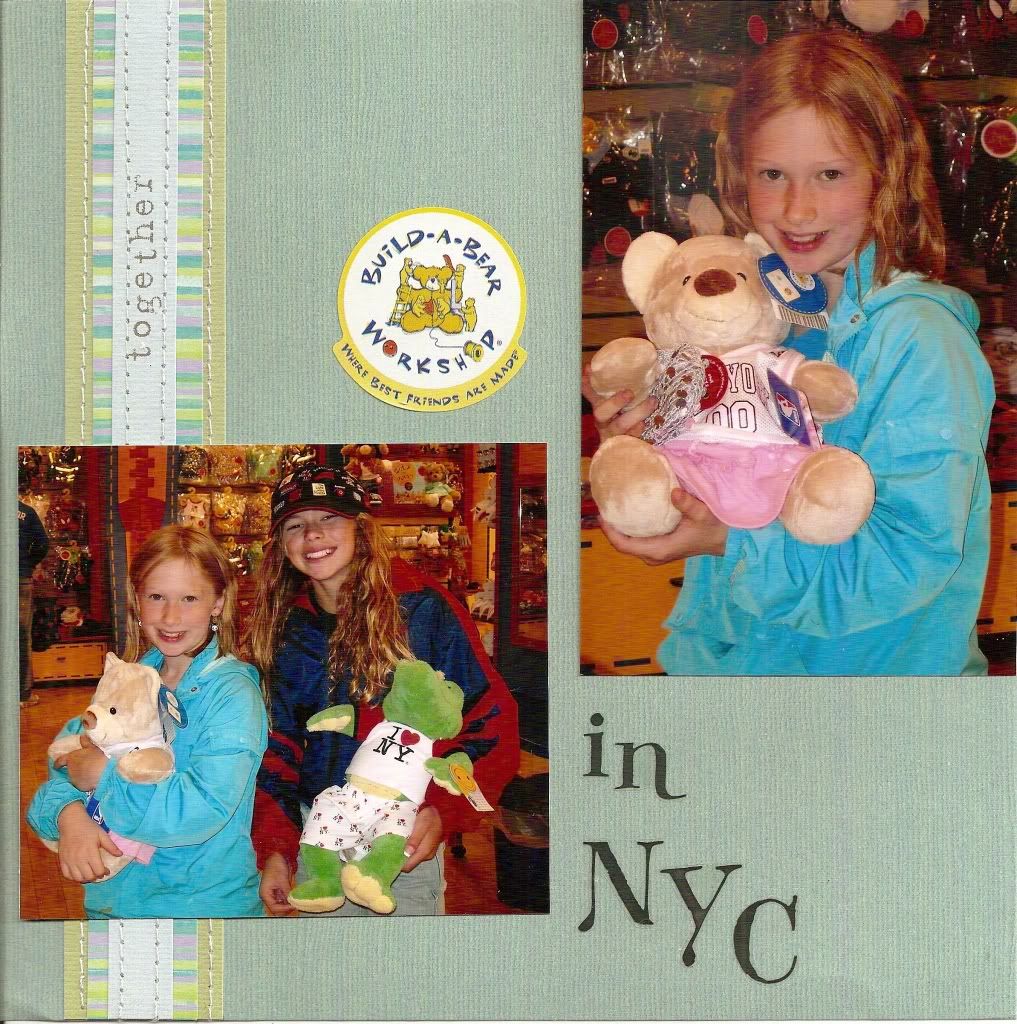
Easy 8 x 8
Click to enlarge A 8x8 simple layout is adorable with two cropped photos, a sticker, and sticker letters on a pre-made page with a stripe.
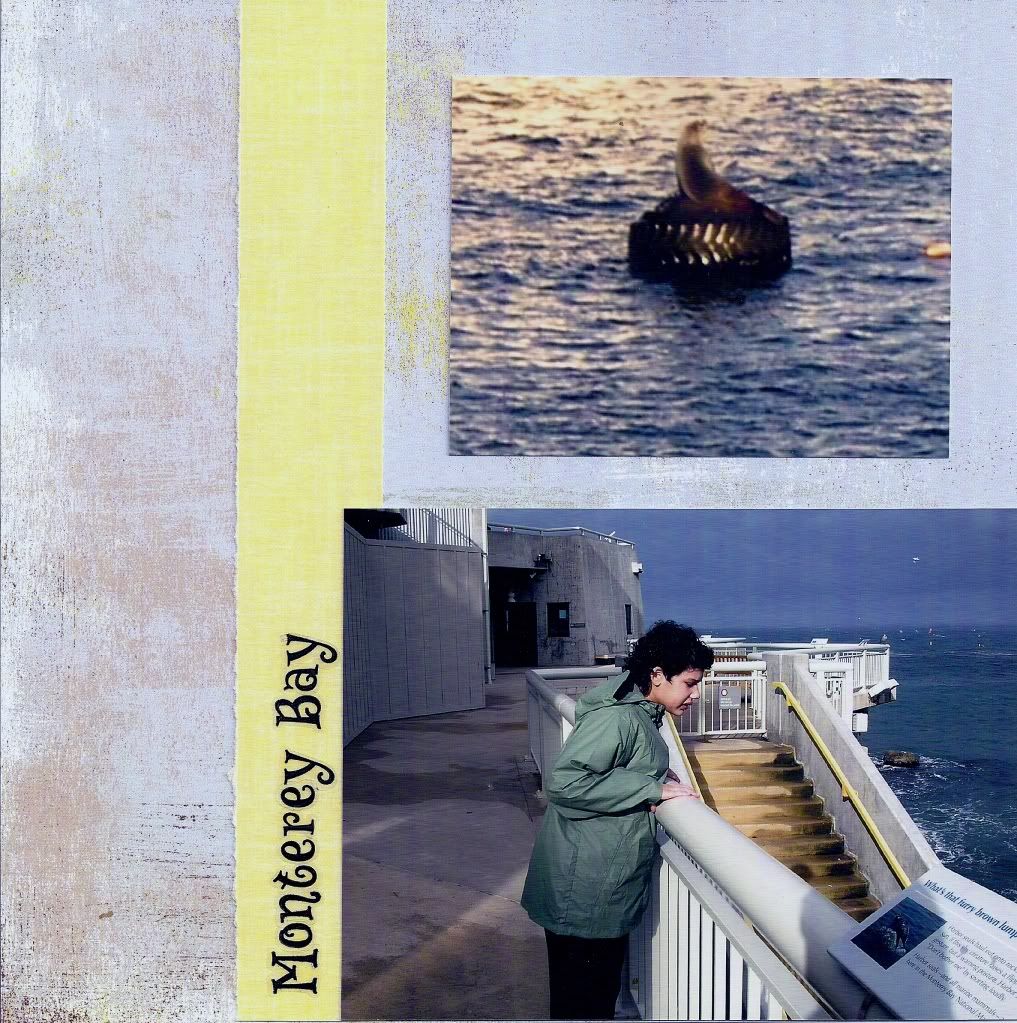
Watching the sea lions
California Redwoods
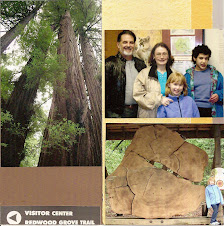
Constructed in One Afternoon Page
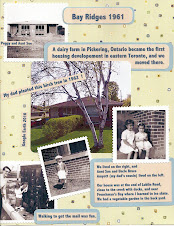
Click to enlarge After finding my childhood home on Google Earth, I found and copied my photos from my "archive" shoebox, recalled this 60's like paper in my stash, knew just what to type and print out in my text boxes, and used my corner rounder for the mats and text boxes. This process has occurred all on the same day exactly once ! And I love this page !
My Crests, Ranks, and Insigna
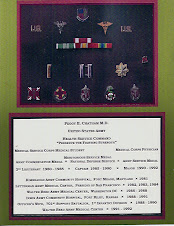
The upper section is a photo of my shadowbox display, and the lower section was typed in Bookman Old Style with the "small caps" and "shadow" features to look old and engraved. I mounted the upper photo on maroon and double matted the lower section with black and maroon. The background color is Army green (of course).
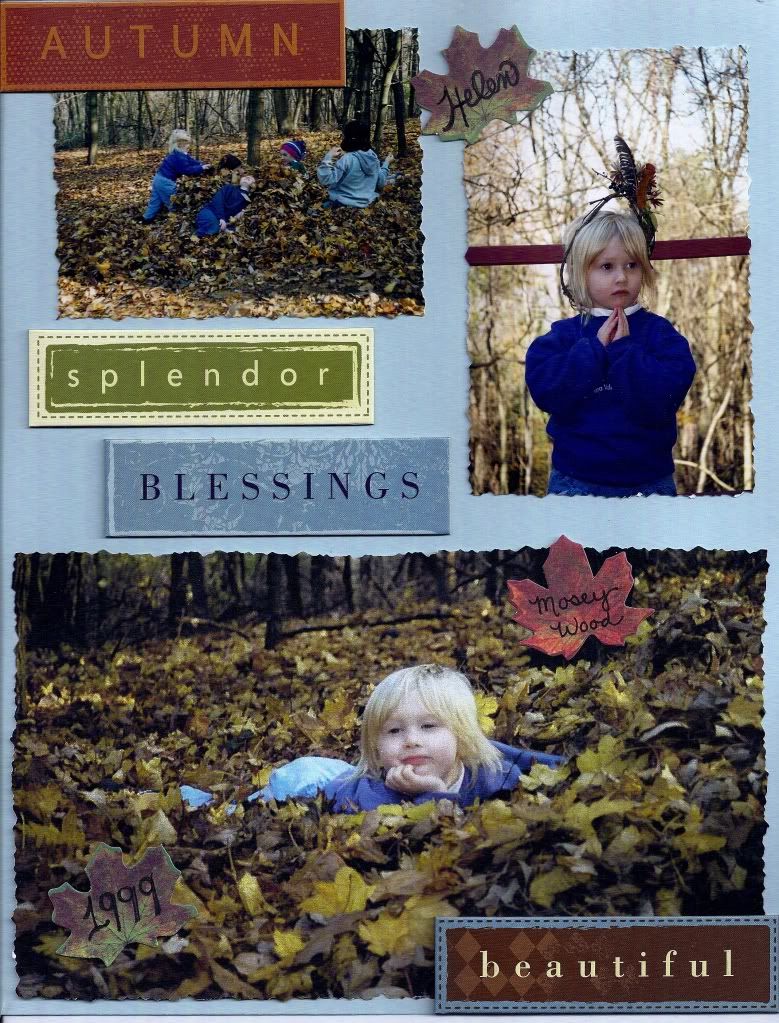
The Eleven Year Page

Click to enlarge I placed these three photos that I loved on blue paper to coordinate with their sweaters. I quickly selected the three leaves and years later wrote her Name, Location, and Year (1999). I put a blank cream text box in the center. In 2005 I used jagged scissors on the edges, but the text box stayed blank. Recently I saw a set of cardstock titles that said everything that I would want to say, so no more text box, and a perfect page in 2010 !
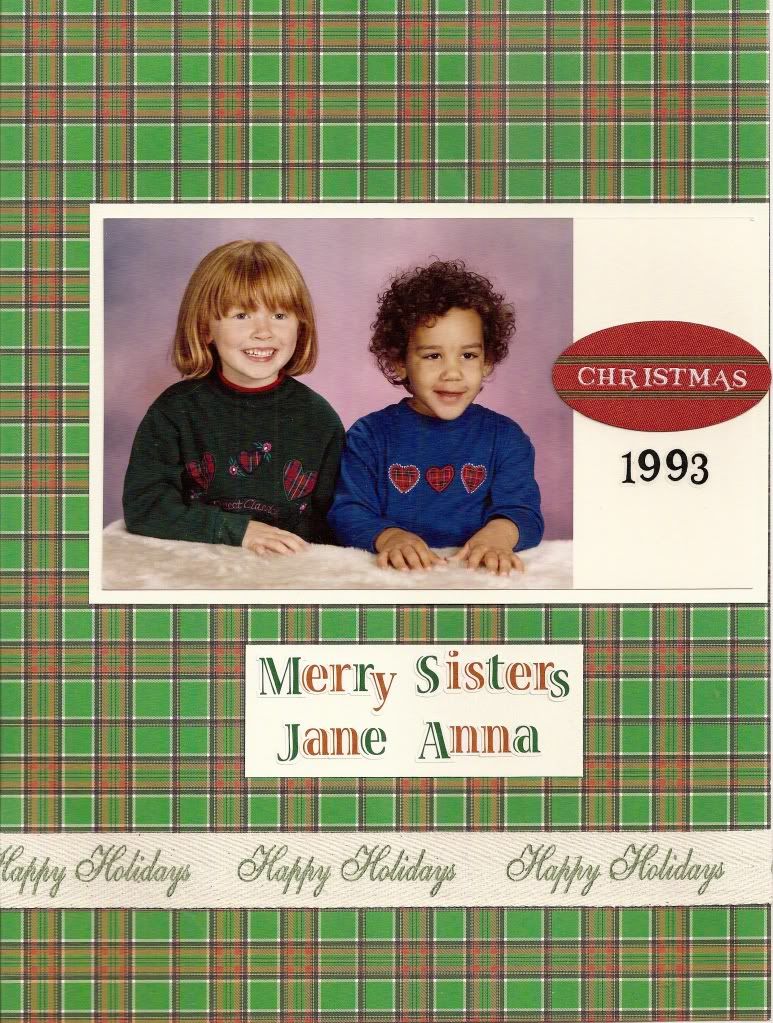
Merry Sisters
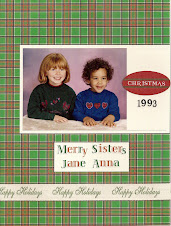
Click to enlarge This plaid paper would only work with the plaid hearts on their outfits in this Christmas card and no other photo. The Christmas oval is fabric, and I recycled the Happy Holidays ribbon from a box of candy to continue to fabric theme.
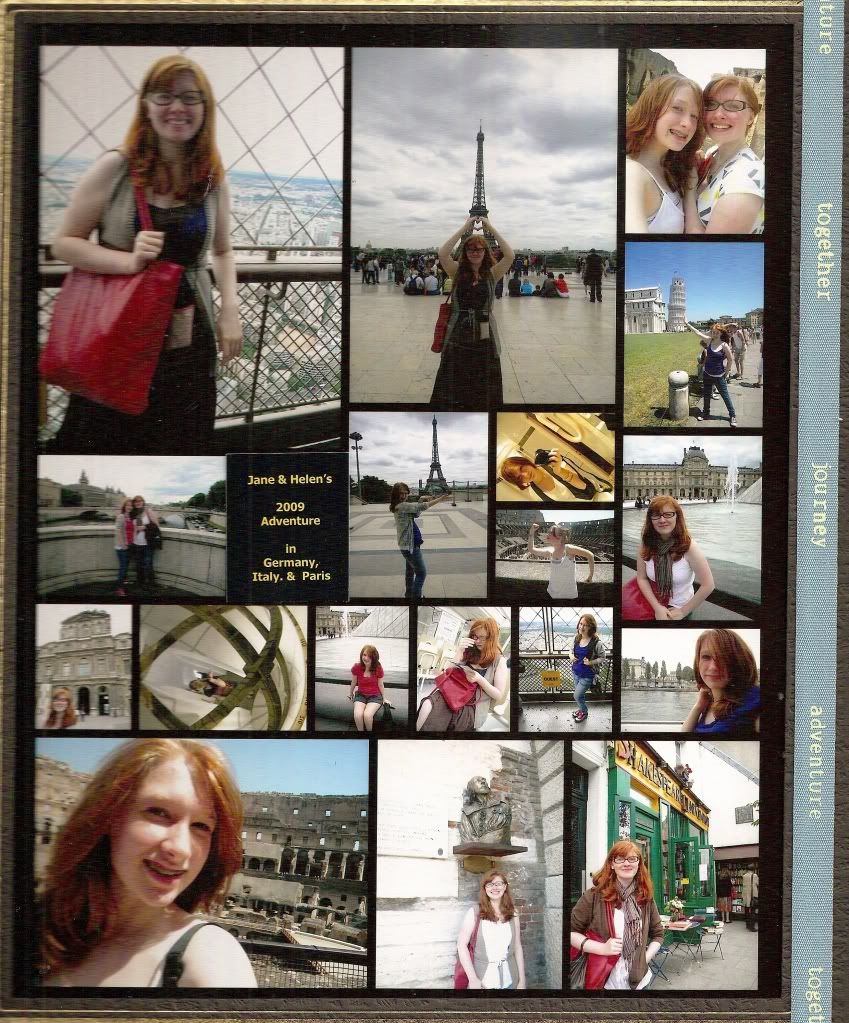
European Collage
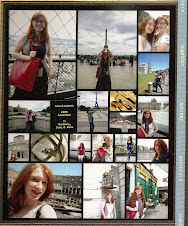
Click to enlarge I created this collage on the Walgreen's website in 10 minutes, it printed at my local store for $3.49 an hour later, I added the text box and the ribbon. Viola ! Page or Present ? Both !
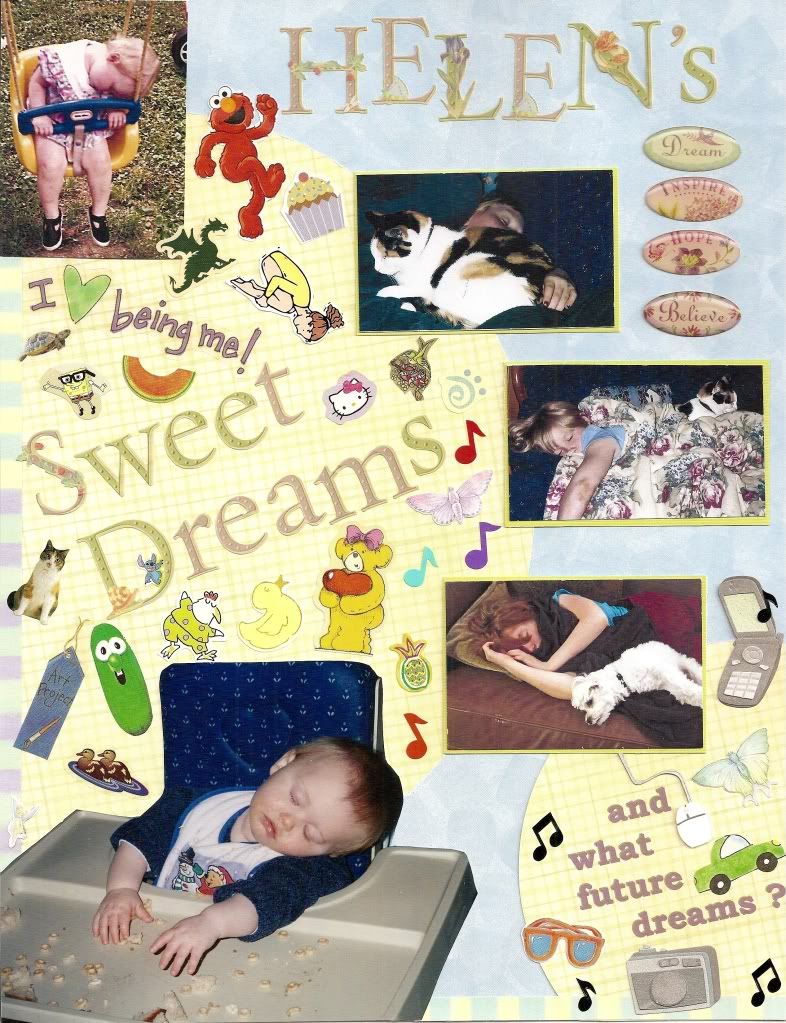
Sweet dreams

Click to enlarge Every sticker on this page is left over from a Helen page (or a Helen page I never made or have yet to make), so of course the stickers all relate to her. I matted the rectangle photos in green to coordinate with the letter stickers. I cut the high chair image from a 4x6 print because the print's background was too distracting.
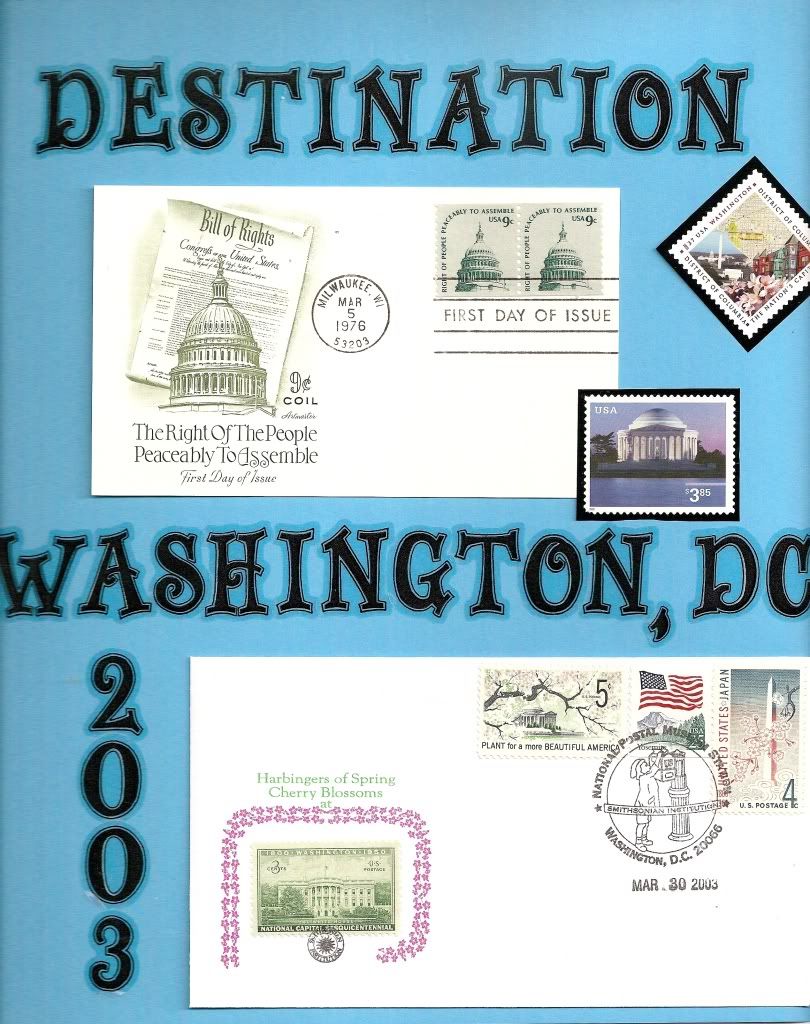
Destination DC -- where postage stamps and scrapbooking meet

Click to enlarge My love for collecting postage stamps, travelling to Washington DC, and scrapbooking merge on this page. Postage stamps, new and used, are great embellishments.
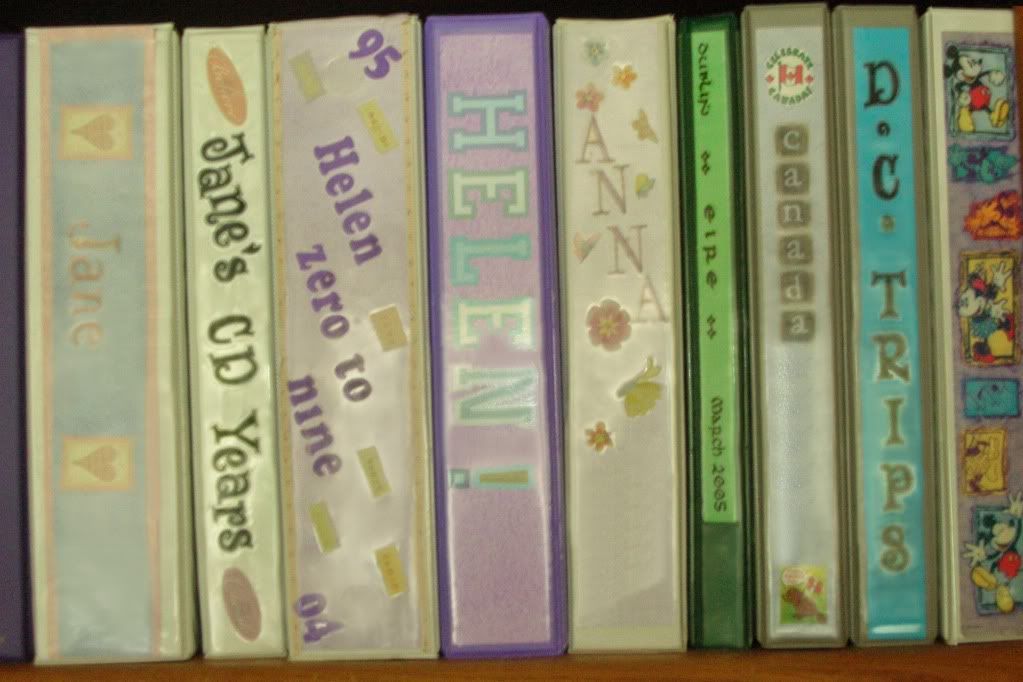
My Scrapbooks
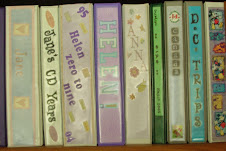
Click to enlarge After I finish a scrapbook page, it finds a place in these three-ring binders for my daughters and our trips. I am starting a book on my life before daughters ! I also have a set of 8 x 8 scrapbooks, each for a single special event.
My Christmas Cover
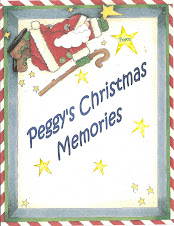
Click to enlarge As soon as I saw this cute piece of Christmas paper, I knew I found my cover. I used Word processing "Word Art" to print my title in a corresponding blue ink. I then applied star stickers to coordinate with Santa's star. There's white space for another line of type in case I can think of something touching and not cliched to write about my favorite holiday.
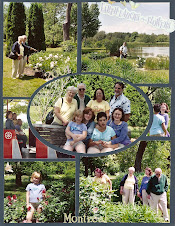
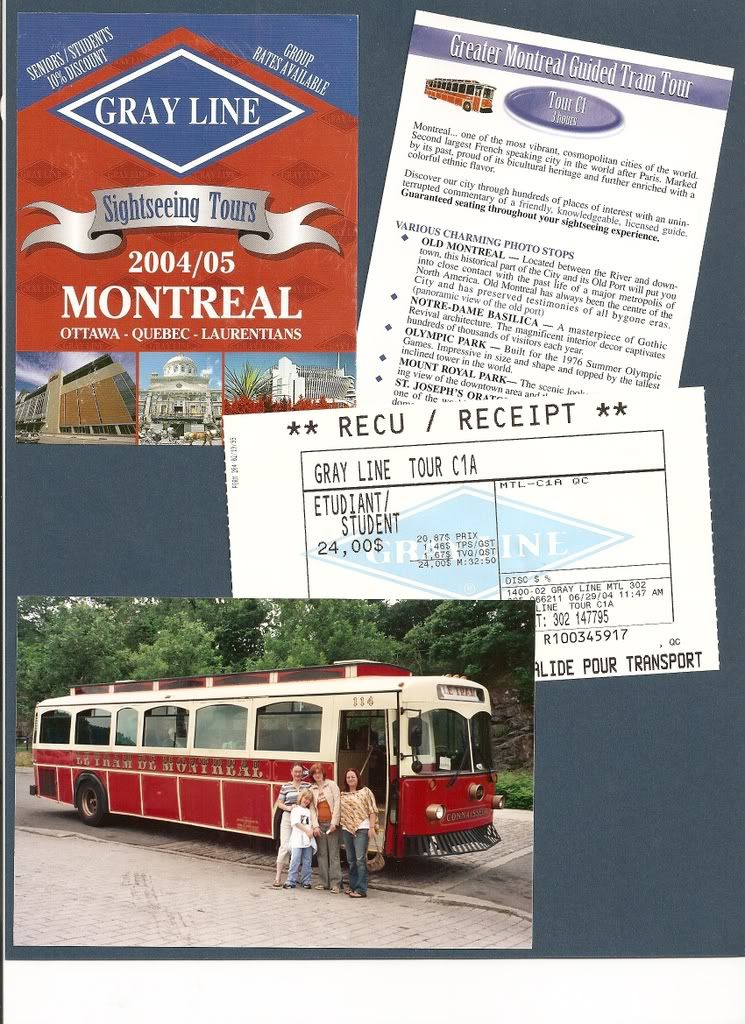
My Montreal Cover

Click to enlarge The clear front pocket of my binder is larger than 8 1/2 x 11, but alas my scanner is not. I put two oval mats under my only group photo from this trip, taken by a friendly tourist. It's relatively easy to hand place stickers to curve along the oval.
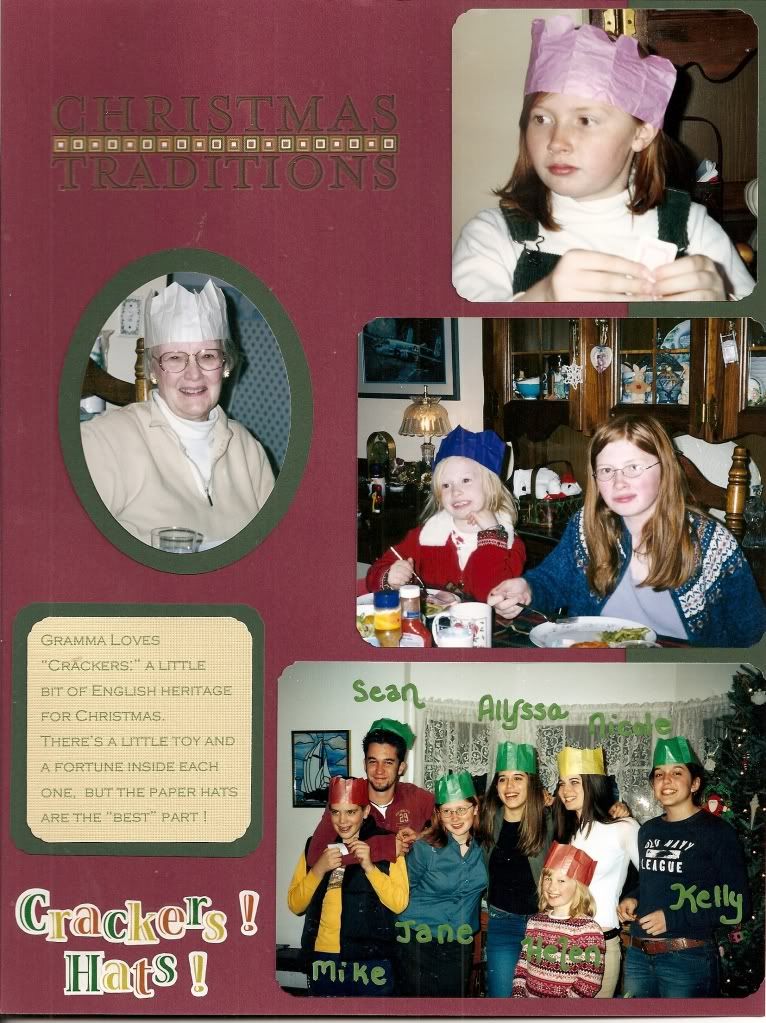
A Christmas Tradition
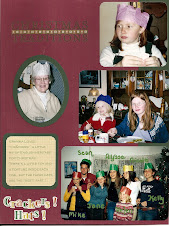
Click to Enlarge The single oval snapshot highlights my mother, the keeper of the English "Christmas Cracker" tradition, from the photos over the years opening her "Crackers" to get the silly paper hats inside. The event goes so fast that it's hard to get more than once nice photo a year.
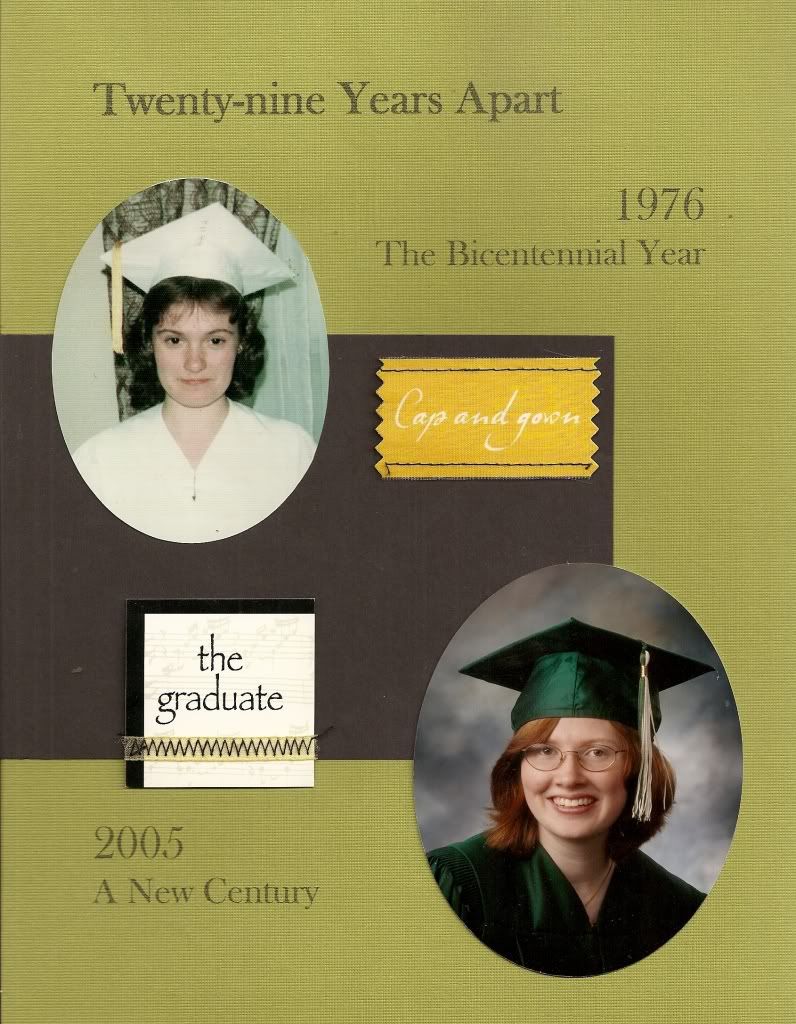
Graduation Portraits
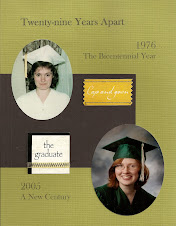
Click to enlarge Rectangle photos would have covered too much space in this layout. Plus, portraits and head shots look more classic when cropped into ovals. Now it's time for me to make a companion page for my 1980 and my daughter's 2009 graduations. I plan to use a black rectangle and two ovals, but a different page color... when I do assemble the page.
Renassance Photos and frames

Click to enlarge To make each frame, I cut one oval frame from cardstock and one from a copper metallic scrapbook paper. To make the frames similar but different I varied the widths of the ovals and cut the outer edge with one of three edging scissors. For the Renassance look, I applied Martha Stewart brand self-adhesive jewels to the frames (and my fingers). I wrote the titles on the copper paper, then used a thin brown mat border.
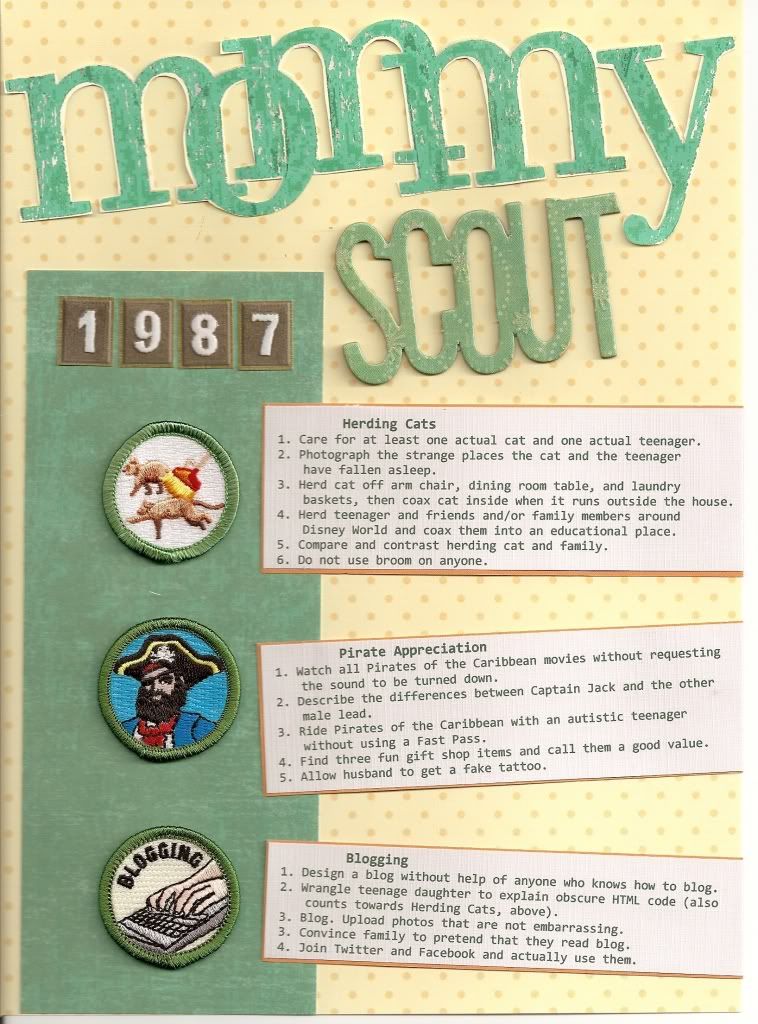
Mommy Scout
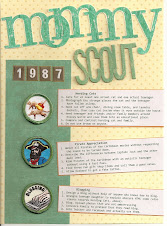
Click to enlarge An entire page of memories, none of which were photographed ! My daughter gave me these three badges that she had bought "somewhere" that made her think of me. She helped me list the "requirements." We had done Girl Scouts so the page evokes a sash. I joined troop 1987 the year she was born.
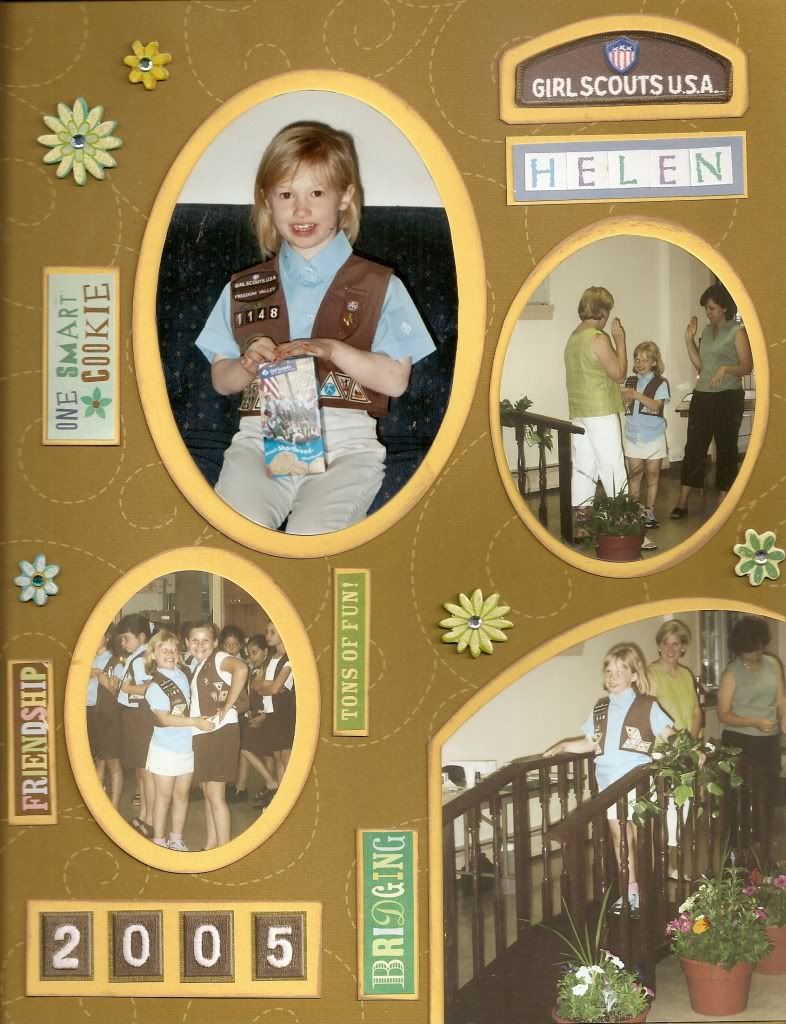
A Brownie from Long Ago

Click to enlarge Although I used matted ovals (because I love how they crop out backgrounds and help focus on the subject), matted rectangles would work fine. I selected a brown paper with a subtle yellow print and used yellow mats to keep the page from looking "muddy." The embellishments are from two packaged Girl Scouts sets. I used the troop numbers for the year. I later wrote tiny captions around the mats.
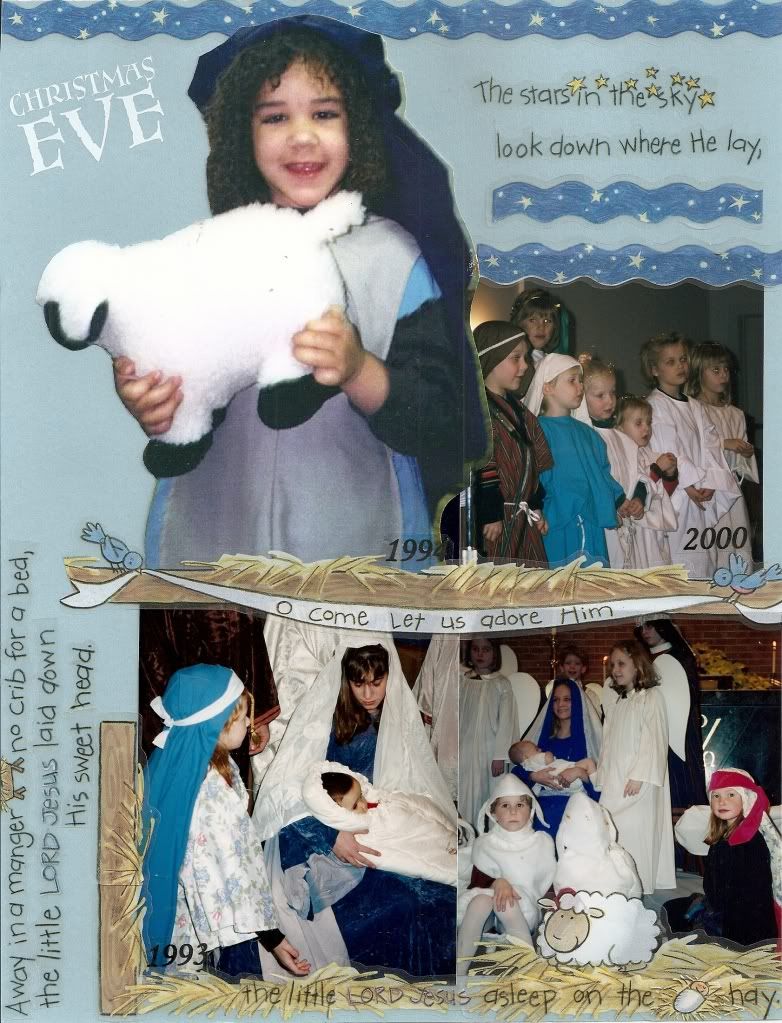
Away in a Manger Pageants

Click to Enlarge Several daughters in several pageants from several years. They're all too old now !
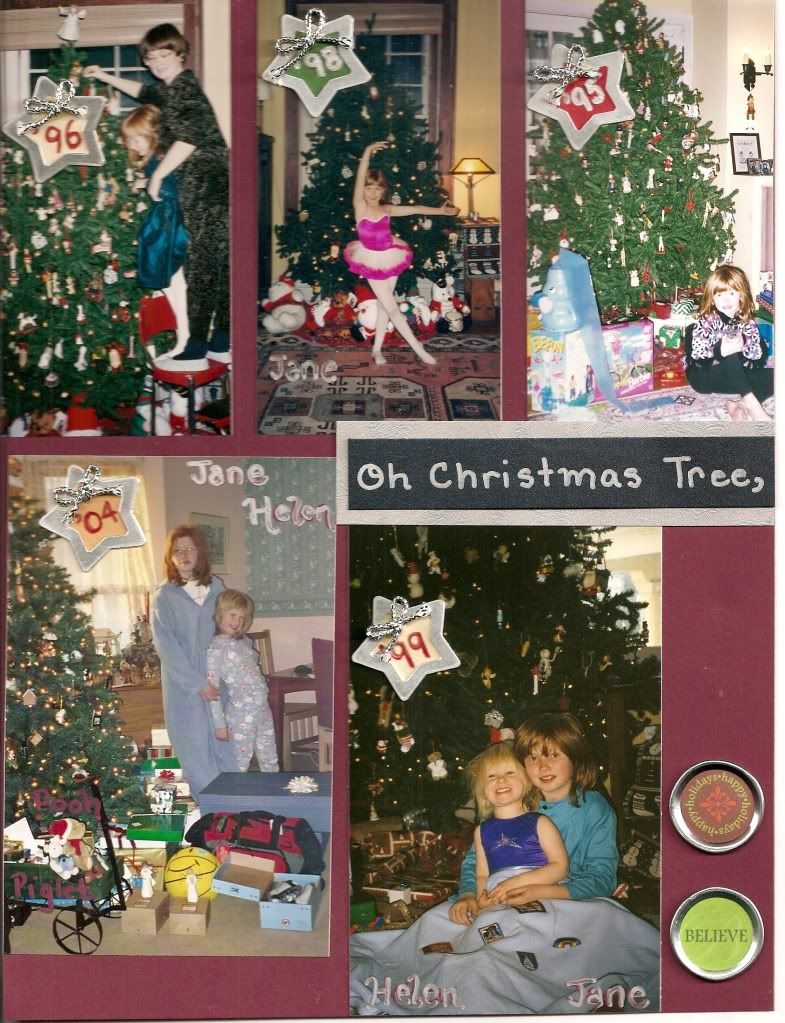
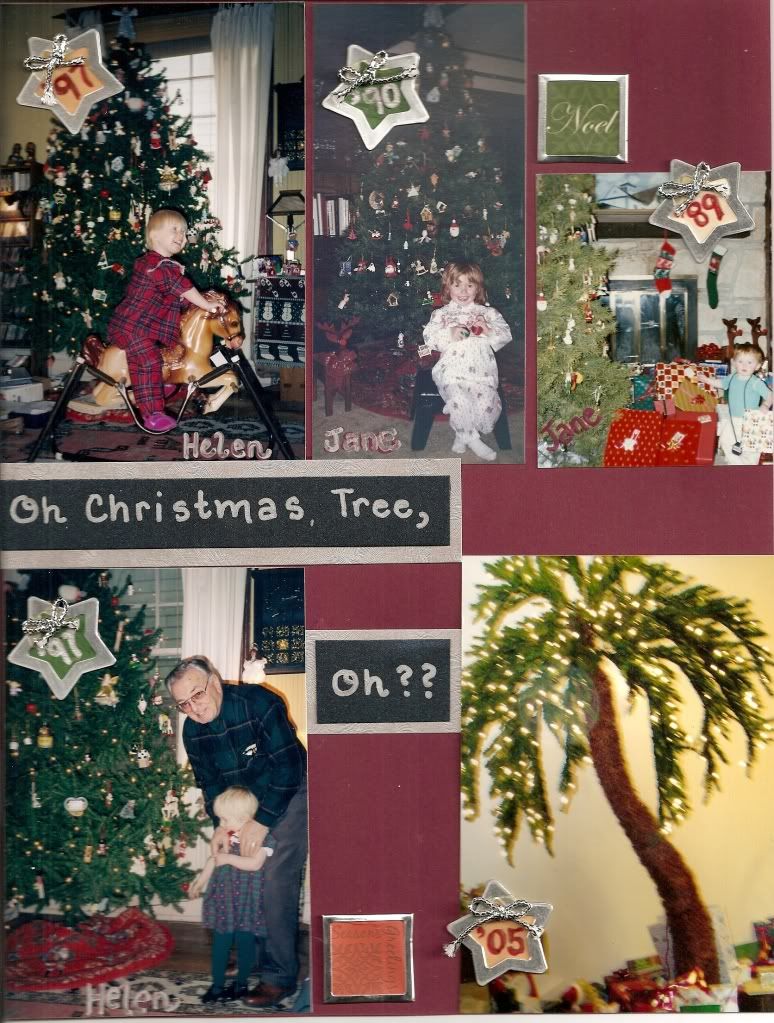
Oh Christmas Tree (left page)

Oh Christmas Tree (right page)

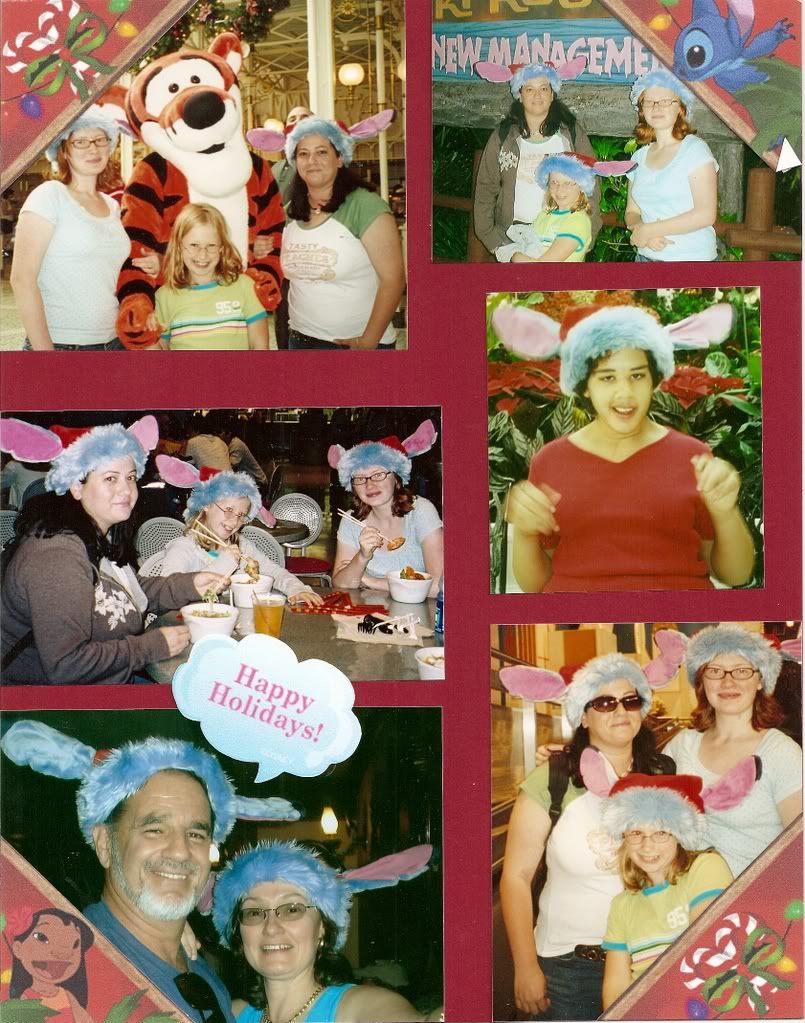
A Mosaic from One Disney Holiday

Click to Enlarge I downloaded the corner pieces from a children's Disney site after typing "Christmas Disney Stitch" into Google. I just need to work a caption or two and the year onto the page (2005? 6? 7?)
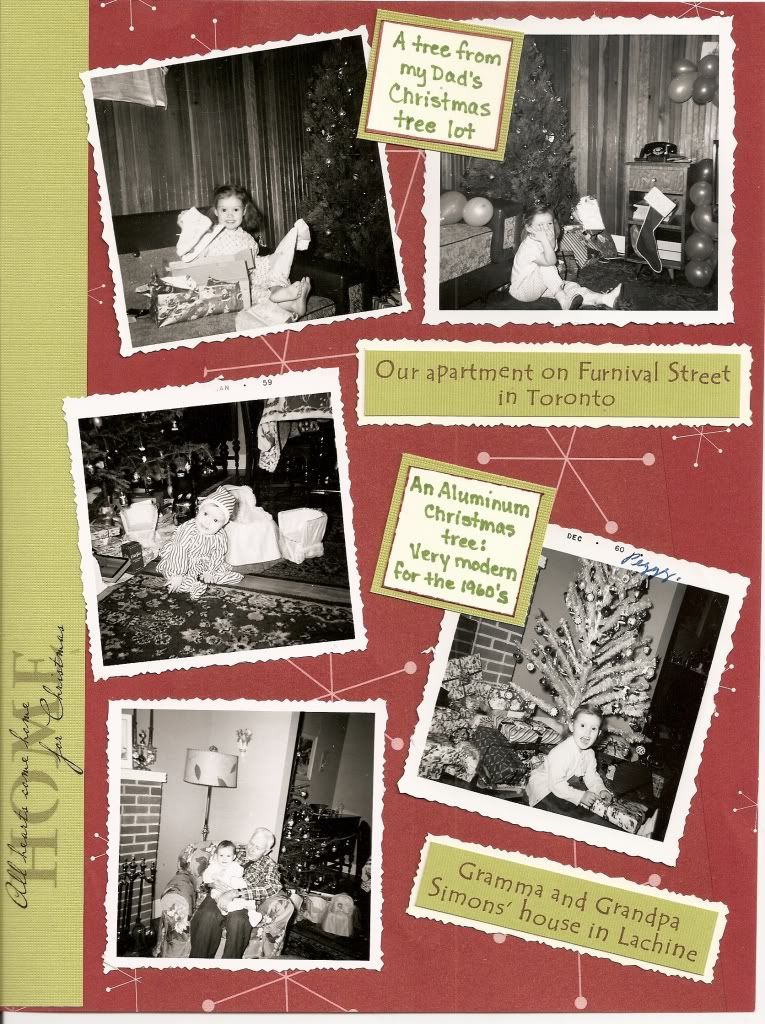
Black and White 1960's Christmas Photos
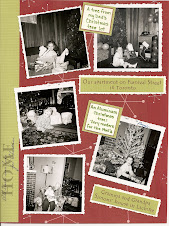
Click to Enlarge The home quote is a rub-on I put on the border strip. I broke my own rule and mounted original snapshots because I had several of the same pose. The two titles are word processed, trimmed and mounted on cardstock I cut with a deckle edge to match the photos. I hand wrote my two memory squares.
1958, 1988, and 2008 photos
Click to Enlarge I kept the original sizes of these photos. I trimmed the margin of my copies with edging scissor to reproduce the ragged edge of the oringinal 50's snapshot. I cropped my 1981 photo to a square and trimmed the margin to continue the vintage look.
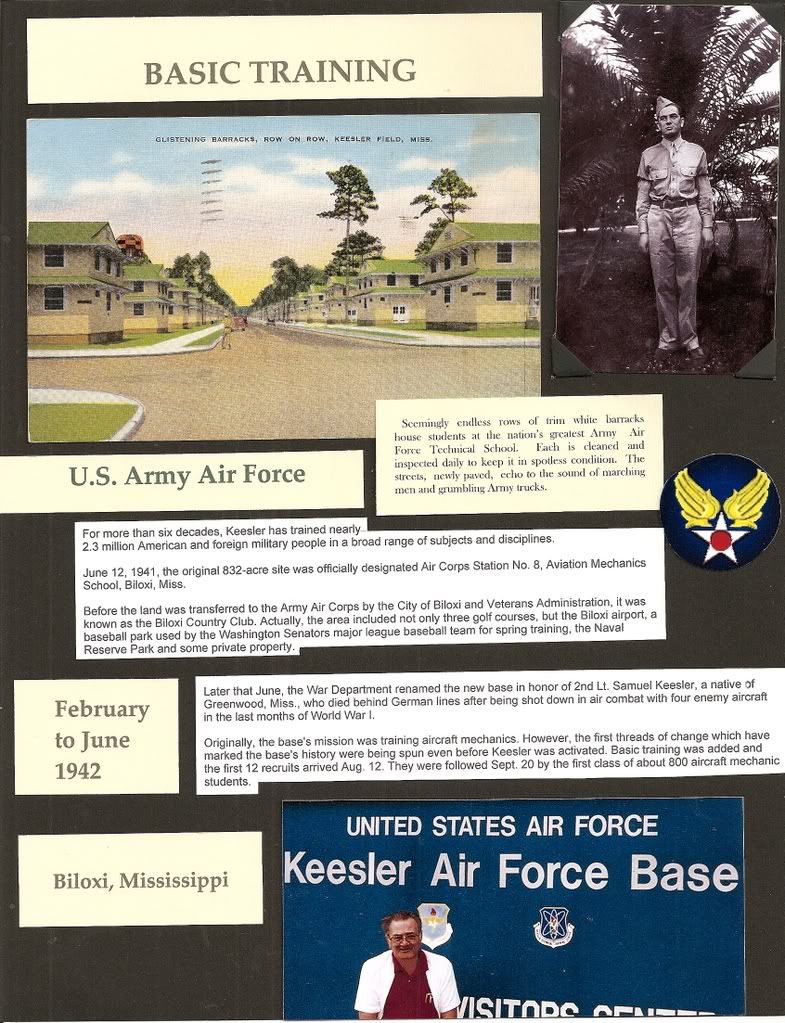
One photo from basic training
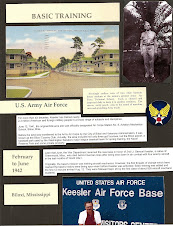
Click to enlarge To accompany one vintage photo from basic training, I found a photo 50 years later by the base entrance, a vintage $2 postcard, the postcard caption from the back, some information from the base website, and a download of the WWII Air Force emblem.
A small 1944 newspaper clipping
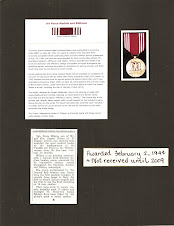
Click to enlarge I scanned and "unyellowed" this little 1944 newspaper clipping, then printed information about the medal from the internet, and hand wrote a caption. I will probably re-do the page to put the article and caption at the top over the larger text so the page will look better balanced.
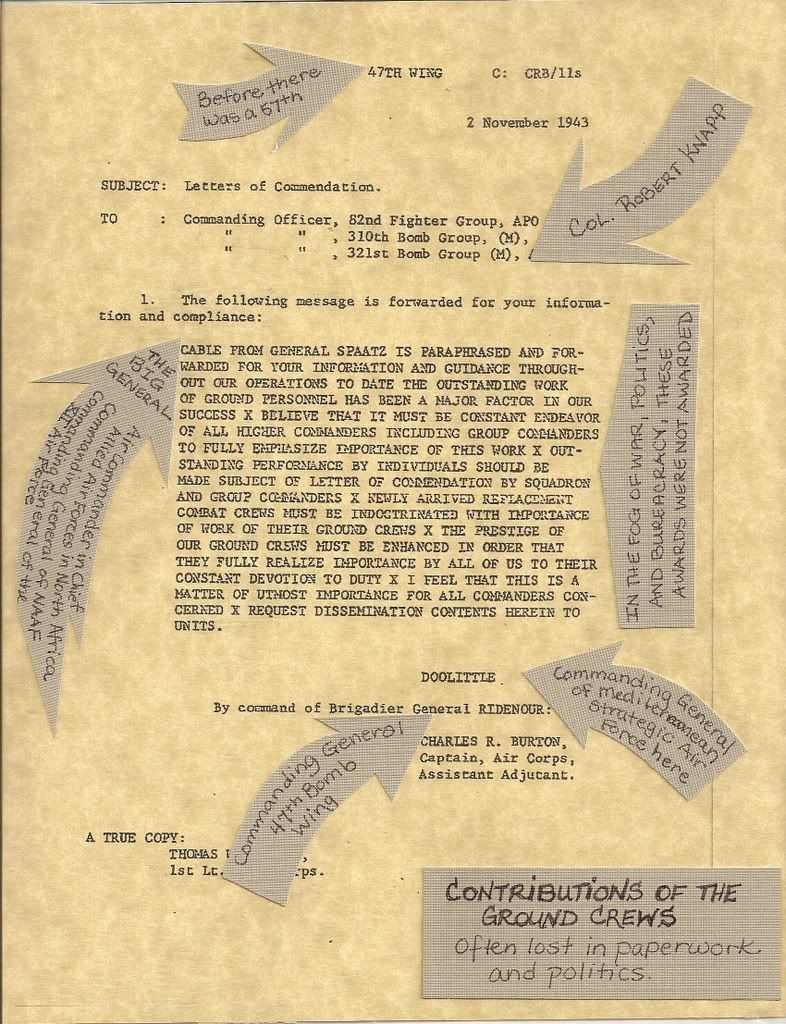
Captions for a letter
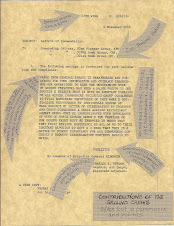
Click to Enlarge I photocopied this 1943 letter onto parchment paper to preserve the vintage look, wrote the captions and title block on self-adhesive cardstock, and attached the cardstock to the outside of the page protector. (My handwriting did not scan well into this image. drat !)
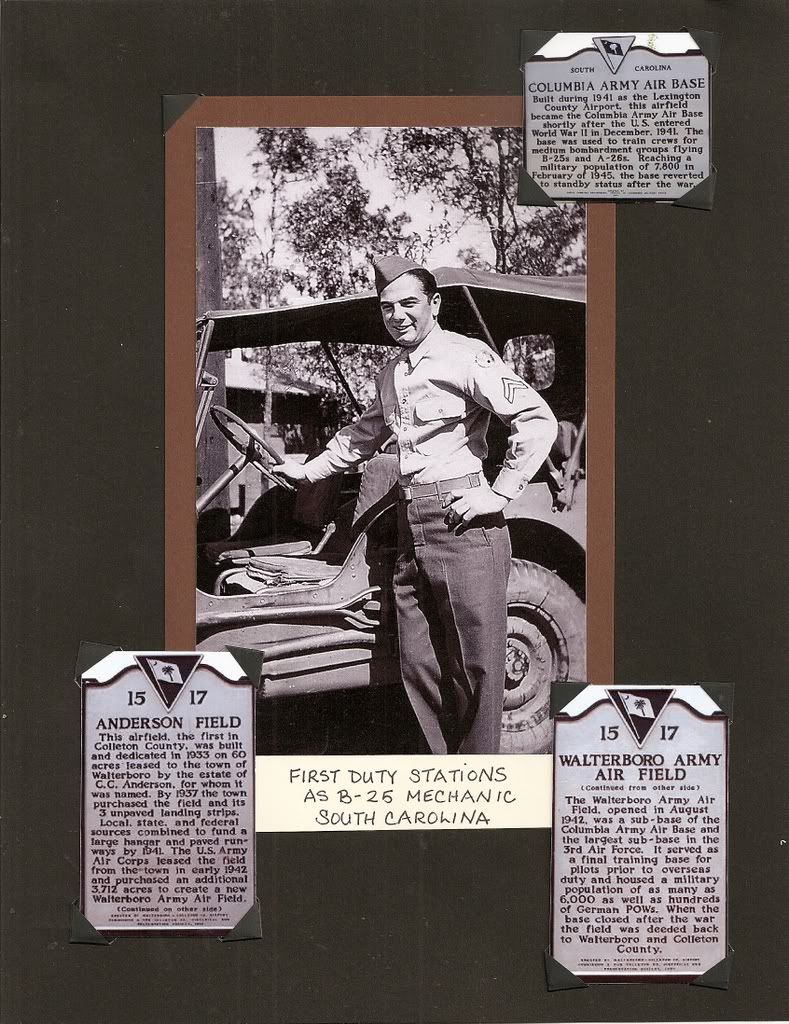
Historical Markers as Embellishments
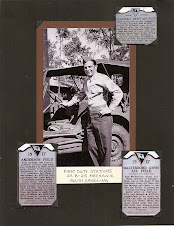
Click to Enlarge I did not have any items from the two bases were he was stationed in South Carolina, but I googled "historical marker" and the base name, and up popped links to these lovely vintage signs.
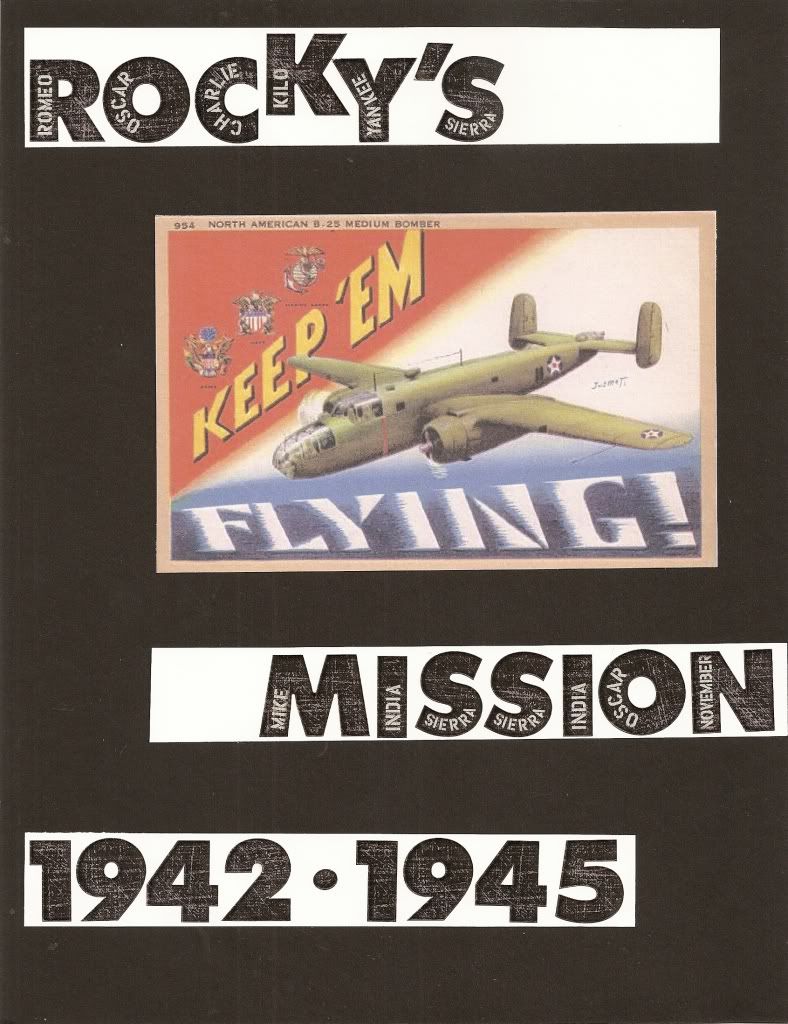
Vintage Postcard Embellishment

Click to Enlarge I scanned this vintage postcard for the focal point of my title page for my step-dad's album about his duty as a B-25 crew chief. I found the postcard by googling "vintage B-25 postcard," and it was perfect !
No Red White or Navy Blue on this Veteran Page
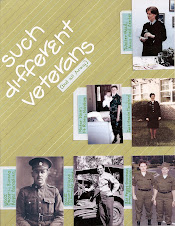
Click to Enlarge Daily life in the Army is not overtly patriotic, it's more green or kacki. I used two shades of sky blue and hand wrote my captions in olive green ink. Notice that the second "e" in "different" is an upside down 3.
"Ragged" softens photo edges

Click to Enlarge A ragged edge softens the edge of a photo on the page, especially if it is not matted. The pink color of the title block comes from the pink in the sunrise.
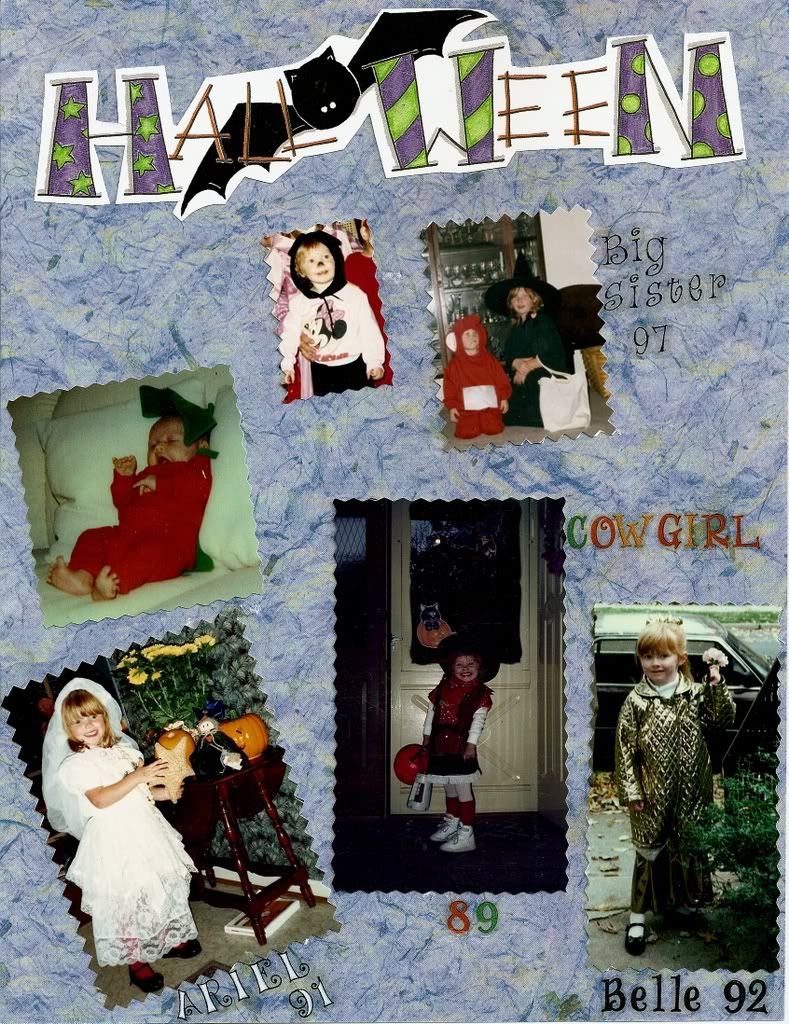
Many Halloweens

Click to Enlarge Using the zig-zag edge of the straight edges makes the edges less stark. Cutting away the cluttered backgrounds and mounting on a solid color put the page's focus on the kids. The purchased Halloween die-cut matches the cut-out technique.
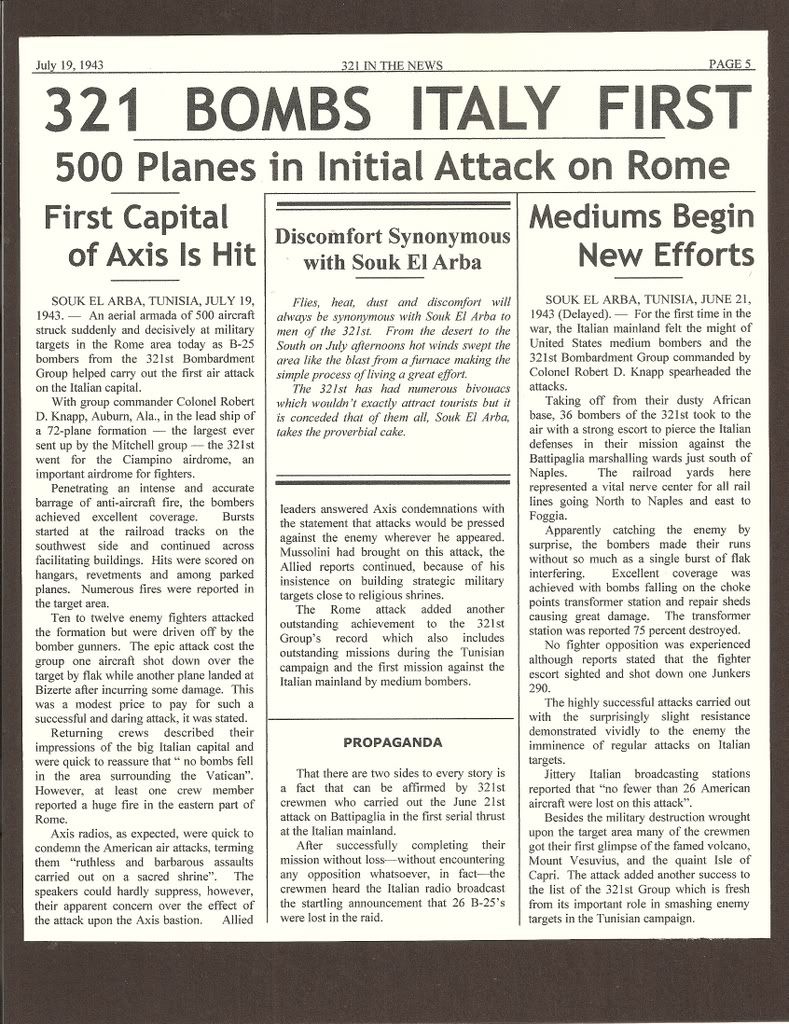
Down-load of an old newspaper

Click to enlarge No extra title or text for this page, printed on beige paper, trimmed, and mounted on black cardstock
A Frightening Title

Titles and Borders printed on white
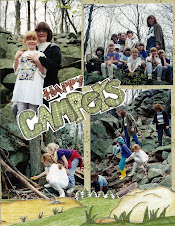
Click to Enlarge Beware titles printed on white unless you use white background paper (what fun is there in that?) I later trimmed off all the white to create this page. I also wrote the name of the camp, some campers names, and the year in the margins before we totally forgot.
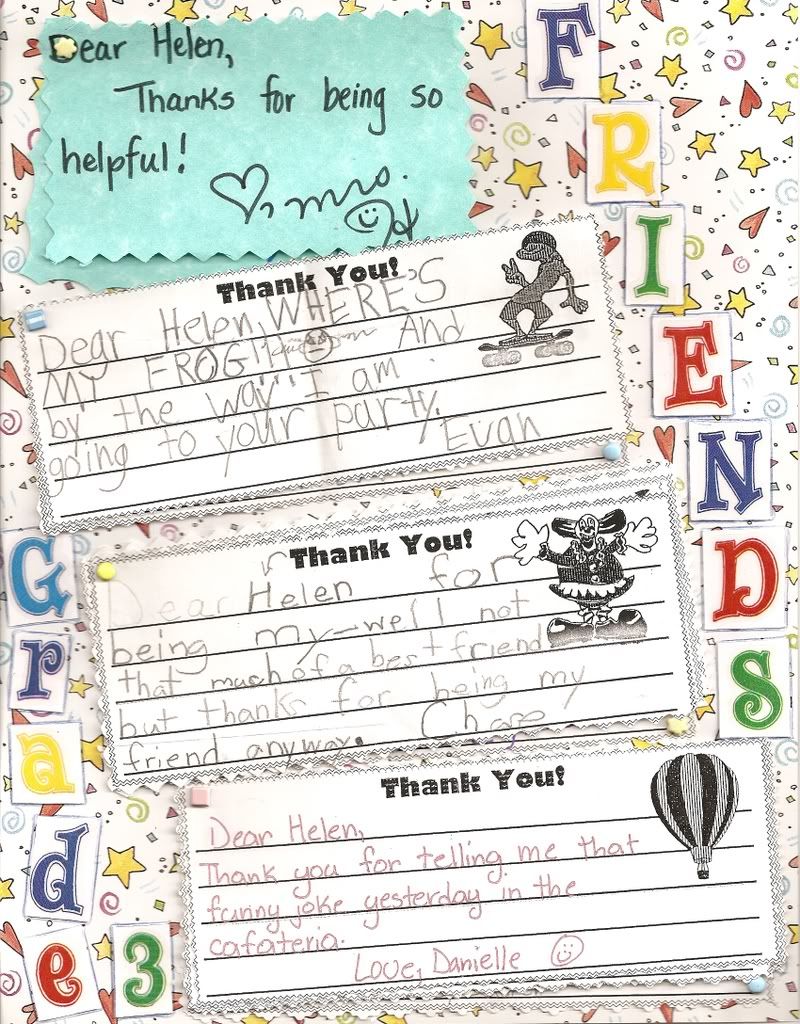
Using Eight Brads

Click to Enlarge I used brads to attach four booklets of notes written by my daughter's class. I put one brad through the upper left corner of each set and one at the the lower right corner of the bottom page of each booklet. Primary colors belong (sparingly) on elementary school and Disney pages.
A Single Photo as Mosaic
Click to Enlarge I love this photo, but it was too boring on a page by itself. Turning it into a mosaic helped make it more interesting, then I found this 12 x 12 paper with the same color tone of blue. I moved the pieces around until the "right" words showed, then trimmed to 81/2 x 11. I have only done this technique once, and I haven't found another photo yet that I think will work, but I continue to look for one.
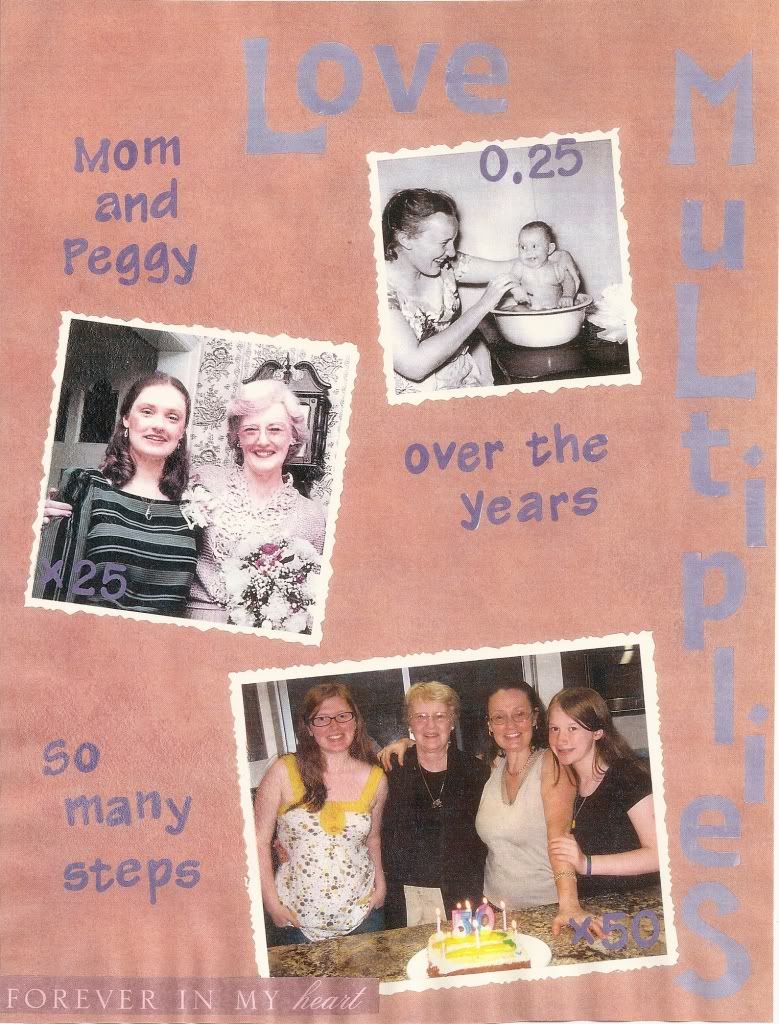
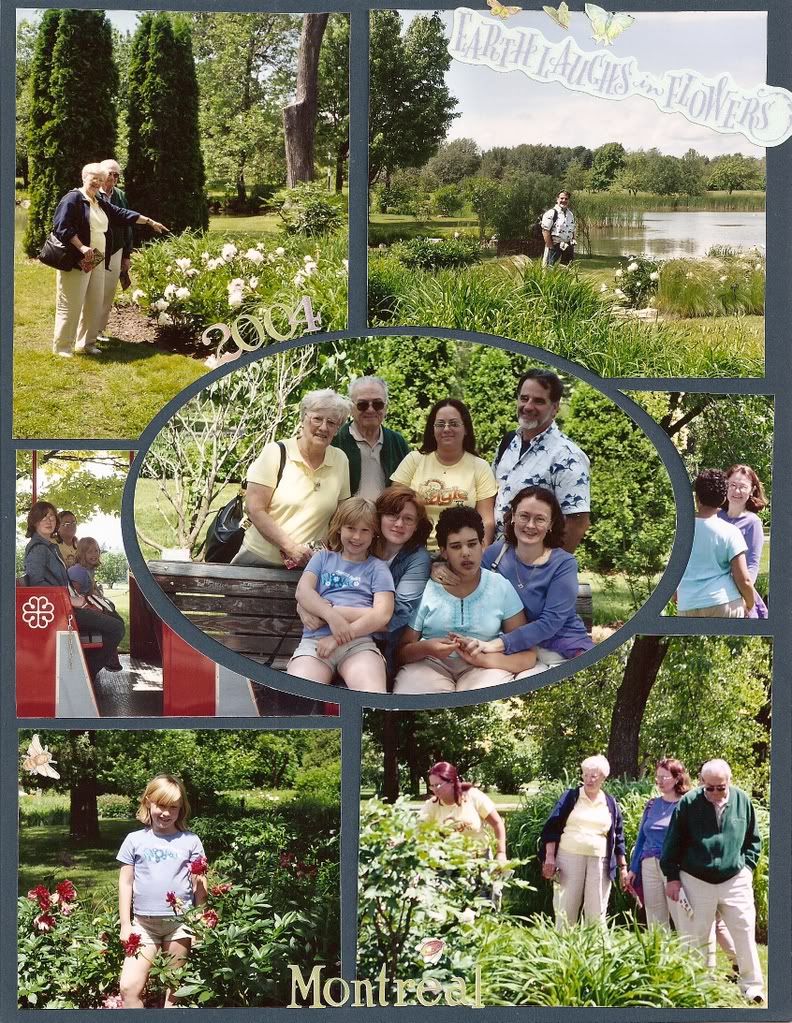
My Most Complicated Mosaic of All Time
Click to Enlarge First I cut my oval group shot with my template. Then, I searched through all our photos and tried "hundreds" of combinations to find the six that fit around the edges. I laid the oval over the photos, and only cut the finalists. The blue borders that look like a frame is the background blue paper. Then a few stickers, and I was done. I played with this lay-out for over a year until I liked the arrangement. The little photo at the right center had no other photographic worth, supporting my mother's belief that no photo sould be thrown out.
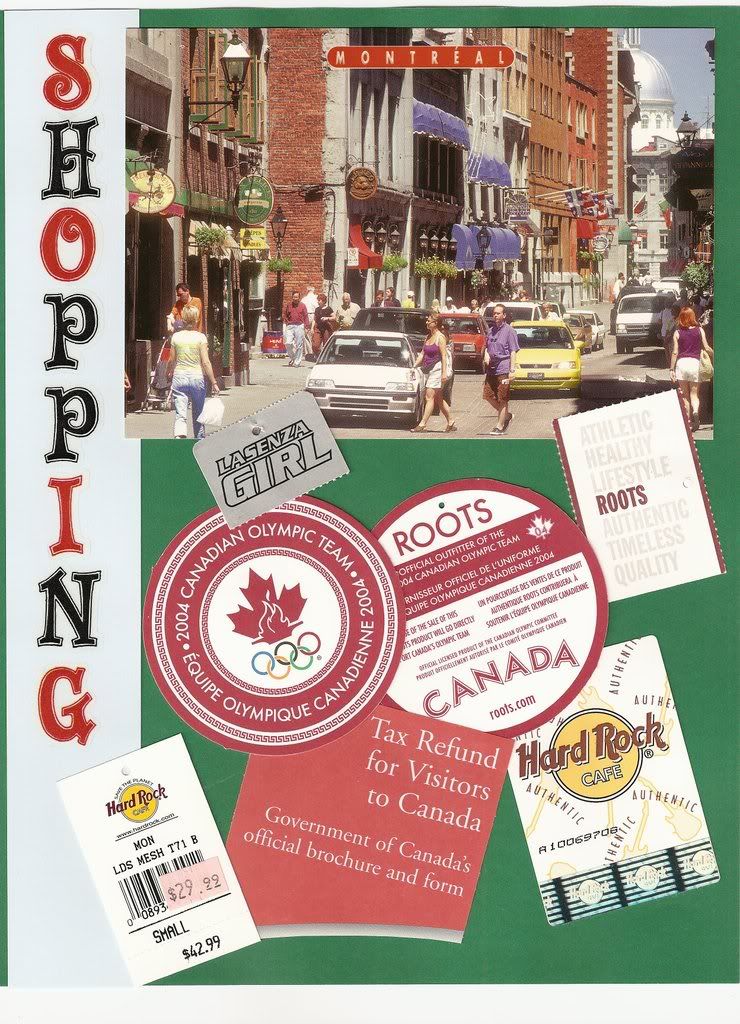
A Collage of tags
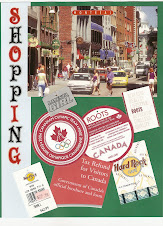
Click to enlarge A postcard and tags from our fashion purchases along with the tax refund pamphlet are enough for this shopping page.
A mosaic without framing
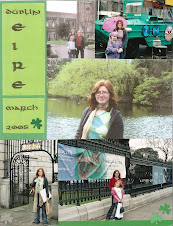
Click to Enlarge Placing the photos against each other avoids the problem of trying to adjust equal margins aaround the photos. This is the title page of my Dublin scrapbook, and it re-uses favorite photos that appear on other pages.
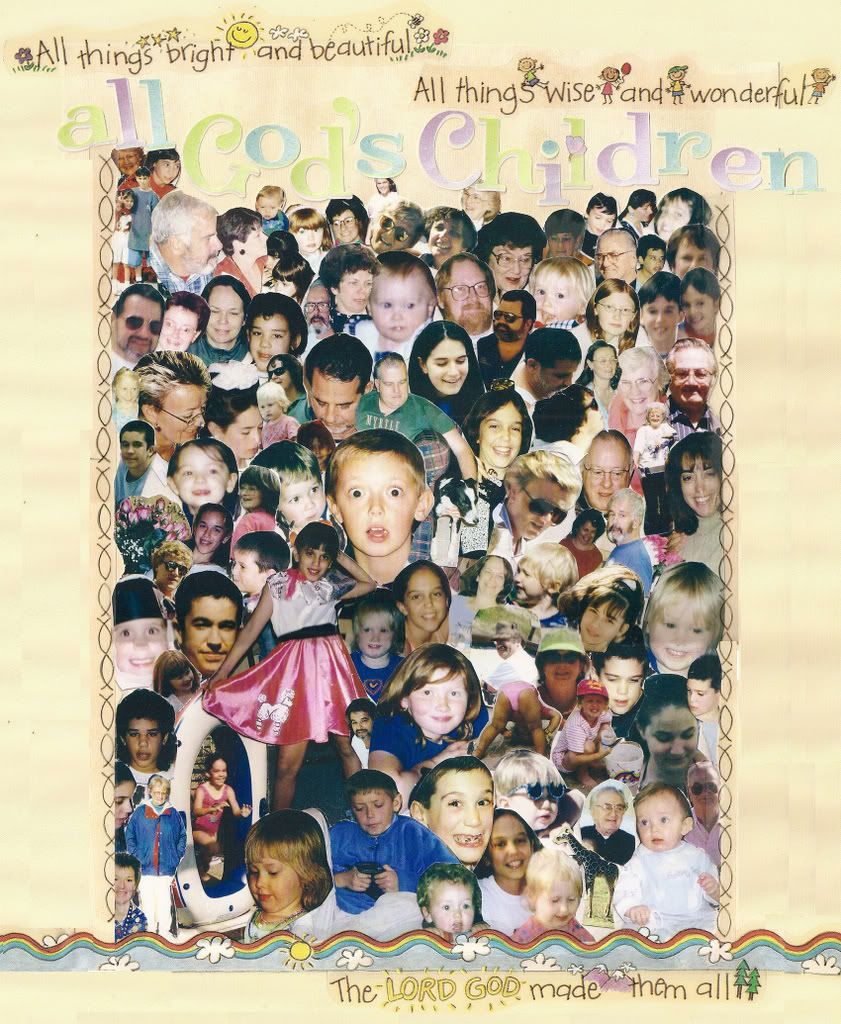
Gramma's Cut-out Collage

Click to Enlarge My mother cut faces out of all the "bad" photos that she could not bear to throw out, then assembled this collage. I added the title with lettering and stickers, then I scanned it to reduce to 8x10.
A cut-out of my enlarged special photo
Click to enlarge My favorite photo of my child who "never" looks at the camera was enlarged by photocopier, cut out by hand, and put on icon patterned paper. The title is a purchased die-cut.
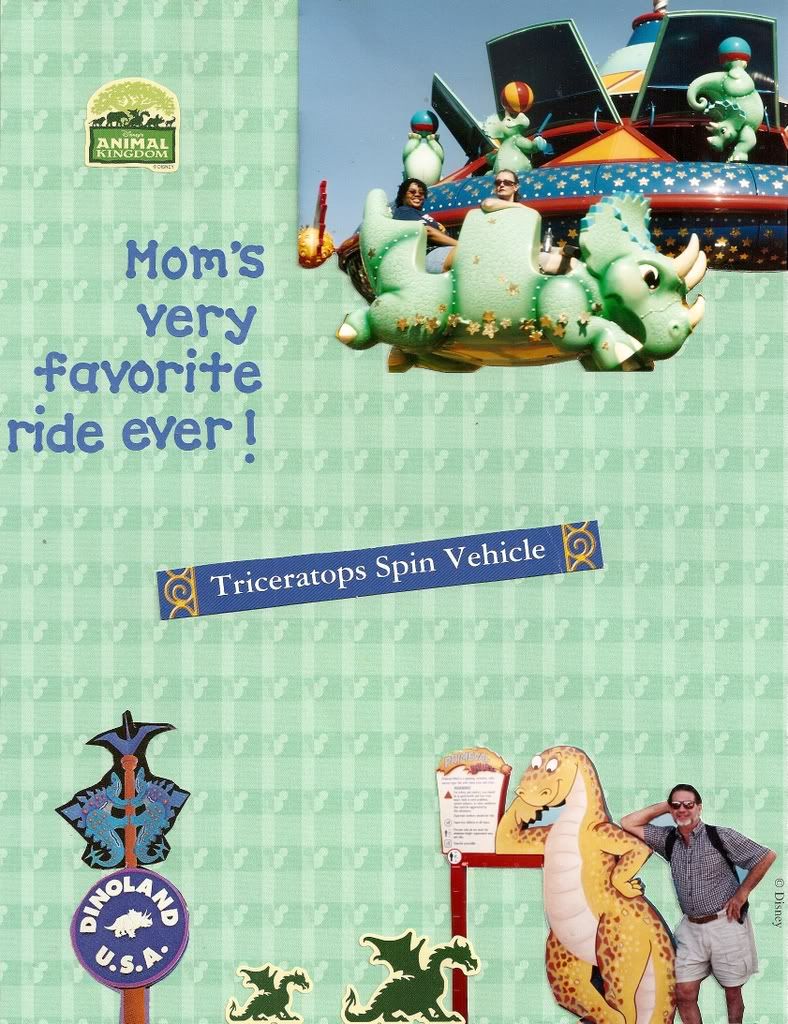
Almost too much scissor work

Click to Enlarge Only for my favorite ride would I spend SO much time cutting out three photos for a whimsical page. It's not my favorite layout, but I used not repositionable adhesive squares and alphabet stickers stuck directly on the page, so I'm stuck with the layout. I love the memory so much that I love the page.
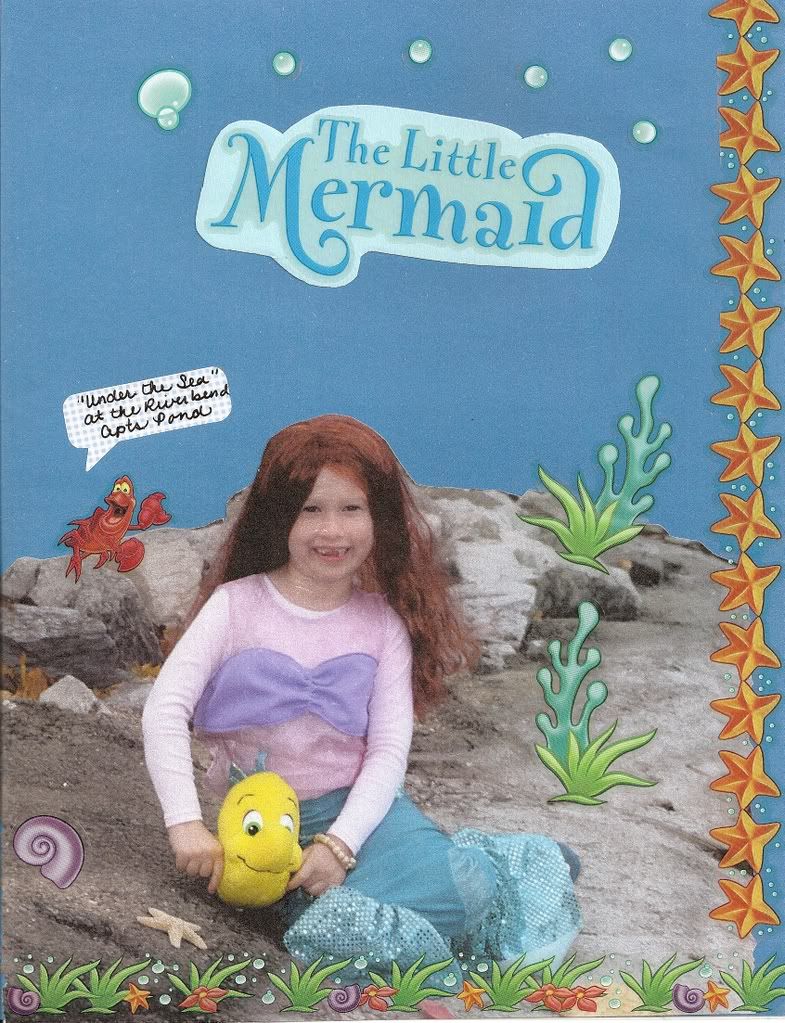
A Big Photo of the Little Mermaid

Click to Enlarge There were several versions of this page until I found these perfect stickers. I cut the background off the enlarged photo of my Little Mermaid sitting by a pond in our apartment complex. A blue background and stickers transform the scene to an underwater motif. I mounted the title sticker on light blue paper that I adhered to the page.
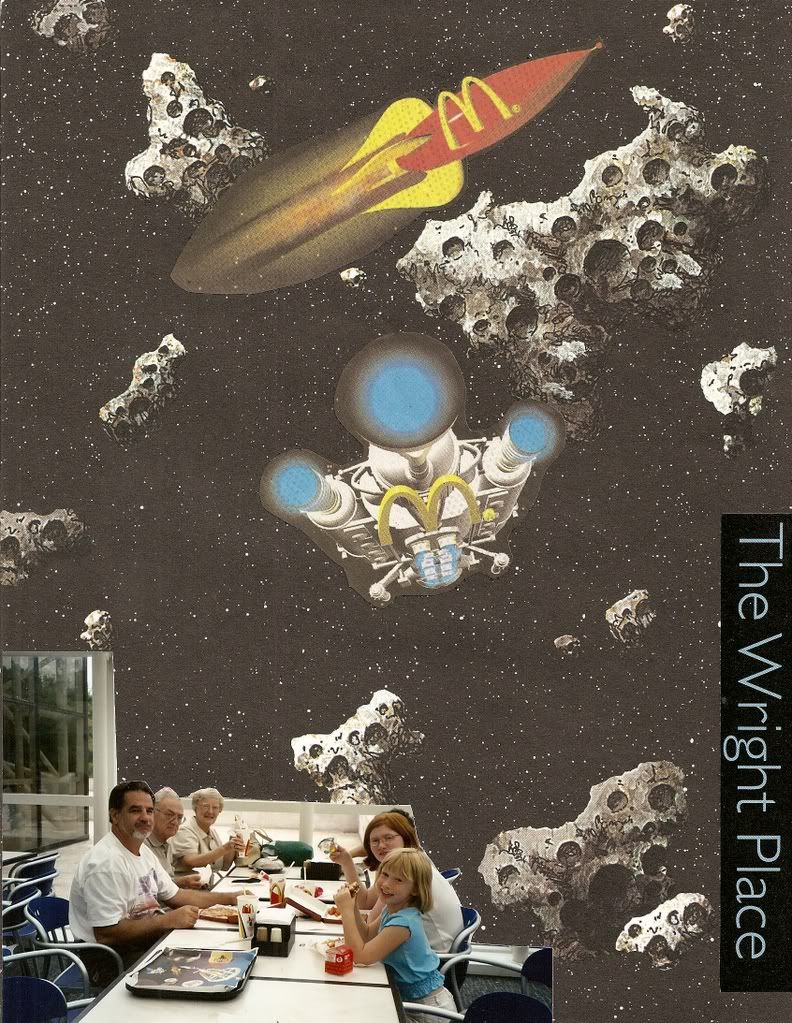
Cut-out Images on a Background
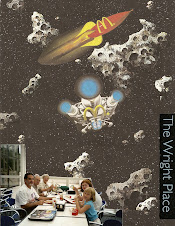
Click to Enlarge I cut out space themed logos from the unique McD's placemat at the Air&Space Museum, cut out the photo of our lunch there, added the title from the museum map, then adhered them all to this asteroid paper I happened to have. What else could I have done with this paper ?
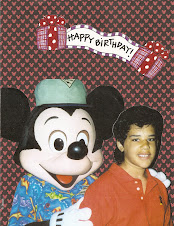
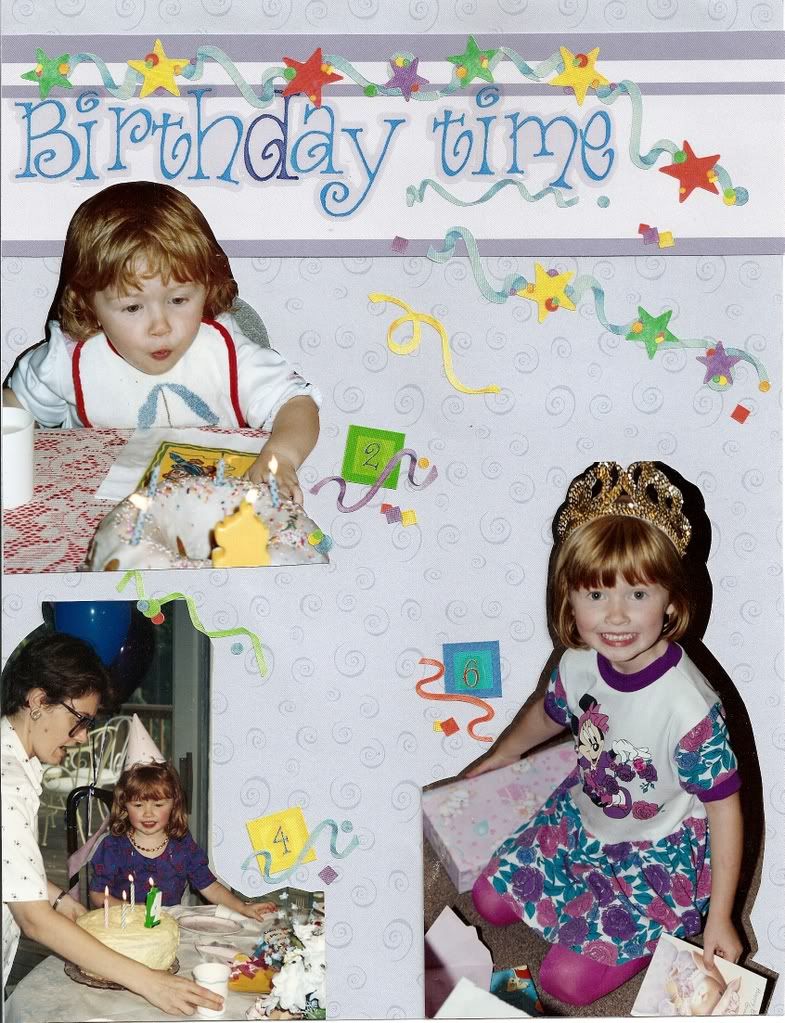
Birthday Scissor Work

Click to Enlarge Cutting away the backgrounds focussed the page on the Birthday Girl. I adhered a border to the backgroun page, aligned a straight edge of each photo to a page edge, then applied many stickers. My daughter points out that I "could" have produced a very similar page with Photoshop Elements, but I like the "old fashioned" techniques and paper.
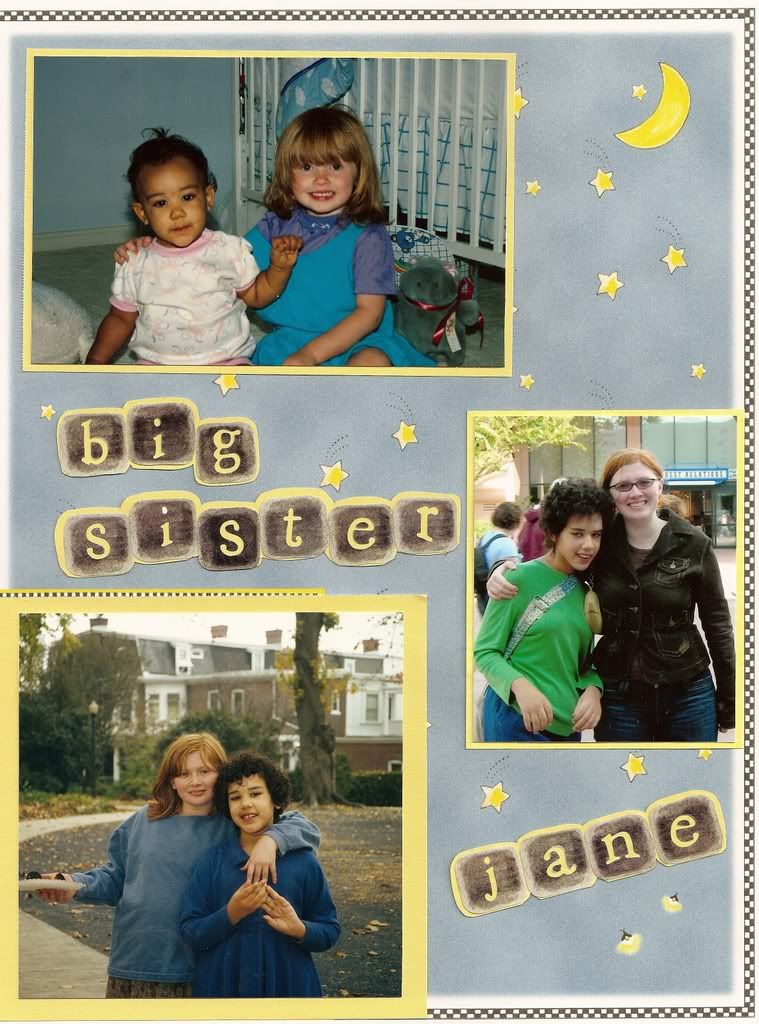
Sisters through the years

Click here to enlarge Three cuddly sister pictures taken when my oldest was 3, 12, and 19 years old.
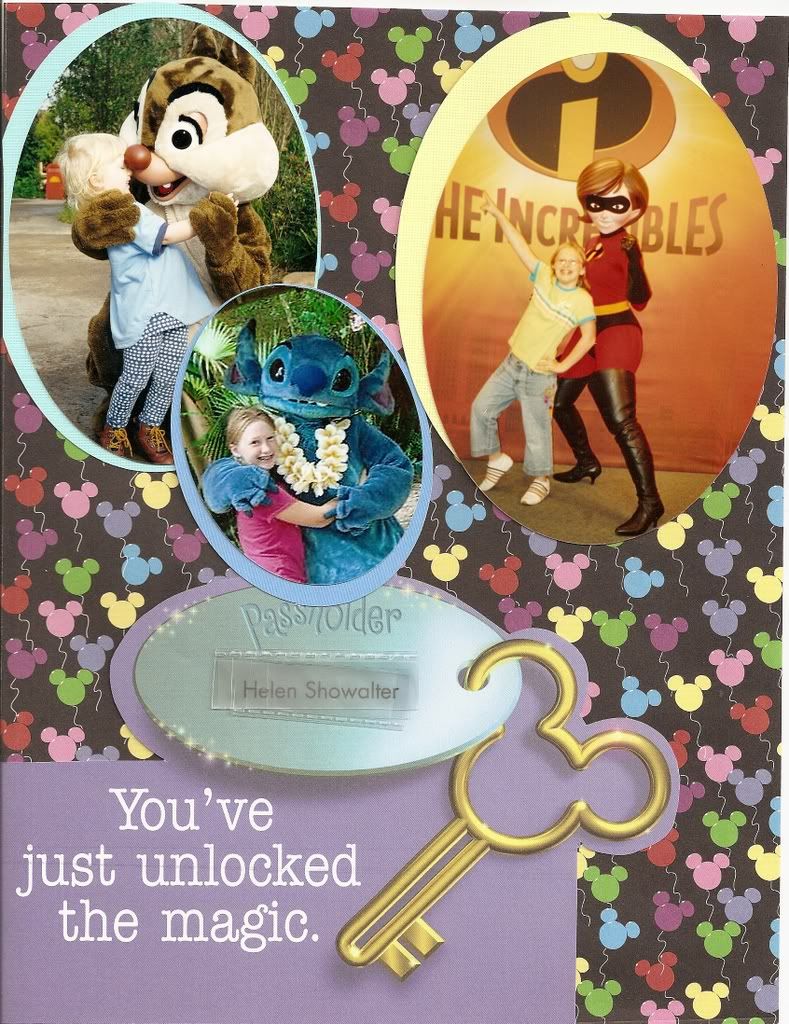
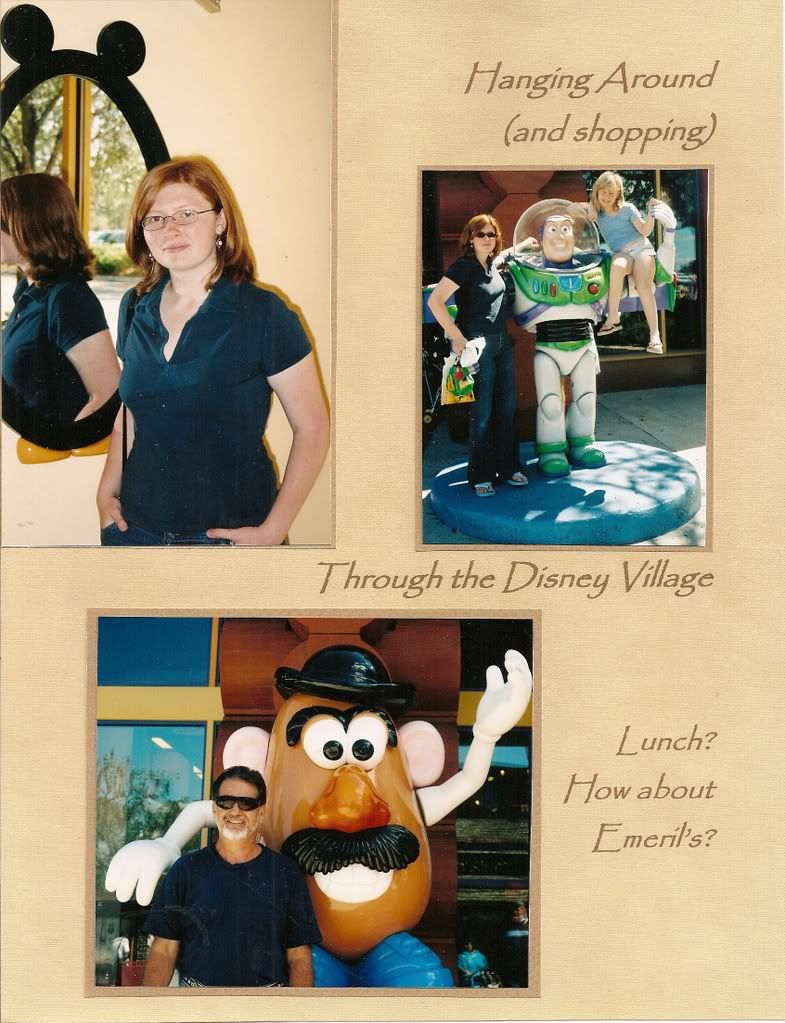
Visits to Disney

Click to Enlarge Different characters appealed to my daughter at different ages. I cut the title from an annual pass mailing. Its purple matched the purple icons on this paper that I had no idea how to use. The photos are matted off-center in other icon colors.
One generation apart

Click to enlarge After I discovered the coincidence of our similar Easter dresses, I scanned, restored color, and printed my childhood photos to create this page.
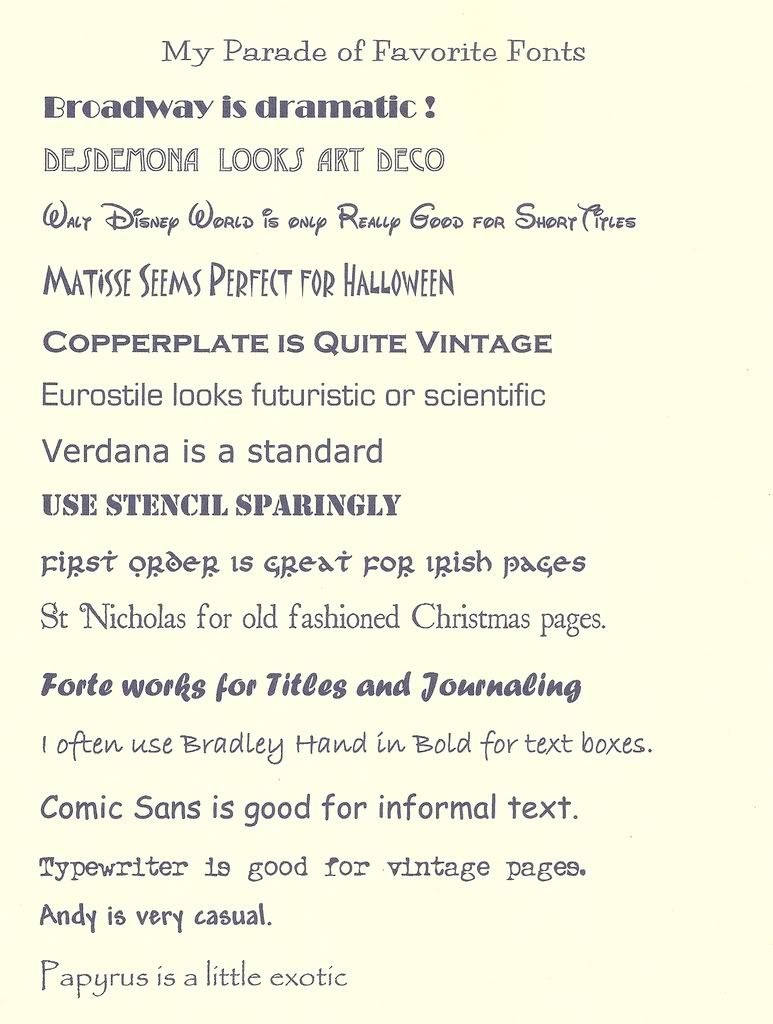
My favorite fonts

Click to Enlarge
Some fonts are best in small doses for titles and captions. Others are best for journalling and a journal title.
Fonts have character too !

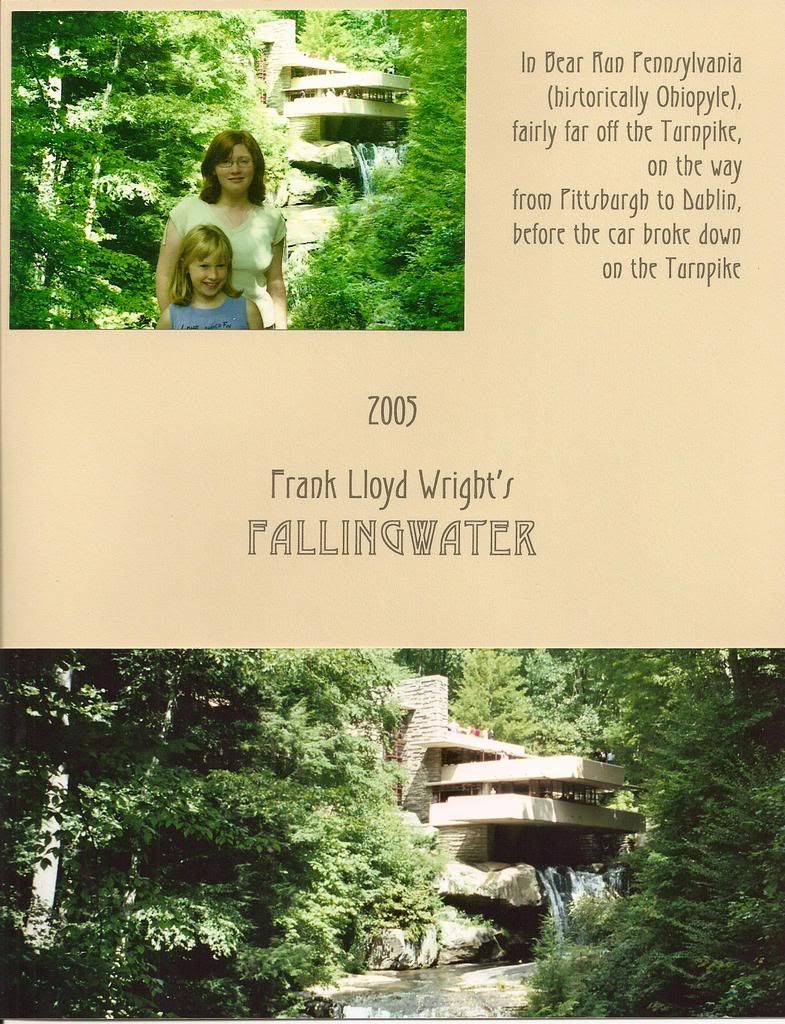
A Panorama Landscape Border

Click to Enlarge
This panorama border is almost the same view as the close-up photo of my daughters. The flush right, ragged left alignment of the text mirrors the building's terraces. The page is simple as is FLW's architecture. Genuine FLW fonts are commercially available for download, but I found that free Gradl and Desdemona worked just fine !
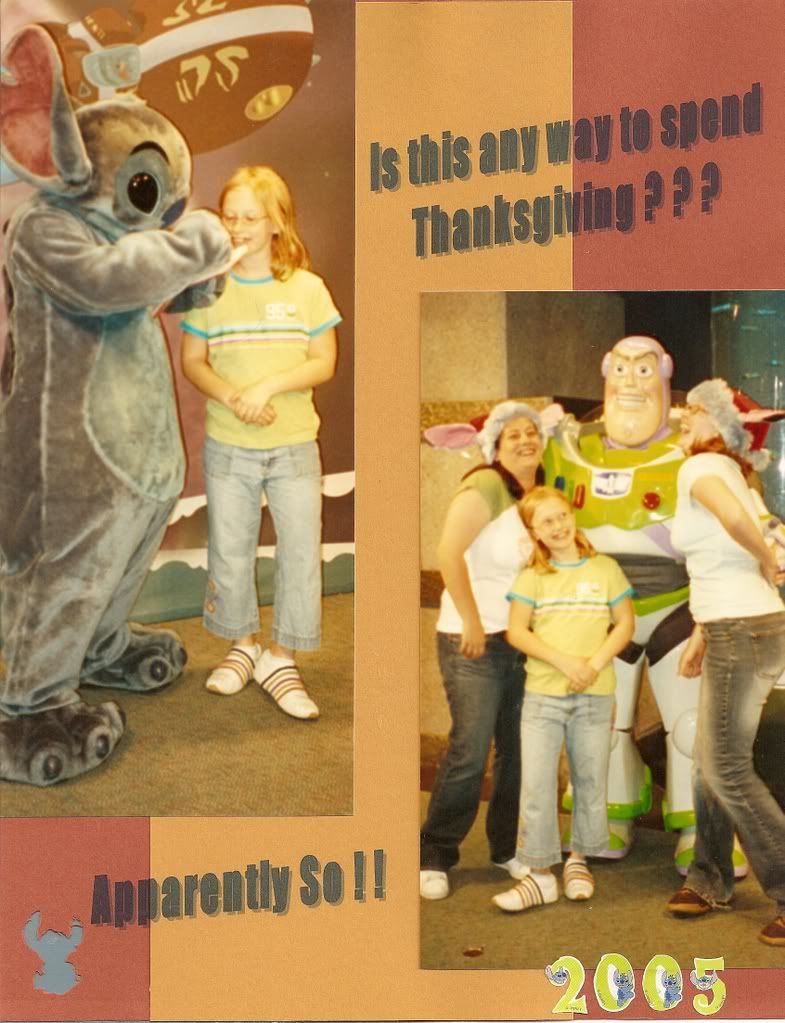
Panoramic People

Click To Enlarge Word's Word Art created the sloping titles printed on two different colored pages. I trimmed the lighter page and mounted it on the darker page to create the stripe. Glittery blue paper is under the Stitch paper punch. My layout fits the silly mood. I used Stitch number stickers for the date. A single color page with horizontal titles just looked too plain!
Panoramic Person
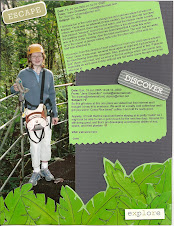
Click to Enlarge
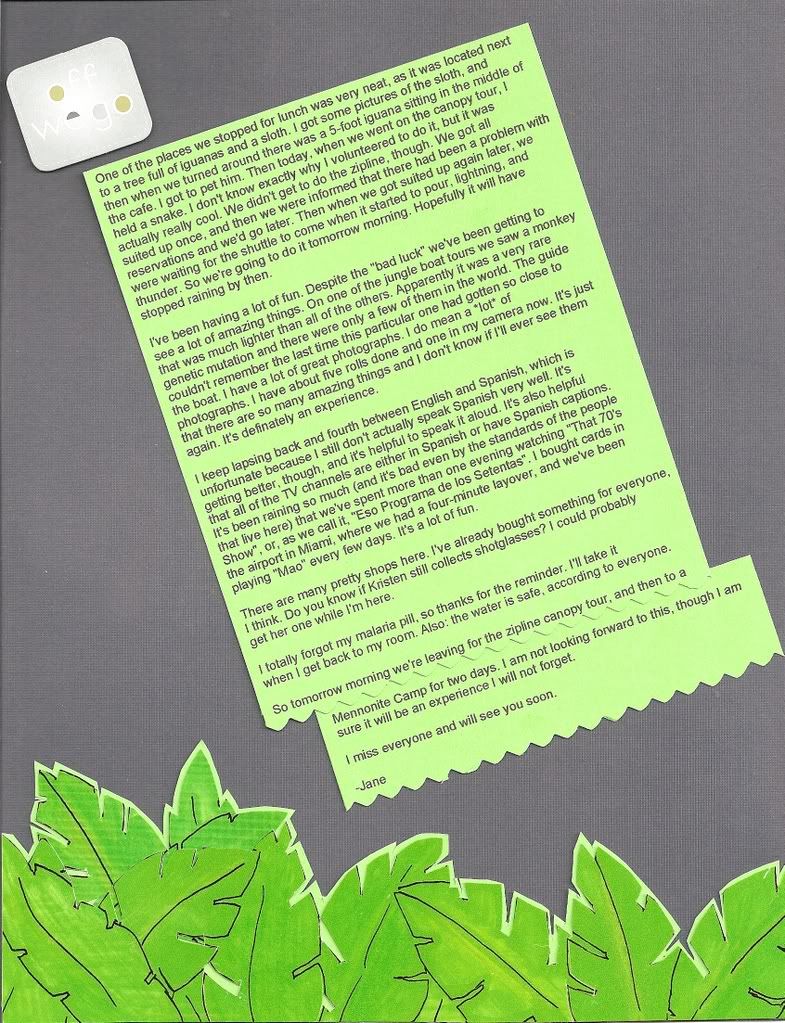
I aligned the text boxes along the tree trunk in this panoramic shot of the Costa Rica jungle zipline station
A simple page faces the busy page

Click to Enlarge
Two busy pages facing each other can be sensory overload. Placing a simple coordinating page adjacent to a busy page is best and less overwhelming. Both Costa Rica pages have text boxes of e-mails. Both borders are cut from purchased borders, and the scissor work was definitely worth it. I backed the leaves with the same green paper as the text boxes. A scalloped edger on the lower edges of the text boxes ties in with the leaves.
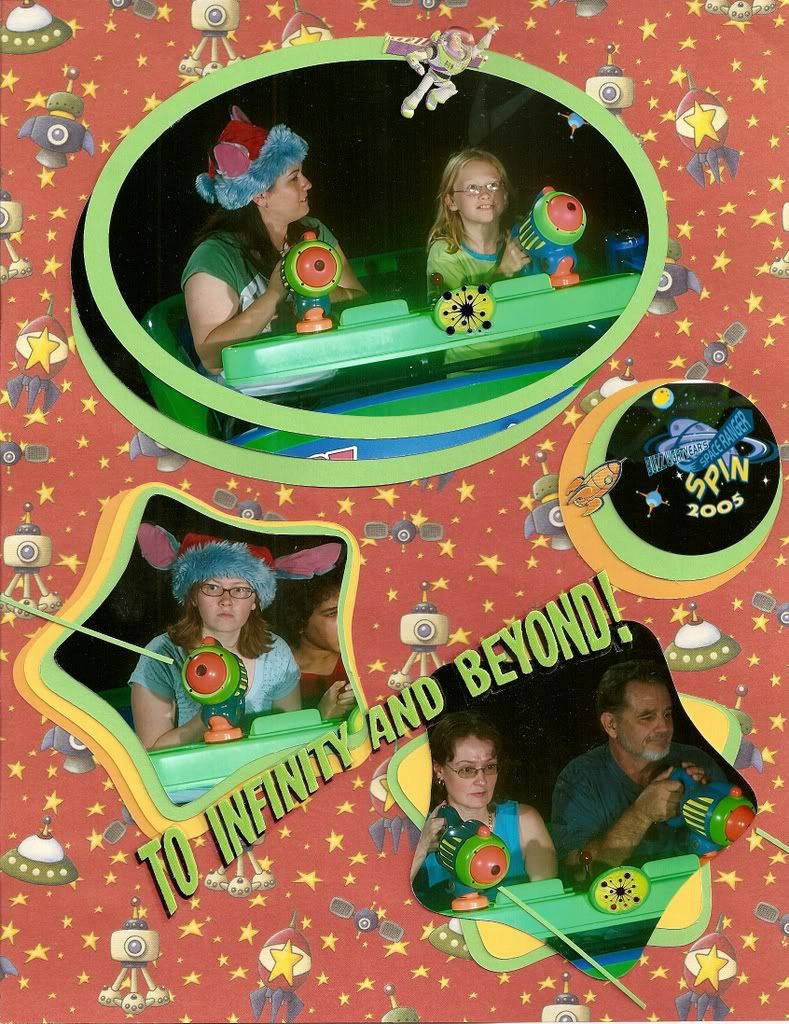
My Brightest and Busiest Page Yet
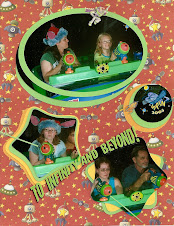
Click to Enlarge
To capture the energy and movement of the Buzz Lightyear ride, I used multiple mats. I used my oval shape cutters to cut a ring mat to put on top and an oval mat under the top photo. With my Creative Memories star shape cutter, I cut multiple mats to overlap. I also overlapped circular mats for the circular photo. Very thin paper strips made the weapon "rays." I purchased the title with the Buzz embellishment.
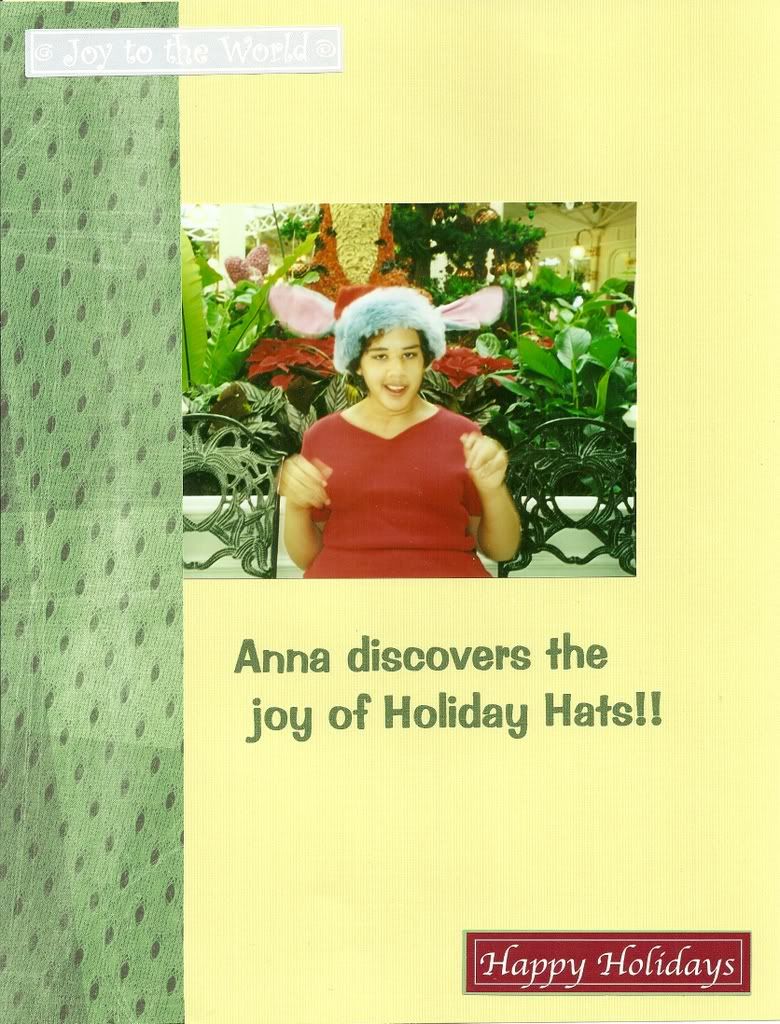
Word and Internet Titles
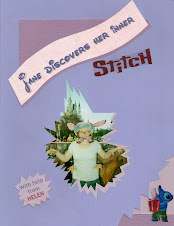
Click to Enlarge
Printing the text was easy, but constructing this page was not. I printed the blue title on pink paper using a Disney font from Fontface, then used a curve template to cut the title strip. The blue and red caption was printed on purple paper, then cut out. "Stitch" and his logo were downloaded from a Disney site and printed on "Computer Grafix" transparent sticker paper. I cut the paper to mount the photo from behind to give the illusion of breaking through. I constructed this page to spotlight a spontaneous WDW photo.
Christmas 40 years apart.

Click to Enlarge The large photocopied photo of my daughters by the tree highlights the copy of the 60's photo of me, my sister, and my Dad that I printed with a white margin that I trimmed with my deckle scissors. The captions are Rub-Ons.
A Child's Christmas Card

Click to Enlarge
I used a heart template to cut and mat the sentiment. I found holly print paper for the background. I still need to add the year in the layout.
The Cat's Christmas Card

The Caption as Title

Click to Enlarge
I printed the caption on the scrapbook page, then adhered the photo. The border is a "left-over" from trimmig a 12x12 page. Two stickers help achor the layout along the diagonal.
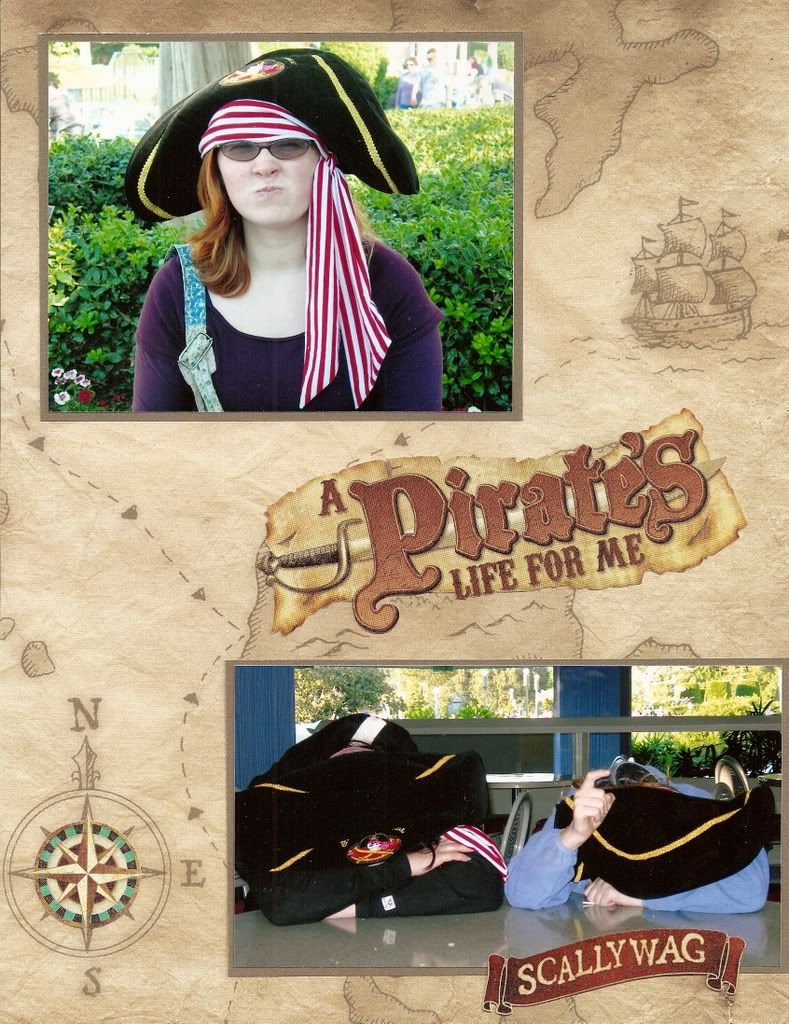
Purchased Pirates Titles

Click To Enlarge
Two photos are thinly matted on the same dark brown color as the "drawings" on the patterned paper. The compass and multi-colored sticker could not be easily created by me, although my teen year old daughter "could" do it with Photoshop if she wanted. Sometimes buying the perfect stickers are SO much easier.
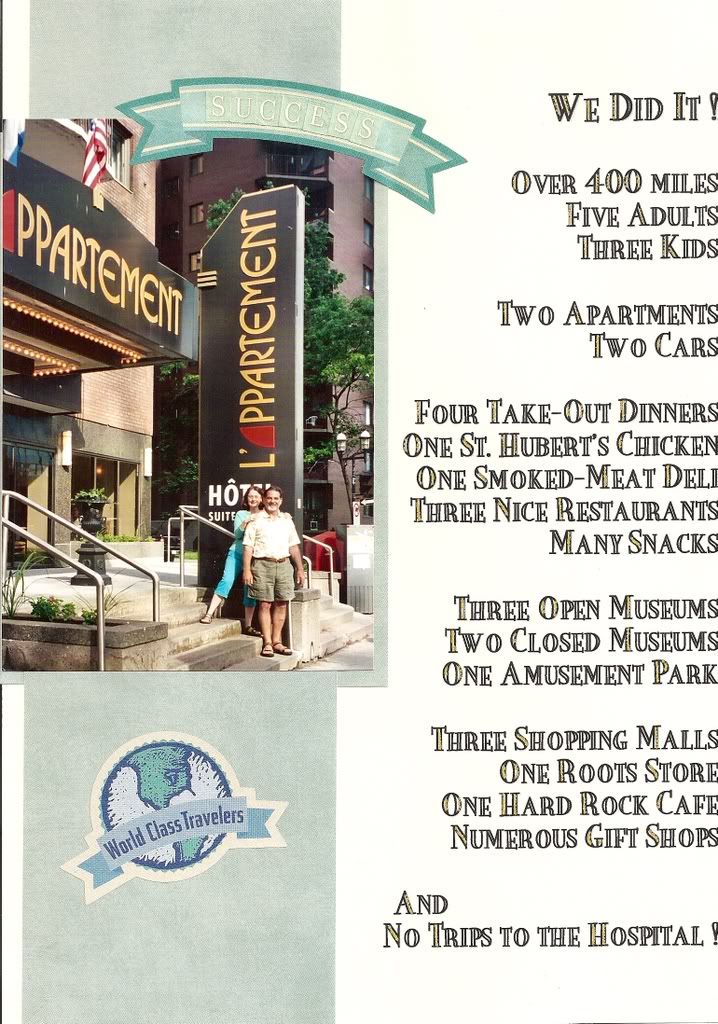
A Travel Log

Click To Enlarge
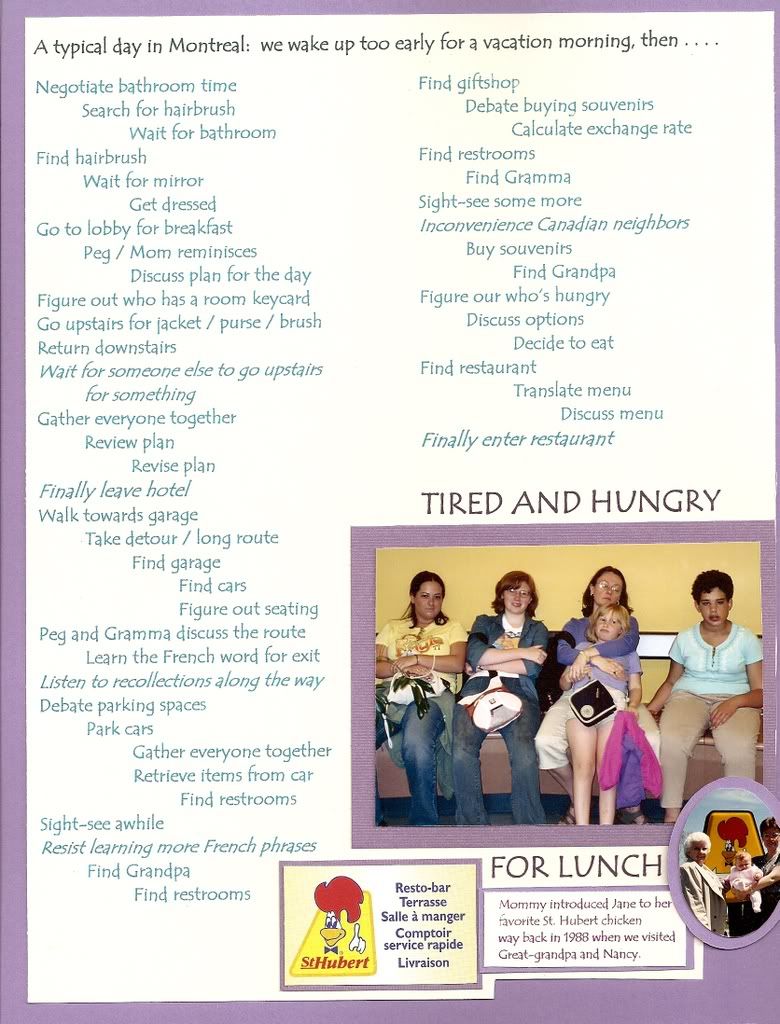
For someone who doesn't like writing lots of description or sentences, a nice list of activities works well.
St Hubert's Chicken - twice

Click To Enlarge I put the small photo of myself, grandmother, and daughter next to the current photo of my daughters at the same restaurant years later. The long list of our day's activities includes lunch at that favorite restaurant.
Bright mats with rounded corners evoke the 60's.
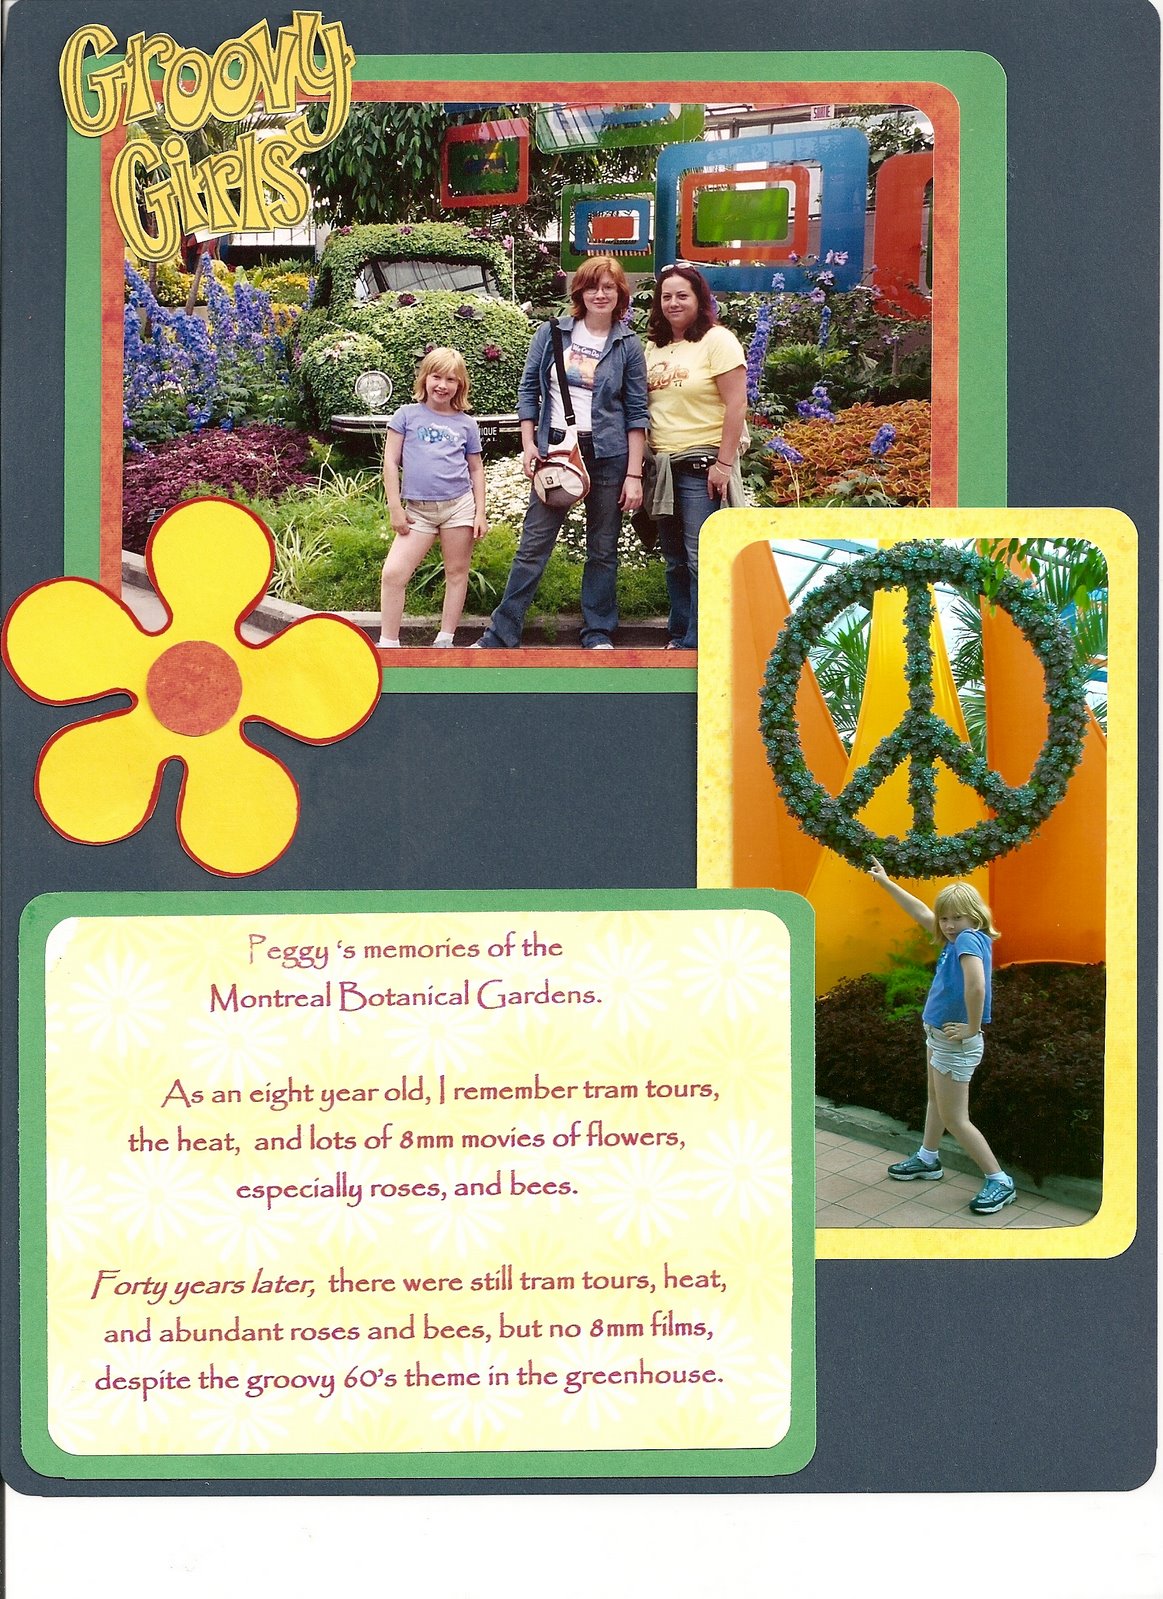
Click To Enlarge A round corner punch for the photos and the double mats matches the hanging sculptures in the greenhouse. The yellow die-cut, mats, and text box paper match one shirt. A brighter blue background paper made the page "too" bright.
Corner punching photos and their mats
Click To Englarge I used a dovetail corner punch for the cropped photos, title strip, blue mats, and purchased quote die cut. The dovetail seemed similar to paper pattern. The blue mats match dots in the paper. Adhering alphabet stickers to cardstock before trimming creates a centered title strip. A craftsy page seemed to tie in with the Beanies.
Multiple matting
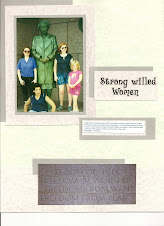
Click To Enlarge
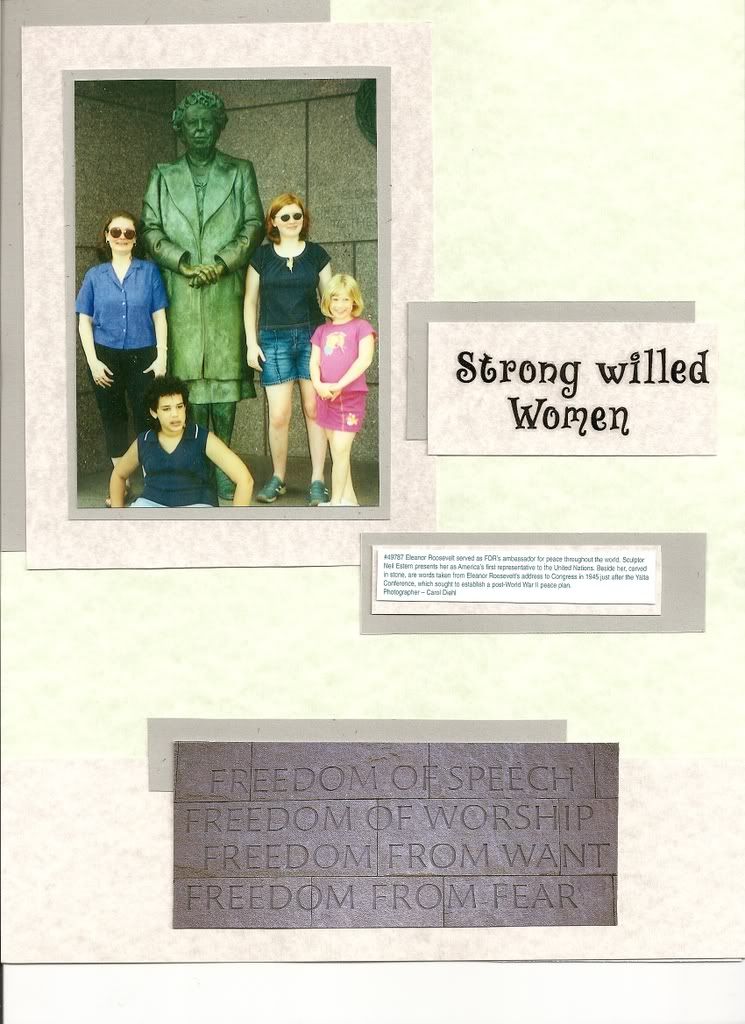
The multiple grey toned mats around the photos, title, and captions evoke the style of the Roosevelt Memorial shown on the adjacent pages.
Lots of quotes
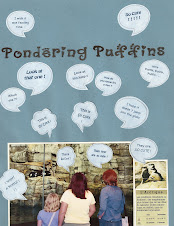
Click To Enlarge
I printed all the quotes on cardstock, then punched them out. Trying to center and space on a quote bubble sticker or diecute is very hard for me. The title was directly printed on the page with my printer.
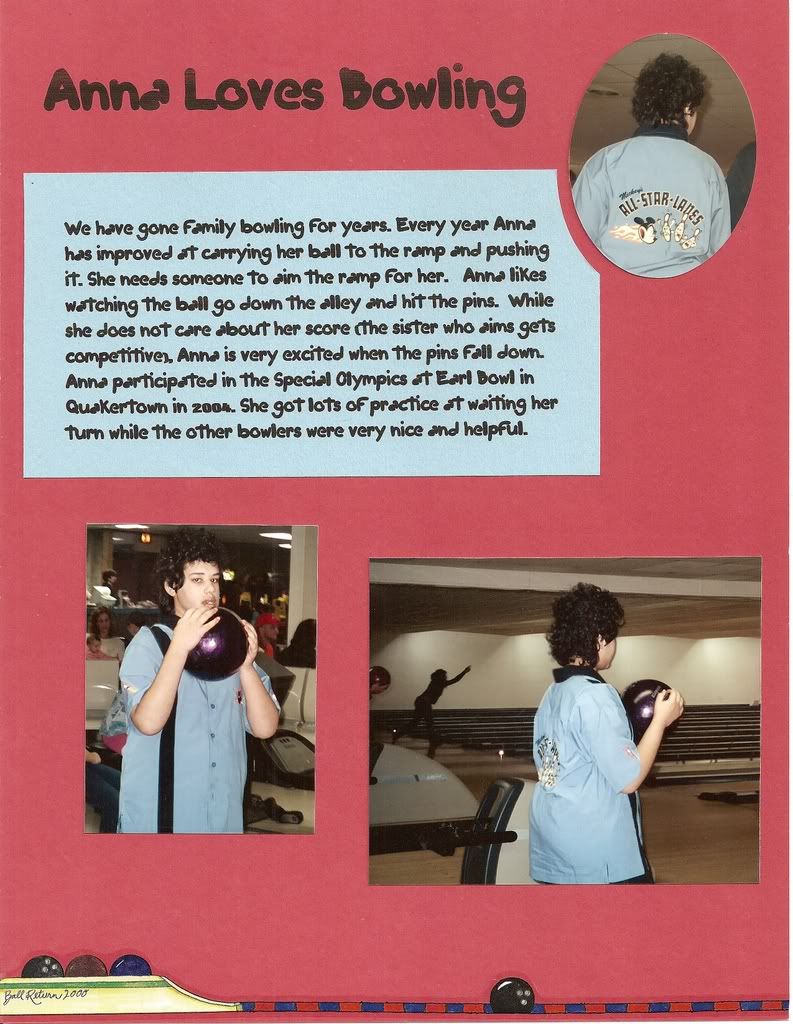
Some Journaling

Click to Enlarge Journaling and text boxes can be hand written, but I prefer to type with fonts that are similar to hand lettering.
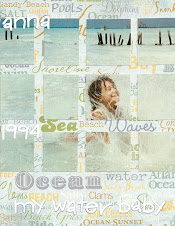
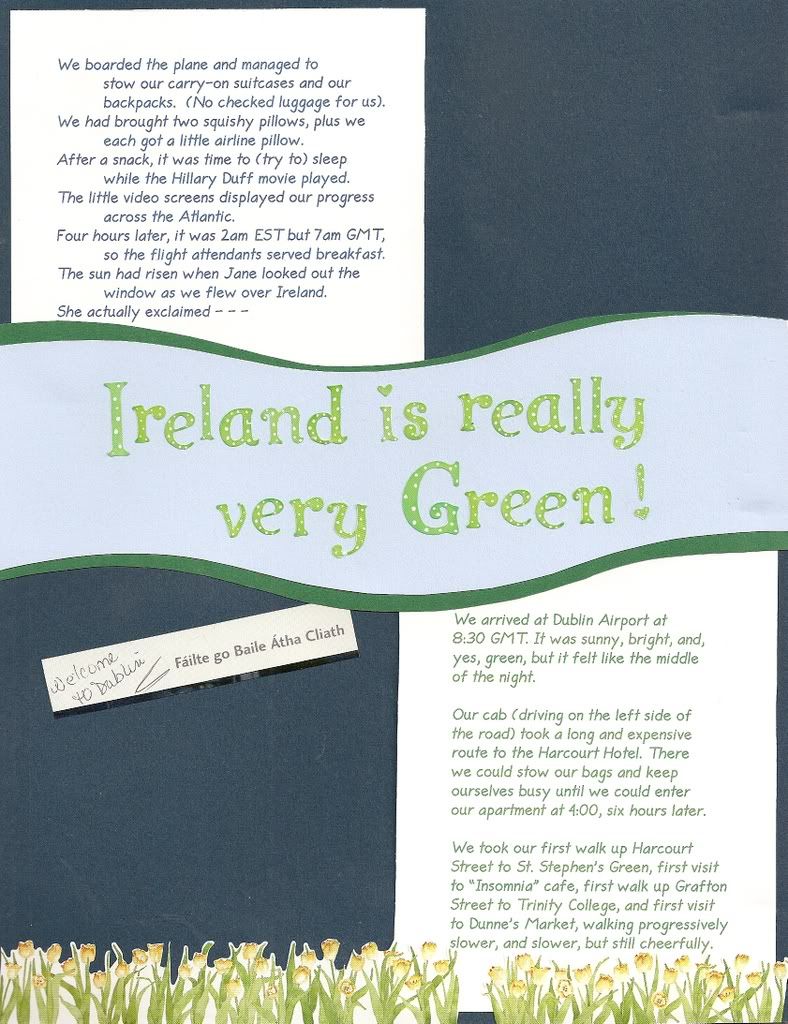
Just Journalling
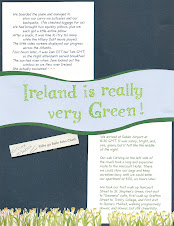
Click to Enlarge Describing our landing at Dublin Airport was a perfect start to our scrapbook. The border is a purchased die-cut. Dividing the text into two section and placing the title in the middle of the page made the page visually interesting without distracting from the text. I tried several stripes for the title, but then the wave came to mind. Green textured sticker letters made the title. The blue title wave is matted off-center on a slightly bigger green wave. I used a Creative Memories wave template to draw the wave, then cut with scissors. I won't cut a straight edge or a circle with scissors, but a curve is fine.
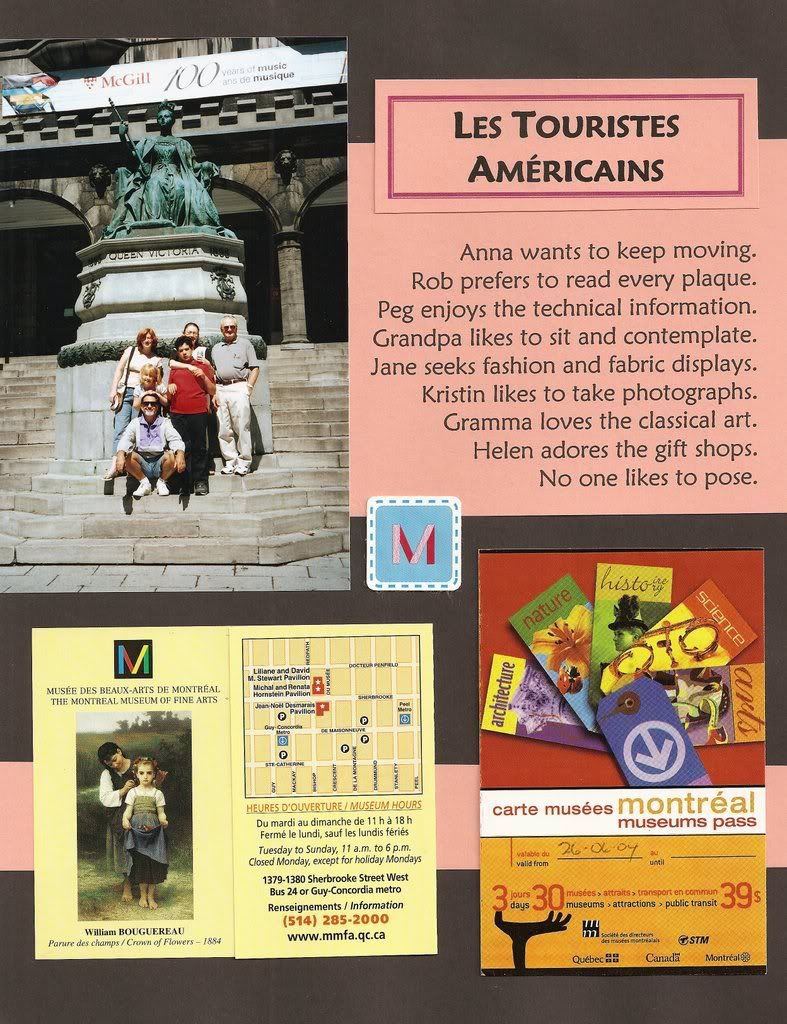
A collage of pamphlets, photo, and text boxes!

Click to Enlarge
A photo in front of a museum would be boring on its own without the photo, museum ticket, card, sticker, text, title. Editing and printing the text "flush right," with each sentence on its own line did take some time ! A strip of the same color cardstock helps unify the design. The title text box is cut separately from the same color cardstock and adhered on top.
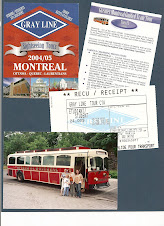
Day Trip Memorabilia
Click To Enlarge
The souvenirs or the photo alone would be pretty boring, but together they make a nice page. There's room for some captions if I can think of anything to add. Sometimes I can't.
A collage with driving directions as the text.
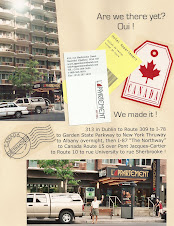
The purchased Canada and postmark stickers, parking ticket, hotel key jacket, photos, and the driving directions from Pennsylvania to the hotel all blend. This layout and title work well for all road trips.
A photo, recollection, and a colorful pamphlet.
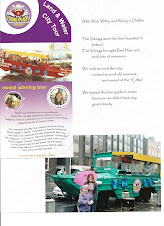
Our narrative text is printed directly on the paper.
Montreal Subway Souvenirs
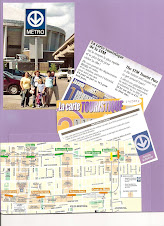
Plus a photo of us all at a Metro Stop. No title, text, or caption seemed necessary to me.
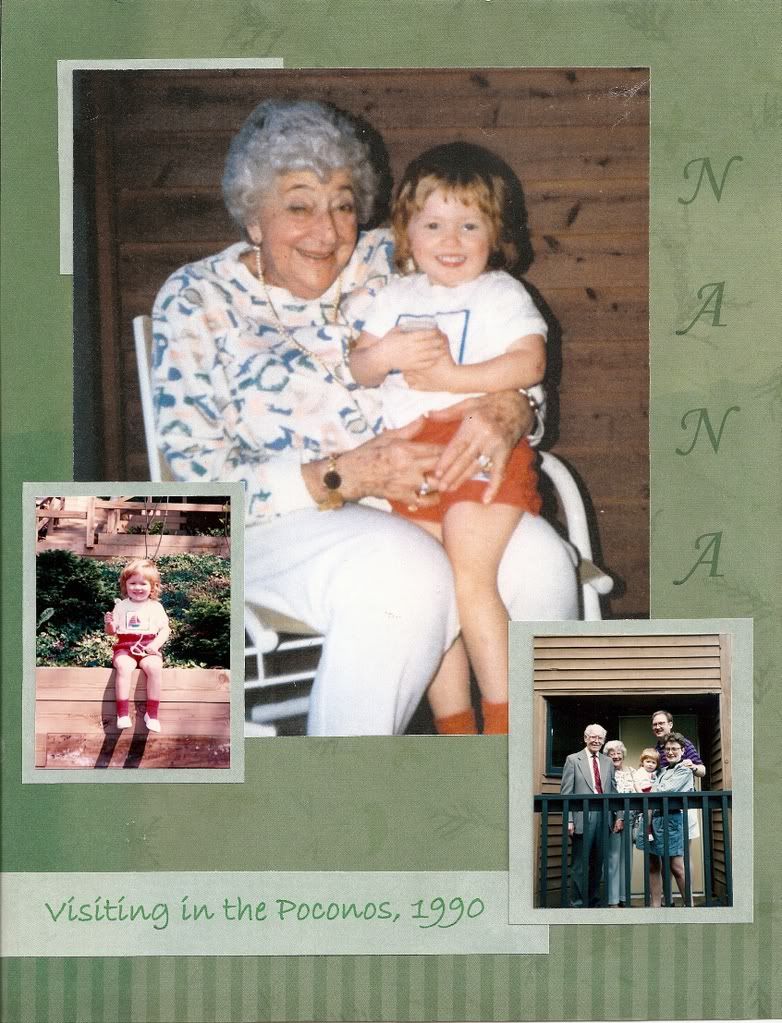
What color for the Poconos ?

Click to Enlarge Shades of green provide a nice contrast to the cabin brown. Although many colors coordinate with brown, green evokes forest. The main photo is enlarged by my color photocopier. Grey-green mats provide contrast for the title, mats for the little photos, and the partial mat for the upper left.
The sky at the top edge

Click to Enlarge
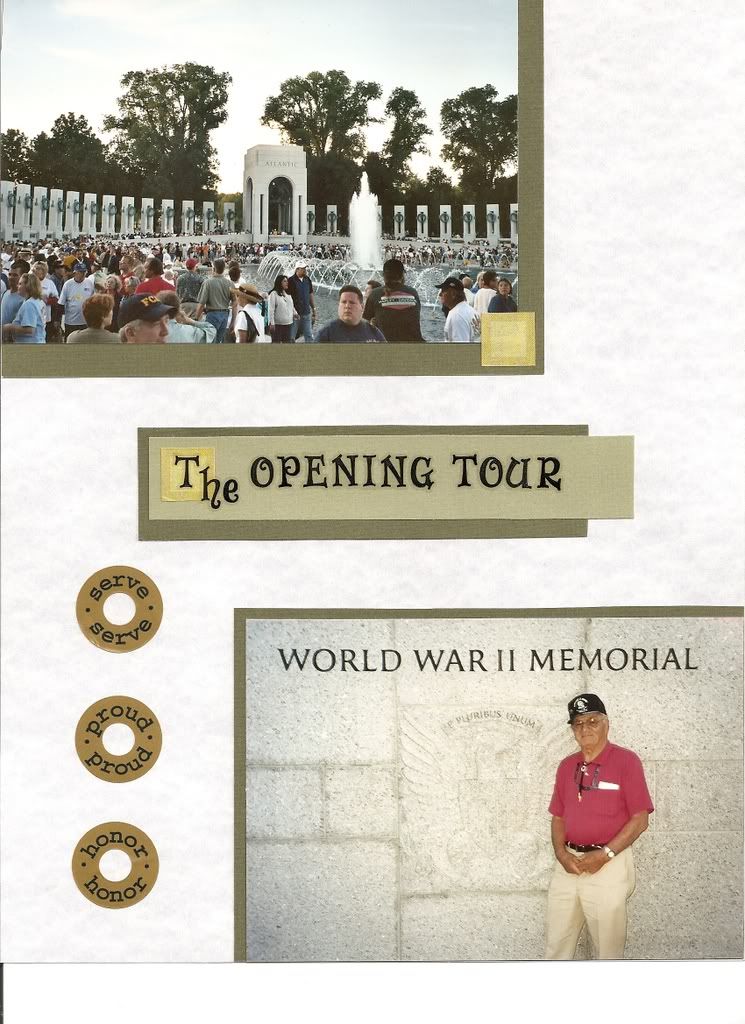
Two minimally cropped photos lay flush with the paper edge to continue the flow from the upper left to the lower right. They are partially matted with Army Green mats to keep the photos from blending into the paper. Pressing letter stickers onto green cardstock mounted on Army Green cardstock created the title that is supported by the Army stickers.
Cherry Blossom Seasons
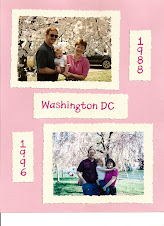
My infant daughter and 12 years later. Matting the photos with wide margins keeps the cherry blossoms from blending into the paper. Letter stickers on cardstock created the captions. A ragged scissor edged the photos and mats.
A Calm Disney Page

Click to enlarge Photos with very thin mats and simple text create pages that balance an adjacent busy page. Printing text directly onto the page before adhering the photos "only" took four attempts for proper alignment.
Four cropped 4x6 photos fit on one page

Click to Enlarge
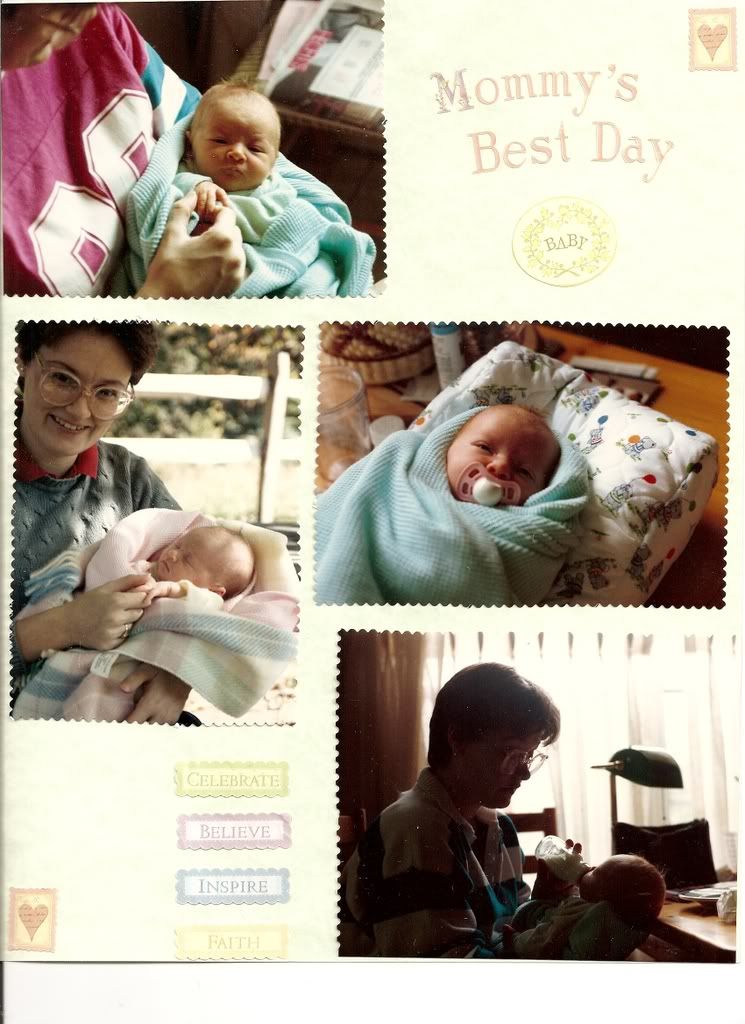
Yellow paper complements the blue baby blanket. Cropping keeps the focus on us and allows four photos to fit on the page. The photos flow from the upper left to the lower right. My partial head fits against the upper corner. Pressing letter stickers directly on the page created the title. Two heart stickers in opposite corners help balance the page.