Happy Thanksgiving !
Merry Christmas Eve !
Merry Christmas !
Happy Boxing Day !
Happy New Year !
and Happy Epiphany and arrival of the Three Wise Men ! (if I don't post before then )
May 2010 be happy and healthy with happy times and time to scrapbook them (eventually) !
Love from Peggy
12/27/2009
12/03/2009
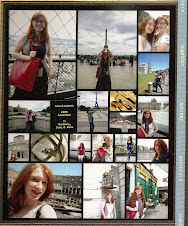
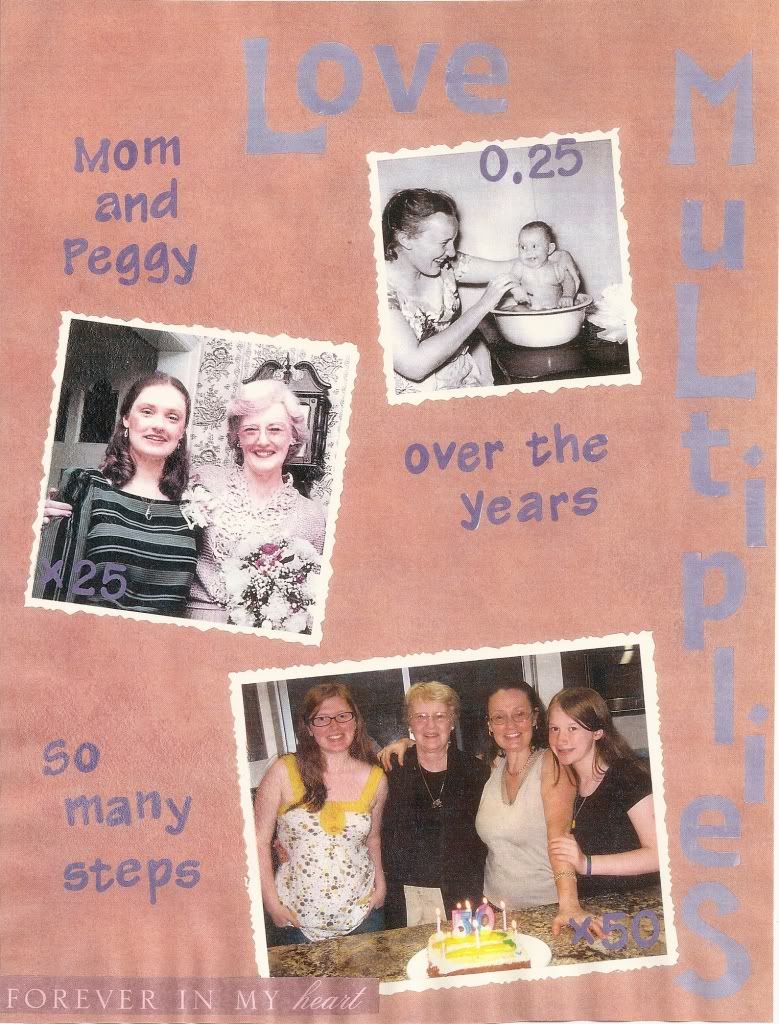
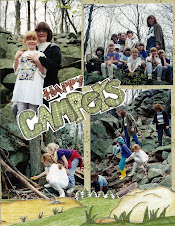
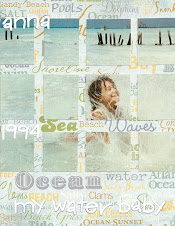
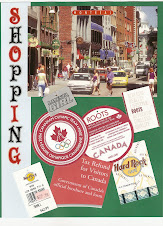
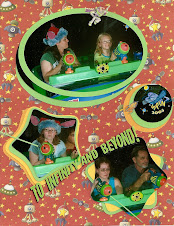
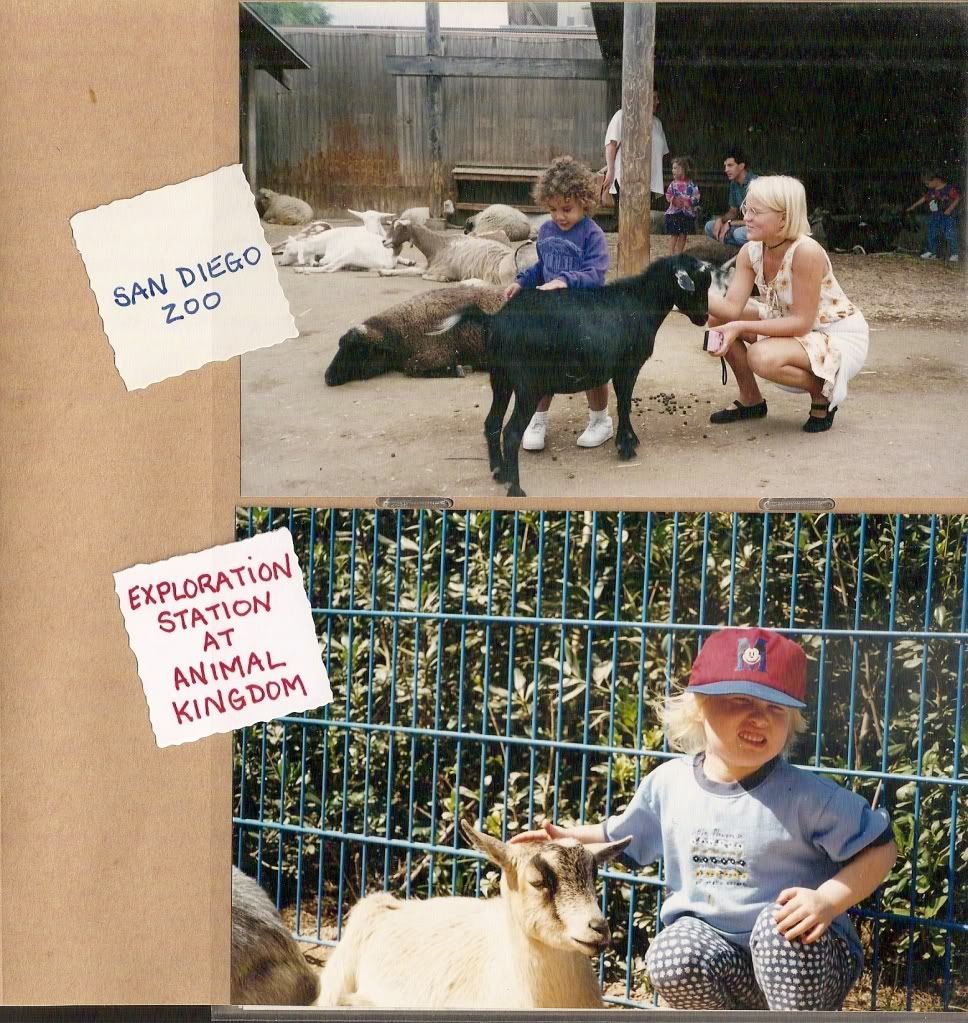
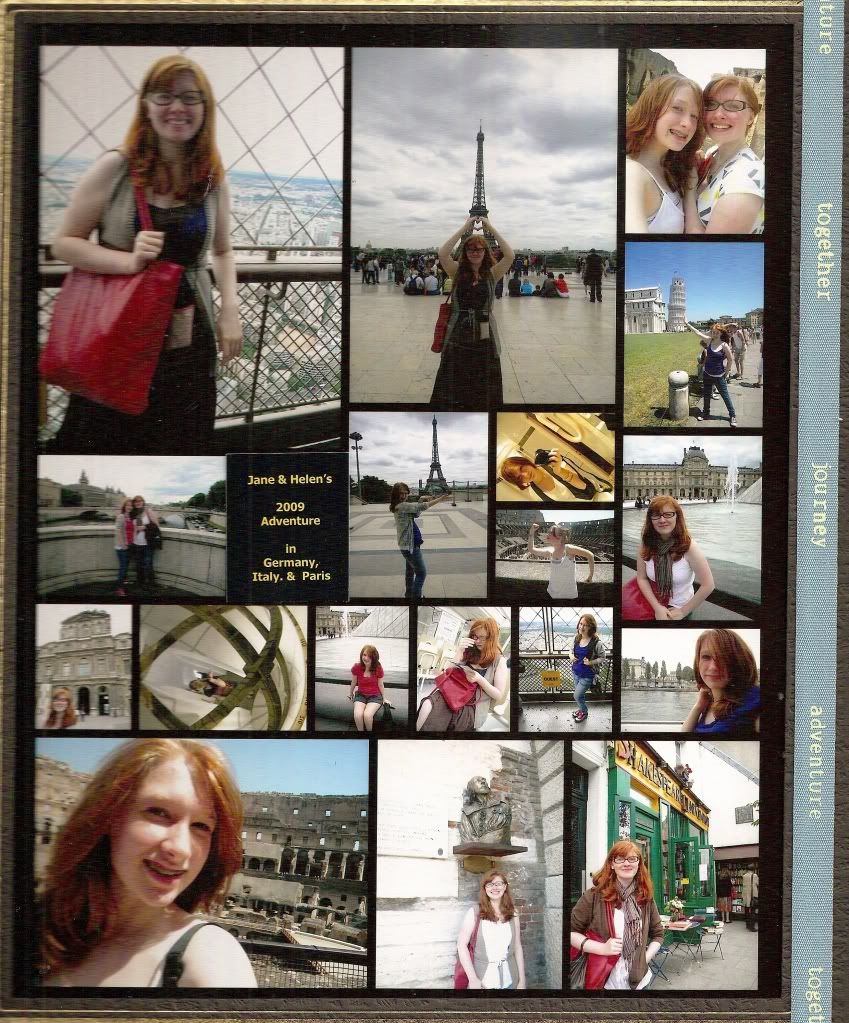
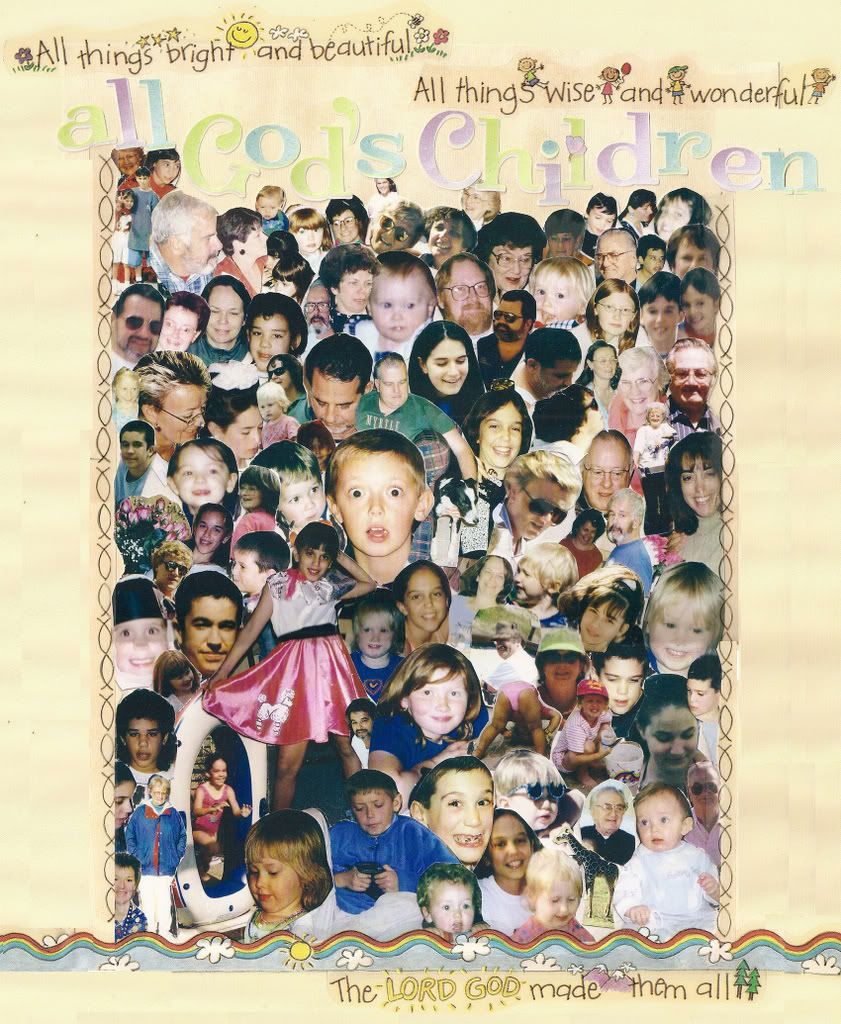
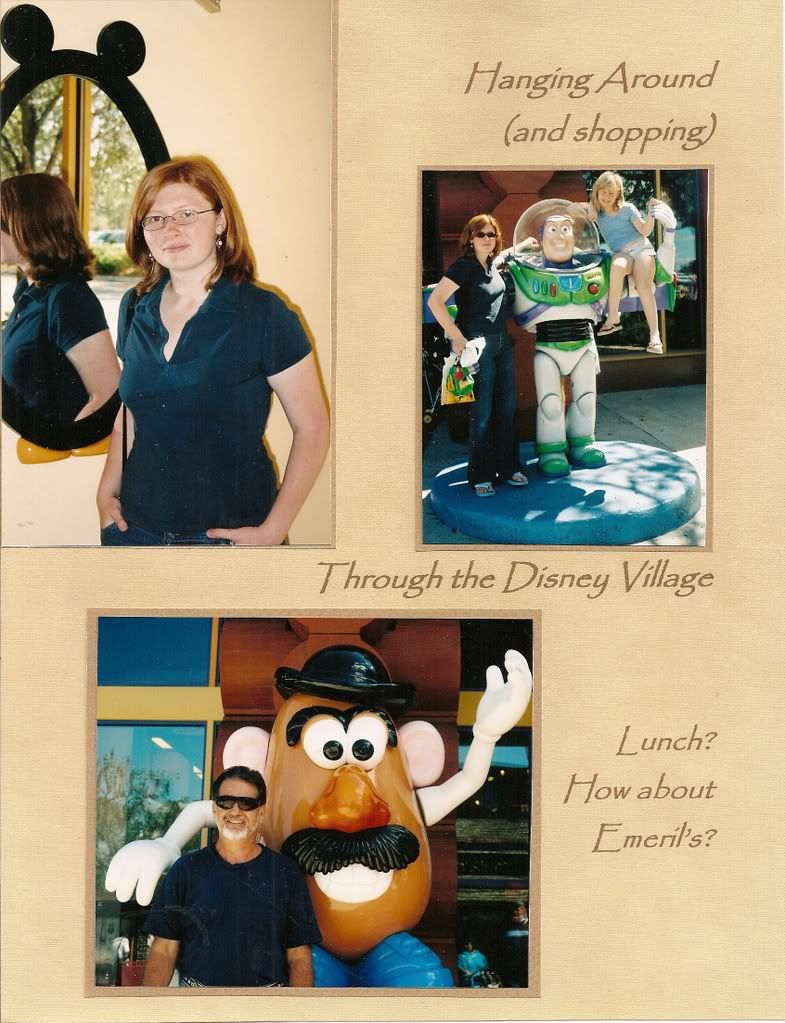
The easiest collages ever !
I have assembled all my scrapbook page collages by trimming, arranging, and rearranging actual photos. The challenge is strangely fun. All the "easier" web and digital scrapbook collage templates that I tried were too tedious for me and actually took much longer. Then I stumbled onto Walgreens collages. Yes, Walgreens. I have not been this excited about a product since Mr. Clean Magic Eraser.
"Easy" is of course a relative term, starting at walgreens.com, clicking on the photo icon, and registering. Finding the collage section is a bit of a hunt by clicking on gifts, then clicking on collages. There are three sizes, 8x11, 5x7, and 4x6. Uploading photos is next and a bit tedious. For a 8x11, up to 12 to 16 photos seem best. The site creates the collage and the arrangement. You can select with width of the margins around the photos and scramble the photos, but you cannot rearrange the photos individually. Once you have an arrangement you like, you can have it printed within an hour at the closest store.
Then the collage is ready for any labels or embellishments to make a page.
10/28/2009
Bits and Pieces and Left Overs
When trying to organize my supplies, I gather up and give away the paper and embellishments that I know I will never use. Often these items purchases seemed inspiring when I purchased them or they are part of a larger set -- beware the combo packs unless you really want that one item enough to donate the rest. A partially used sticker sheet, random remaining letter stickers, and odd embellishments are harder to donate because they look so used, because they are.
On a rainy day when I feel obsessive (not very often), I have cut up the partially used sticker sheets into individual stickers that I put into a ziplock "grab bag" that seems so much neater.
Another option is using those left-over stickers. I liked the style because I used part of the sheet. One option is using similar stickers to make a personalized border for an essay, recollection, summary, title, or journaling page.
Another option is working these stickers into existing pages. Especially if I buy some new Disney embellishments for one page, the remaining stickers find a home on older pages. I bought a large set of spiritual and religious embellishments for our vow renewal pages, and the remainders were great for older baptism and confirmation pages I made when I could not find any embellishments that I liked.
9/20/2009
Why do I scrapbook ?
The summer of fourth grade, my mother had me scrapbook our road trip through New England.. Scrapbooking the Nixon-Humphrey campaign was a school project. I scrapbooked Apollo 11 all on my own. Then no more scrapbooks. My children's baby books were cute fill in the blanks styles.
Then in 2000 I visited my cousin Lynn who had plunged into scrapbooking. I was hooked, despite my stressful and chaotic life and job, I love my scrapbooks, my scrapbook paper, my supplies, and my tools. I love my scrapbook magazines. I love font websites. Why ??
- Scrapbook pages are more meaningful to me than the stored boxes of photos and bits and pieces of paper I collect
- Shifting through the boxes for material for my pages triggers memories I had forgotten.
- Compared to my day jobs, creating attractive pages gives me a challenge without real risks of pain, danger, death, or lawsuit.
- Applying design concepts learned in my past lives working in my father's typography studio and working in Dr. Cooley's college media production labs link my past and current lives.
- My interest in historical research can provide captions, embellishments, and style elements that are uniquely mine.
- My life requires a hobby that I can do anytime, with little travel, timetable, and relatively little cost for supplies (at least per purchase).
- Swapping scrapbook pages with my mom lets us collaborate despite our distance
- Scrapbooking has given me an identity in my family -- the photographer of photos for the scrapbook.
- Looking at the albums on the shelf reminds me that my life has been full of happy times.
- Occassionally my children actually look at them.
- Rarely my children actually show them to friends.
- When I am old, I will enjoy looking at them and forcing young people in my life to look at them with me.
9/07/2009
My Scrapbooks and Covers
This weekend I moved all of my 8 1/2 by 11 scrapbook pages into three-ring binders (from Staples, Home Depot, and Walmart) and out of the traditional "post and screw" style scrapbook albums (from the scrapbook stores). All those traditional scrapbook albums and all never used 12 x 12 scrapbook albums went to the thrift store.
Three ring binders open easily. Because I scrapbook based on my current mood and interest, not chronologically, with binders I can add pages in their protectors to the middle, the end. I can rearrange pages easily. Traditional post style albums require a screw driver and almost require an engineering degree to open and add more pages, and they do not open and lay flat like my binders while I rearrange my pages.
I start a scrapbook in a 1 inch or 1 1/2 wide binder, when it's full I move the pages into a 2 inch wide binder, and when it's full, then Volume II starts.
My oldest daughter has a 2 inch binder that includes her "younger" and "older" years and a 1 inch binder for her high school years. My middle daughter has a 2 inch binder. My youngest daughter has two 2 inch binders, and she just started high school and her volume III. I have been scrapbooking almost her whole life, and I have been catching up for her sisters.
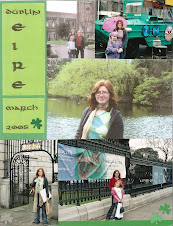
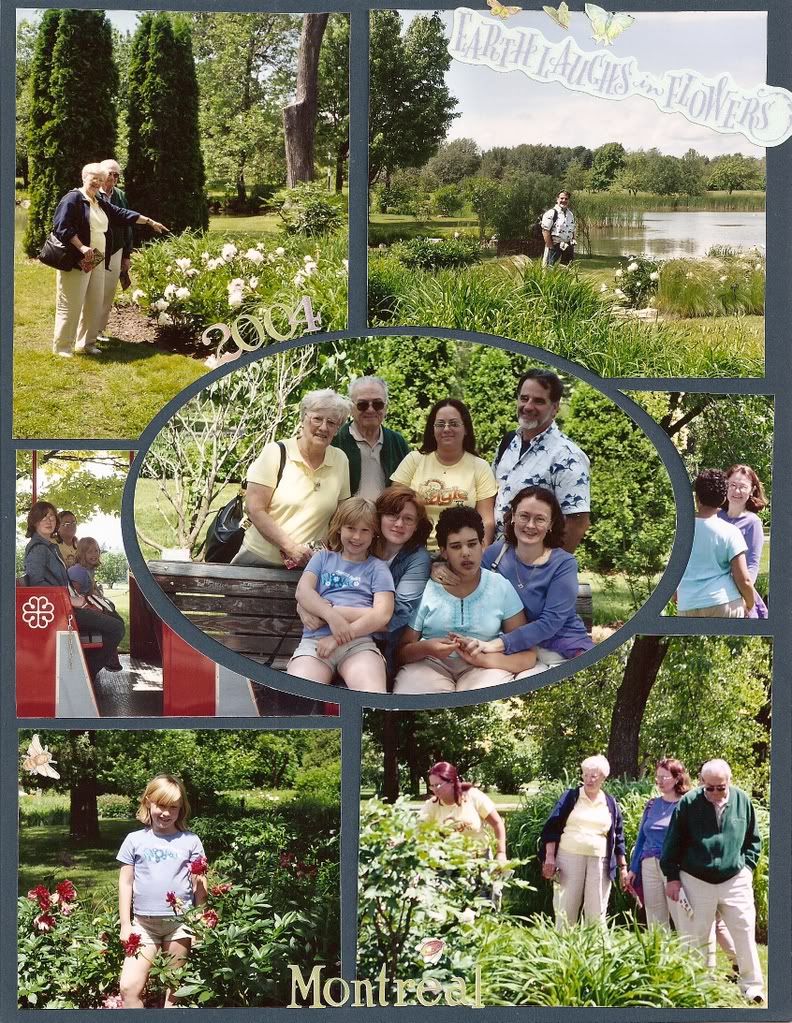
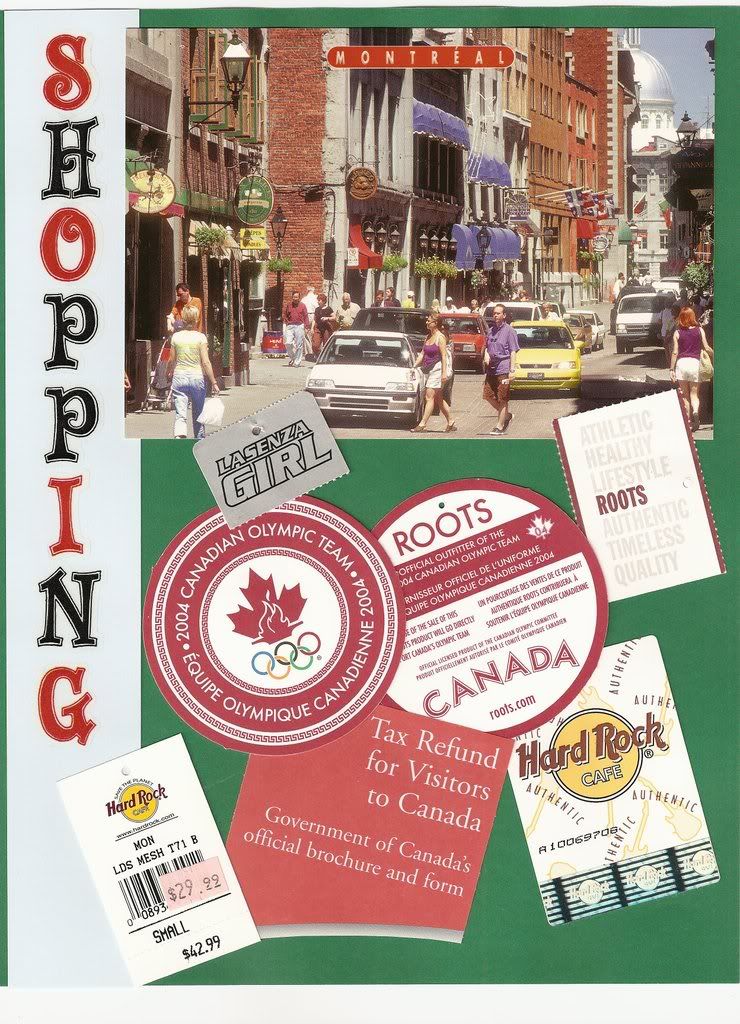
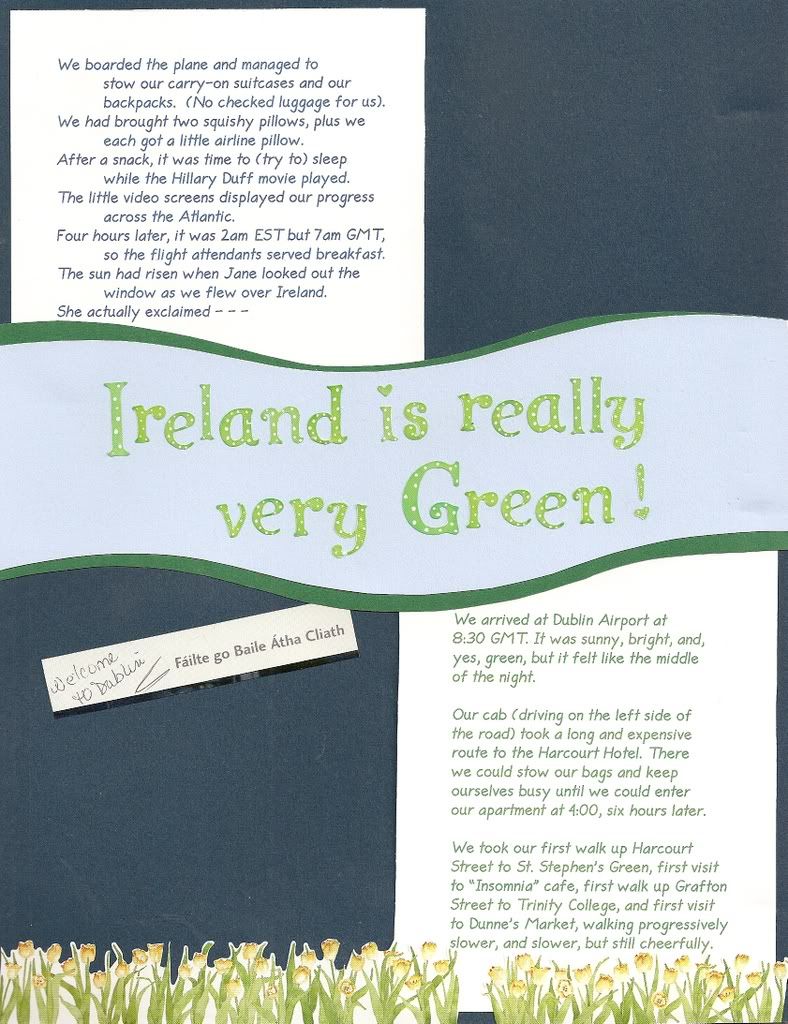
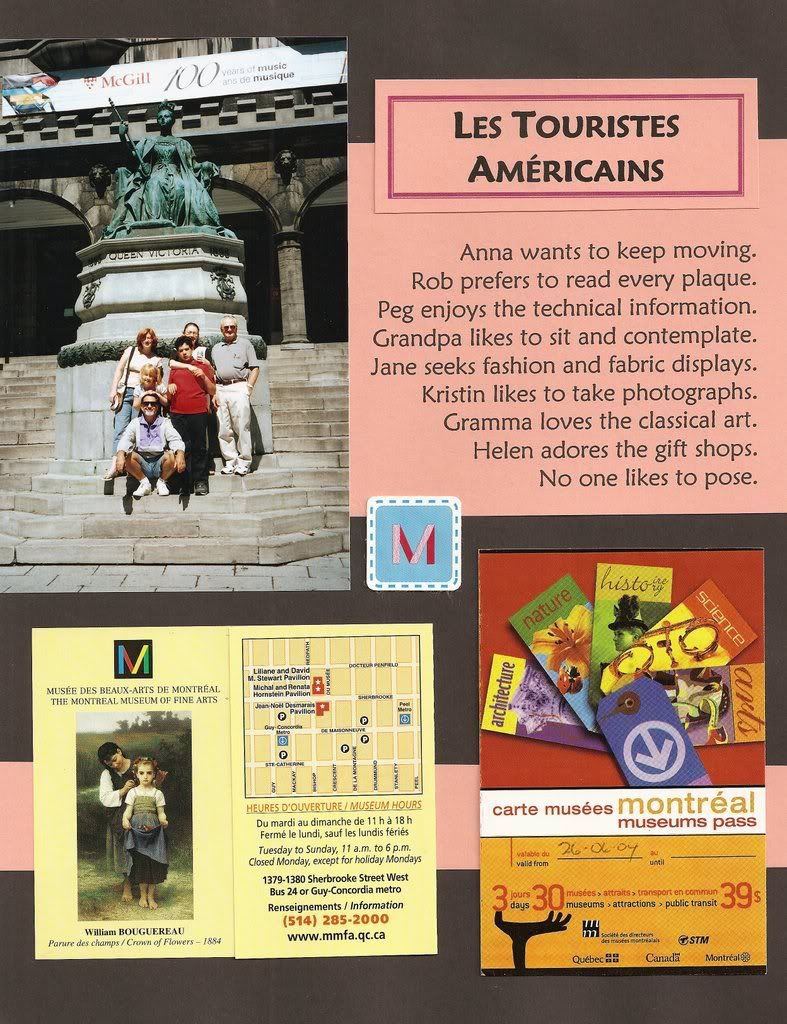
I have one 2 inch binder full of Disney pages and one of Christmas pages, one 1 inch binder for DC trips, one for Canada trips, one for my step-dad's WWII memorabilia, and a 3/4 inch binder for our Ireland trip. Most of my single event scrapbooks are 8x8 albums, but Ireland was a great trip that needed larger pages to tell the story.
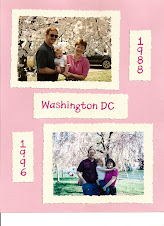
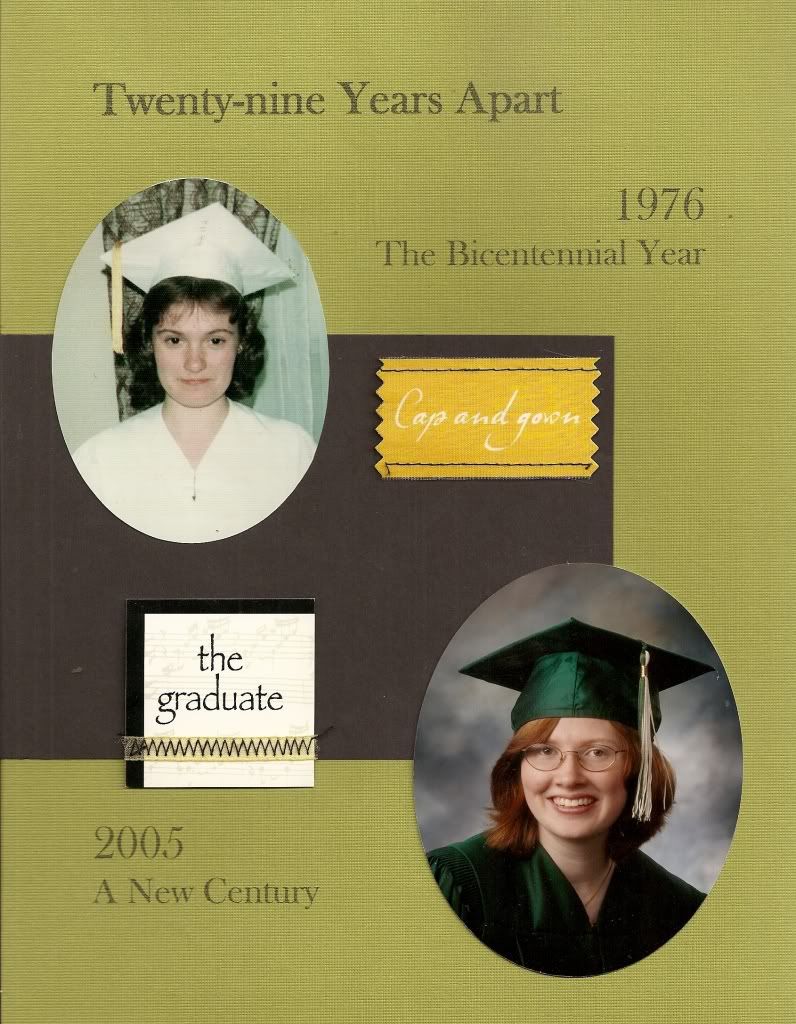
In 3/4 inch binders I just started a scrapbook of my life before daughters and a scrapbook of my college years, sprinkled with pages from whatever college events my daughter let me document. We both attended the same college, so "then and later" comparison pages are irresistible (to me, not my daughter who is very indulgent).
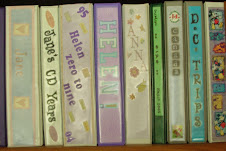
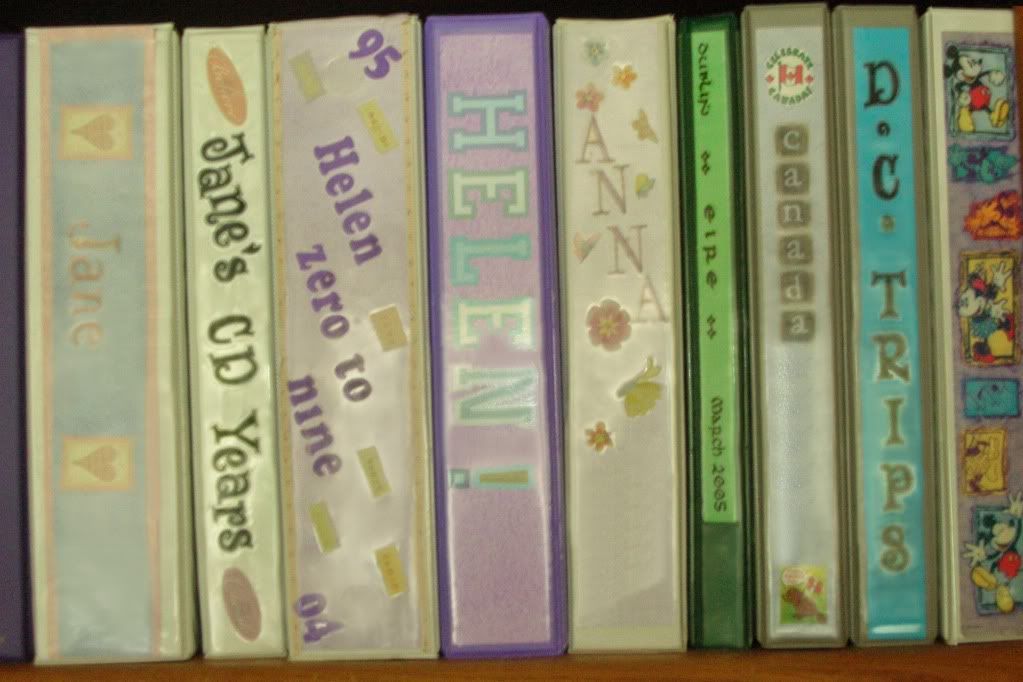
I buy binders with a clear "see through" cover and spine, so I can create a cover scrapbook page and spine design. I use a 12x 12 piece of scrapbook paper that I trim into the two pieces because the cover is about 9 1/2 by 11 1/2. When I "move up" to a wider binder, I can move the cover. Traditional scrapbook albums have solid or pre-printed covers and spines that cannot be personalized as much.
My one scrapbooker daughter crated on 12 x 12 scrapbook album, and I have not made a single one. Larger pages need artistic filling that is not my style.
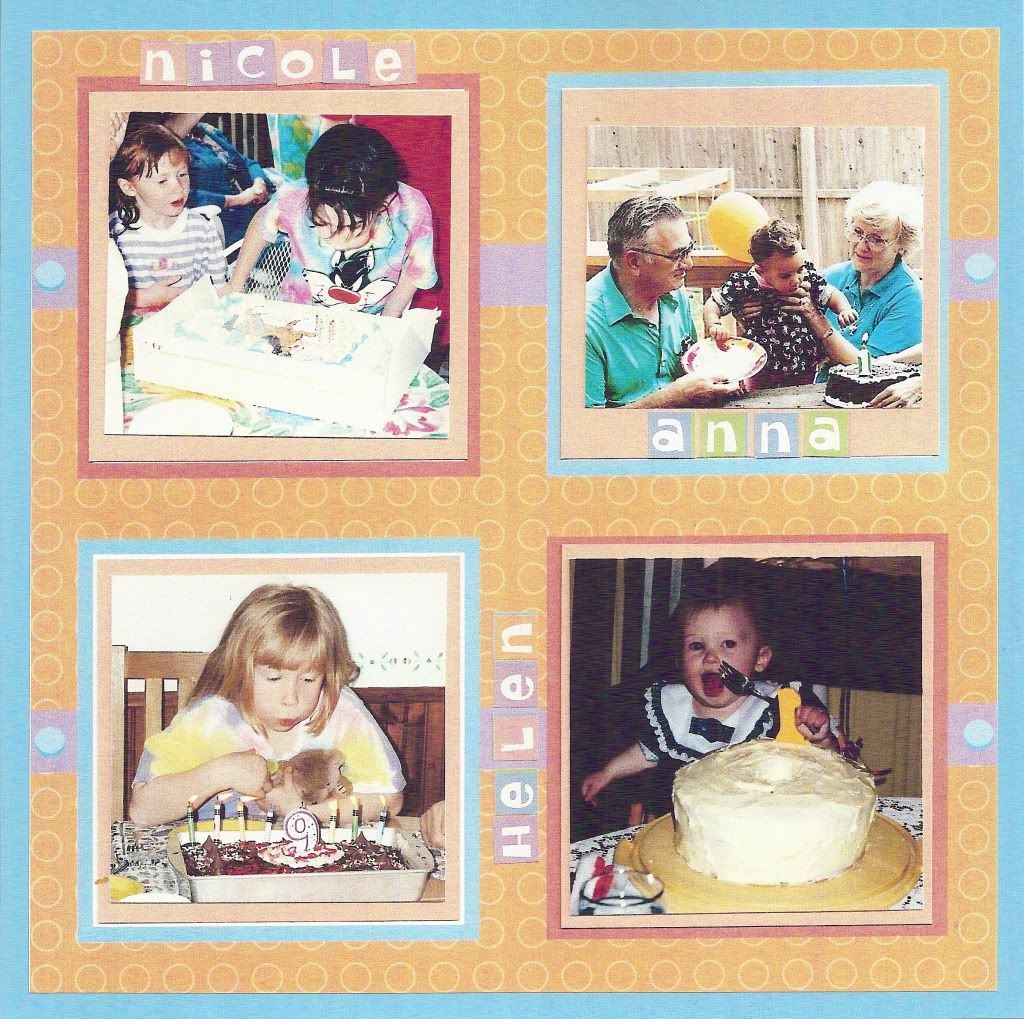
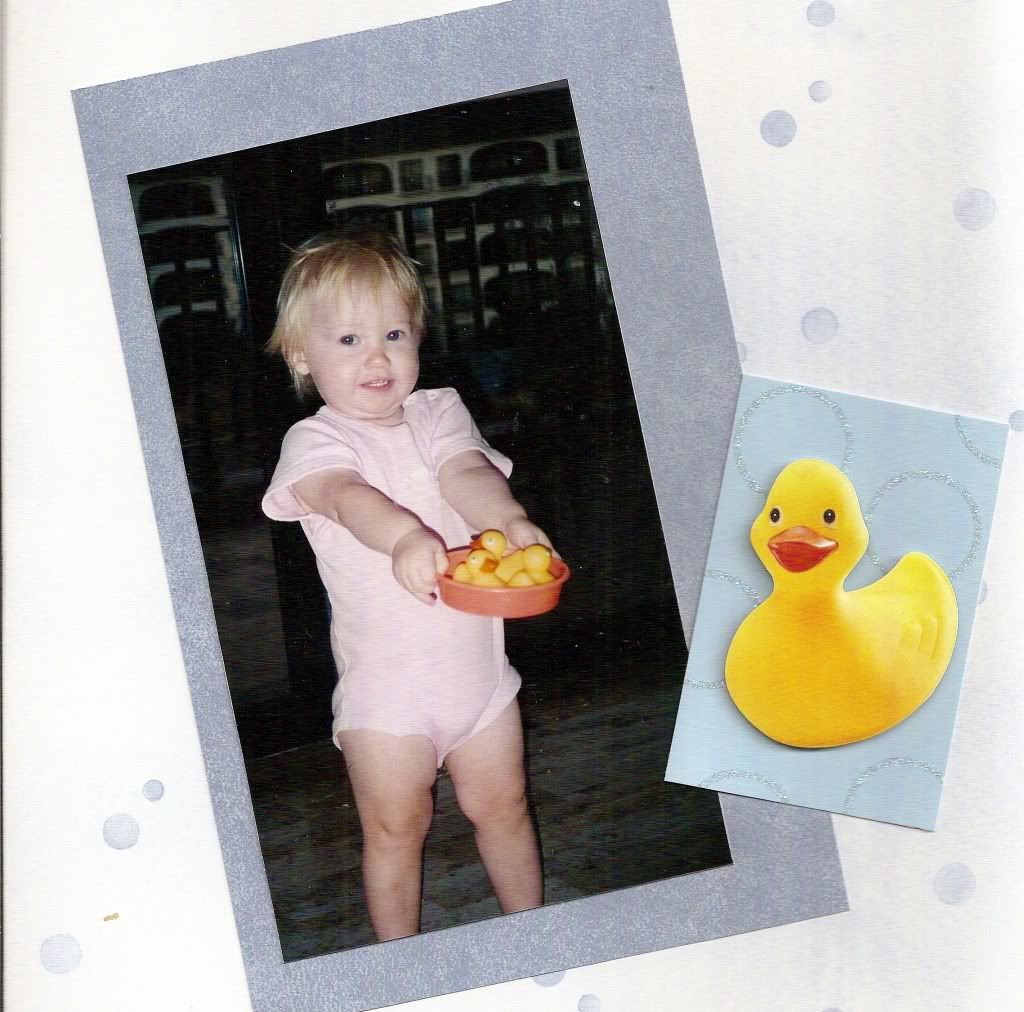
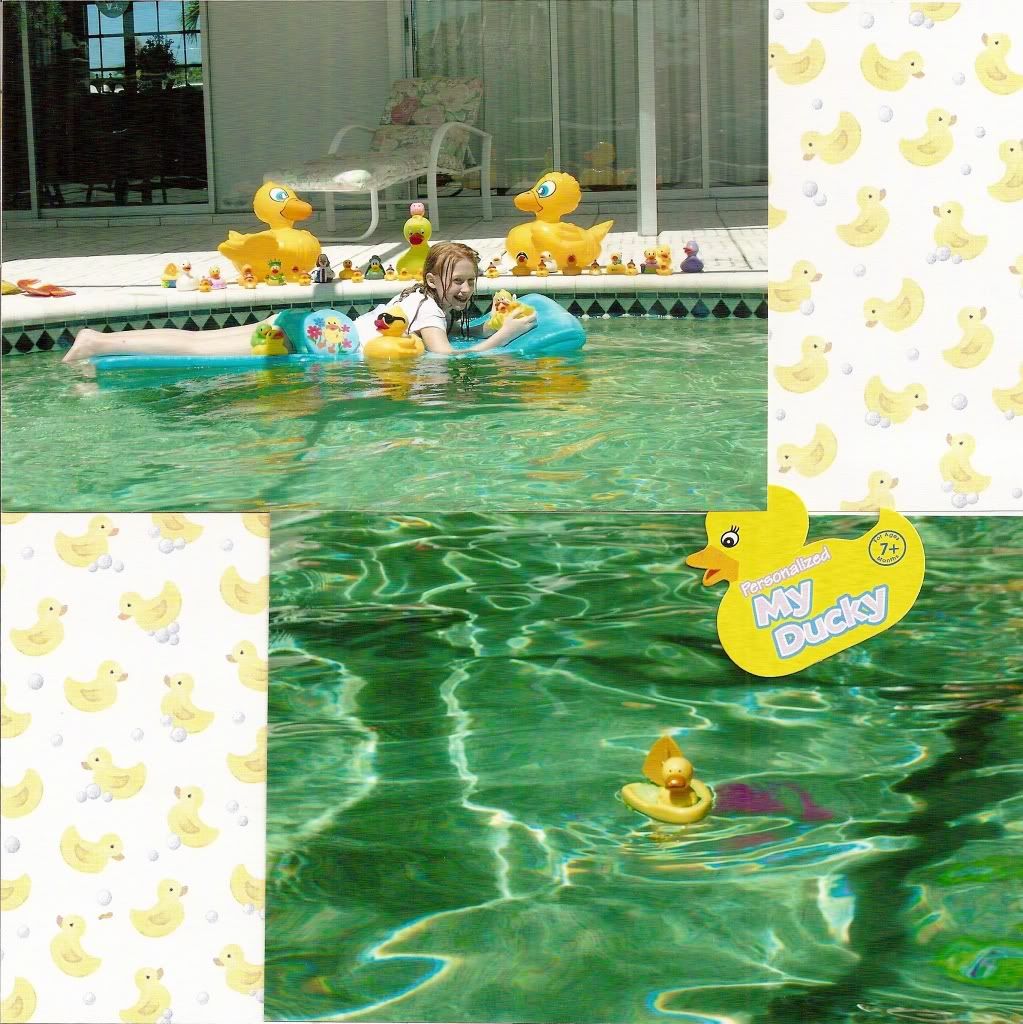
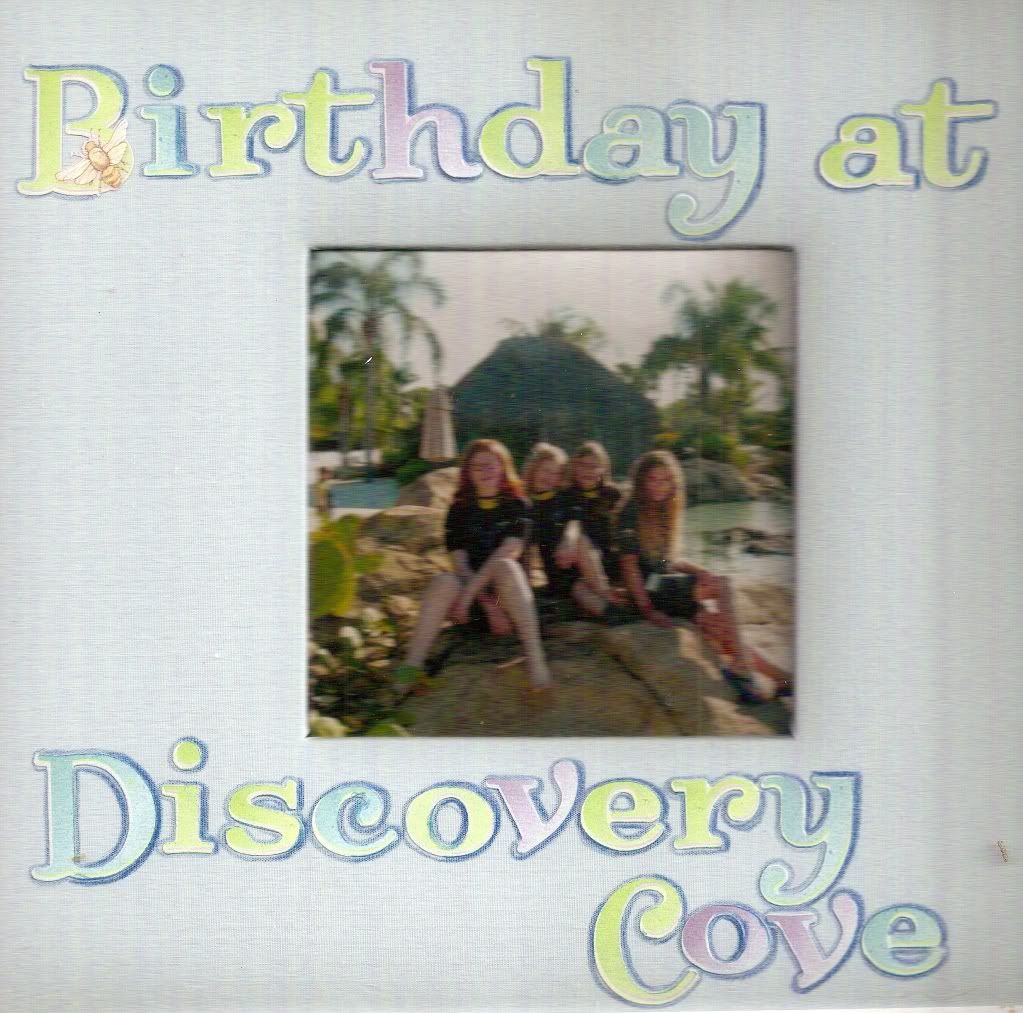
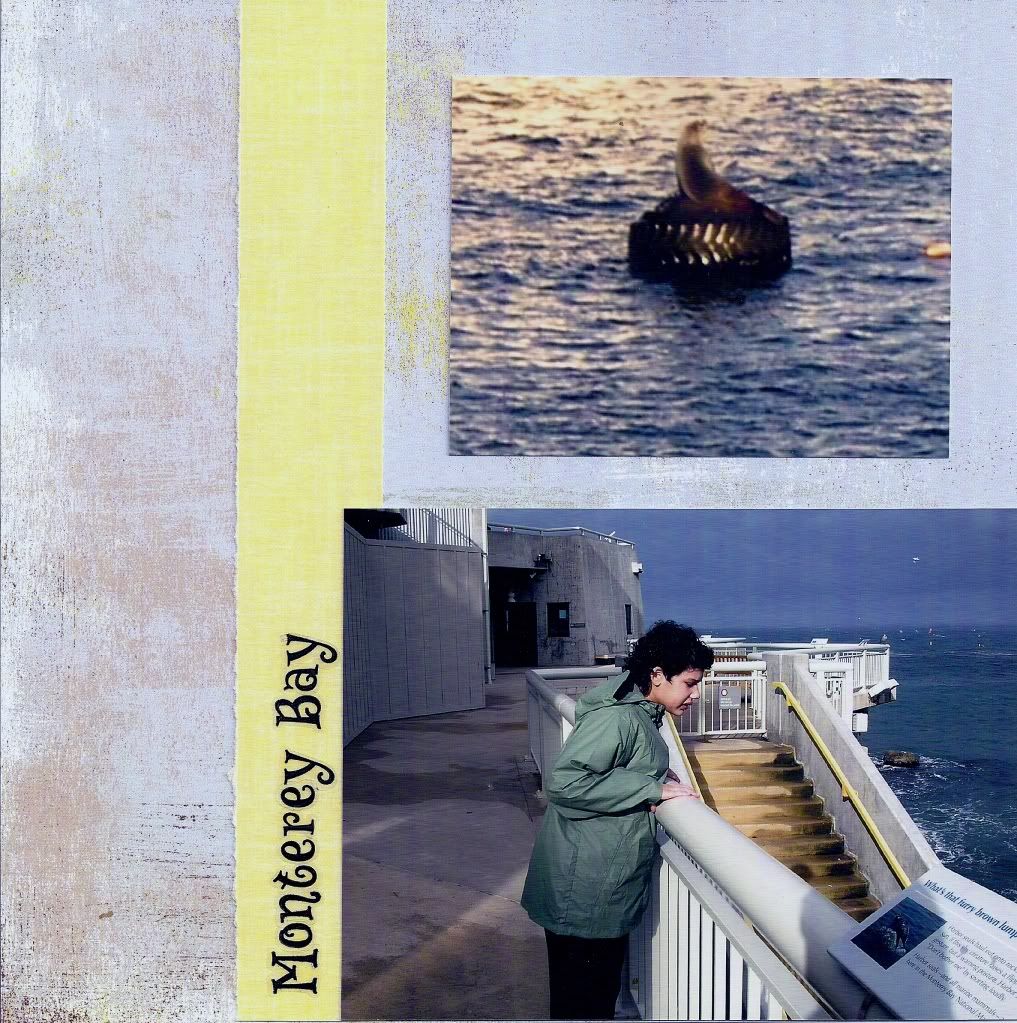
I use 8 x 8 scrapbook albums as glorified photo albums for recent single events and trips with one or two photos per page, not as much cropping or techniques. It is easy to find pre-decorated theme scrapbooks in this size. My 8 x 8 trip scrapbooks are: trips to California, Costa Rica, China, and Discovery Cove. My event scrapbooks are Graduation Party, Fifth Grade projects, my Informal Wedding, and Vow Renewal five years later. I also have one album of "duckie" photos and one album of "cake" photos. More about them later !
Three ring binders open easily. Because I scrapbook based on my current mood and interest, not chronologically, with binders I can add pages in their protectors to the middle, the end. I can rearrange pages easily. Traditional post style albums require a screw driver and almost require an engineering degree to open and add more pages, and they do not open and lay flat like my binders while I rearrange my pages.
I start a scrapbook in a 1 inch or 1 1/2 wide binder, when it's full I move the pages into a 2 inch wide binder, and when it's full, then Volume II starts.
My oldest daughter has a 2 inch binder that includes her "younger" and "older" years and a 1 inch binder for her high school years. My middle daughter has a 2 inch binder. My youngest daughter has two 2 inch binders, and she just started high school and her volume III. I have been scrapbooking almost her whole life, and I have been catching up for her sisters.
I have one 2 inch binder full of Disney pages and one of Christmas pages, one 1 inch binder for DC trips, one for Canada trips, one for my step-dad's WWII memorabilia, and a 3/4 inch binder for our Ireland trip. Most of my single event scrapbooks are 8x8 albums, but Ireland was a great trip that needed larger pages to tell the story.
In 3/4 inch binders I just started a scrapbook of my life before daughters and a scrapbook of my college years, sprinkled with pages from whatever college events my daughter let me document. We both attended the same college, so "then and later" comparison pages are irresistible (to me, not my daughter who is very indulgent).
I buy binders with a clear "see through" cover and spine, so I can create a cover scrapbook page and spine design. I use a 12x 12 piece of scrapbook paper that I trim into the two pieces because the cover is about 9 1/2 by 11 1/2. When I "move up" to a wider binder, I can move the cover. Traditional scrapbook albums have solid or pre-printed covers and spines that cannot be personalized as much.
My one scrapbooker daughter crated on 12 x 12 scrapbook album, and I have not made a single one. Larger pages need artistic filling that is not my style.
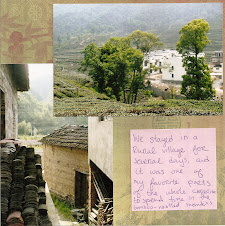
I use 8 x 8 scrapbook albums as glorified photo albums for recent single events and trips with one or two photos per page, not as much cropping or techniques. It is easy to find pre-decorated theme scrapbooks in this size. My 8 x 8 trip scrapbooks are: trips to California, Costa Rica, China, and Discovery Cove. My event scrapbooks are Graduation Party, Fifth Grade projects, my Informal Wedding, and Vow Renewal five years later. I also have one album of "duckie" photos and one album of "cake" photos. More about them later !
8/29/2009
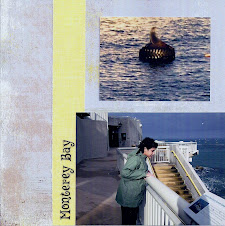
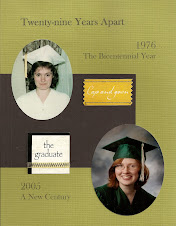
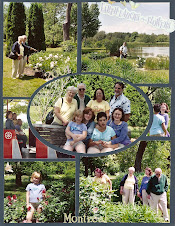
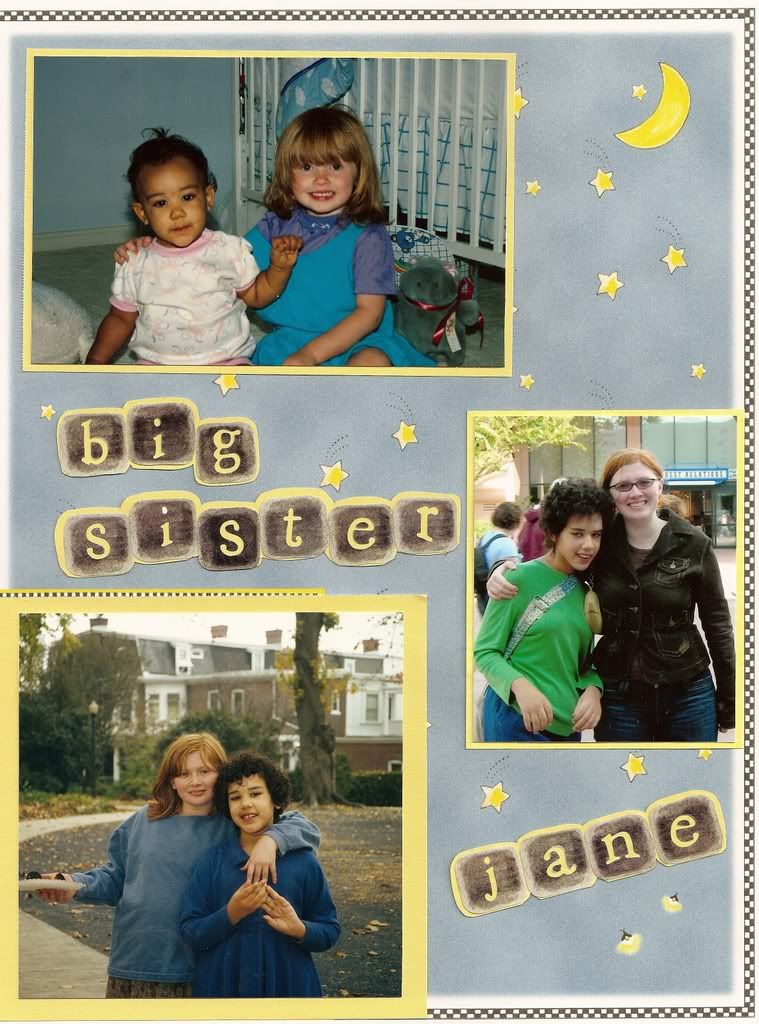
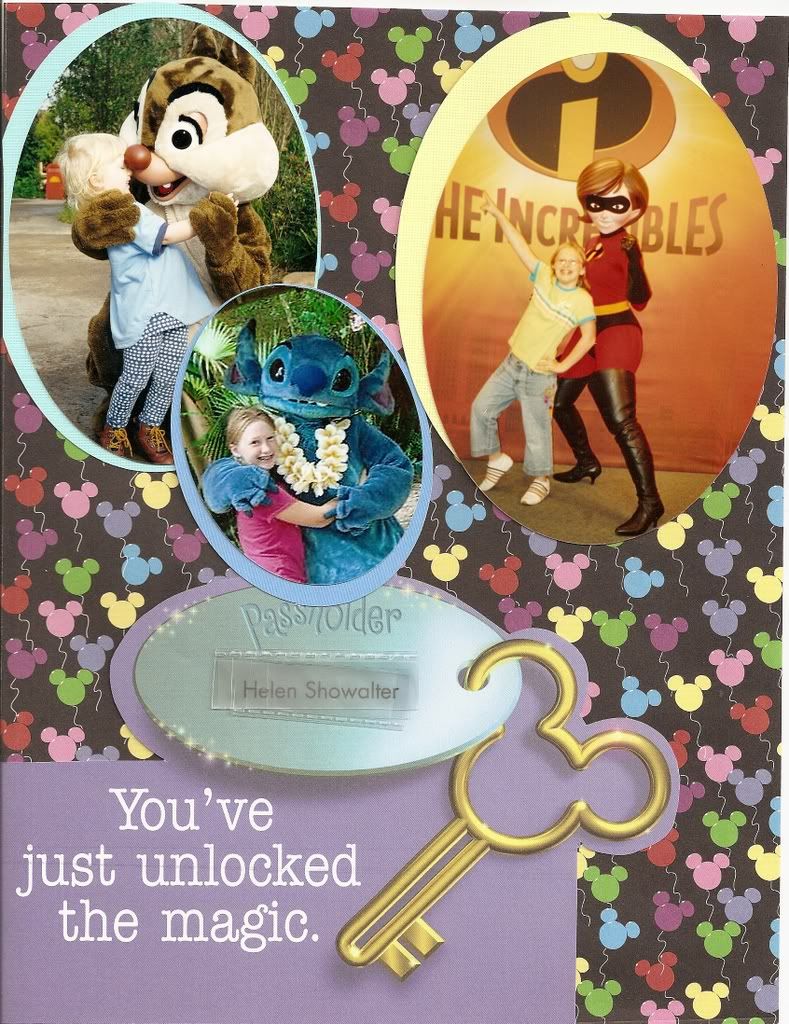
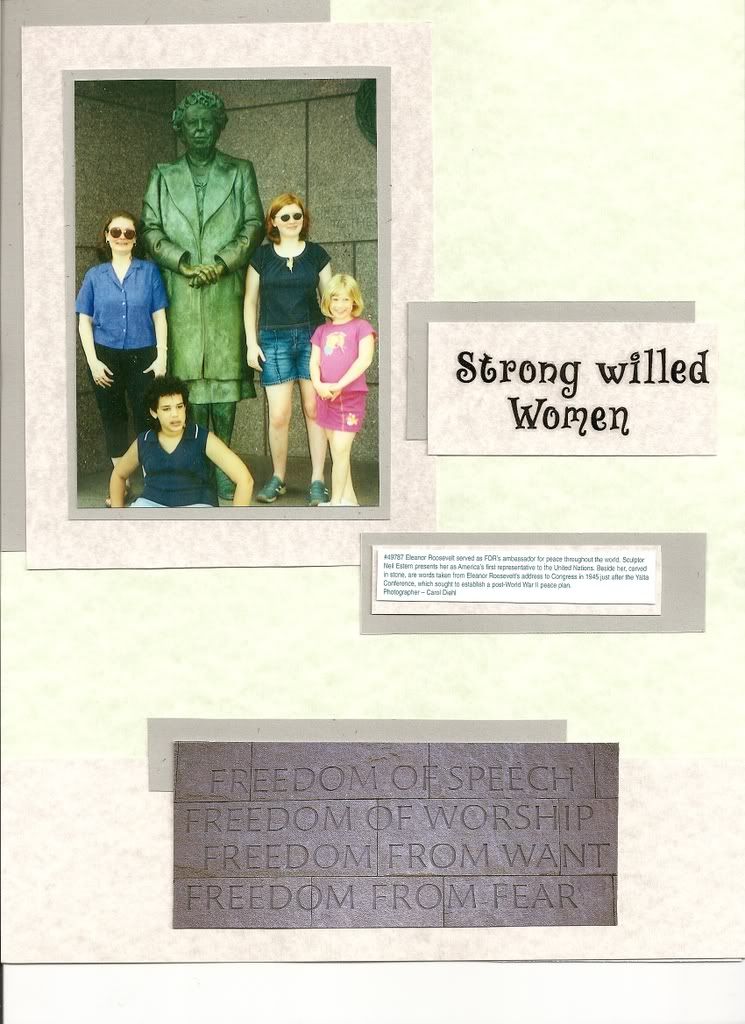
Spotlights should be oval
My final thoughts on ovals: Spotlights land on the stage in an oval shape. An oval shape also spotlights special photos. Those annual school portraits, reunion group photos, wedding photos, anniversary couples portraits, and even photos of kids on Santa's lap all are enhanced by being cropped into ovals. Layouts with one or two ovals seem the most balanced.
8/01/2009
Oval mats and frames
I use mat borders around most photos on recent pages. Cardstock mats are cut larger and placed under photos. Many photos have a thin mat border, others have one or two wider bands. White, black, contrasting colors, or even matching the background color, mats also add dimension and depth. Ovals and rectangles are my most versatile photo and mat shapes. Most of my pages feature people, and I think people fit best in ovals and rectangles. Plus ovals seem more elegant -- think old portraits.
Frames are cardstock ........ frames........placed over photos to make them look........framed. Easy concept, difficult technique. I like frames, but that are not worth the effort unless I want to photos to specially look framed. Why not buy a package of cardstock frames at the scrapbook store ? I have bought a few packages, and the color, or size, or width, or number of duplicates never has fit my page. Never, ever.
Cutting mats and frames myself has been the only solution to fitting to my photos and my imagination. Rectangle mats are easy to make with my paper cutter, but rectangle frames require a separate system I would not use enough to buy. Another reason to love ovals is that my one cutting system cuts oval mats (one cut) and frames (two concentric cuts -- cut the outer edge to make an oval, then cut the inner edge that makes the frame and an inner smaller oval to use elsewhere). My Creative Memories Oval Shape Cutter has four plastic oval templates and three cutting knives that can make 24 different size ovals. I always have the right size oval.
I love Creative Memories tools. They used to be sold at parties, but now they have a website and representatives. A little like Avon.
7/11/2009
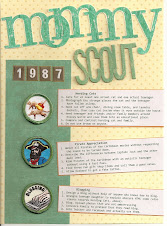
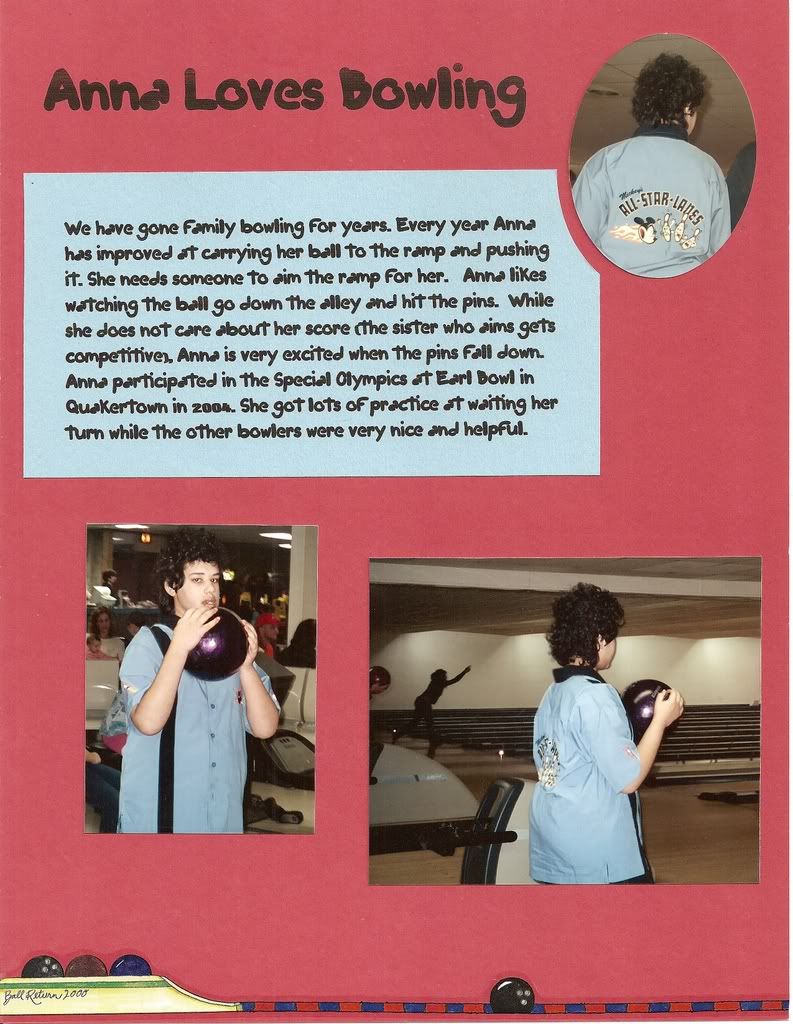
Memories WITHOUT photos
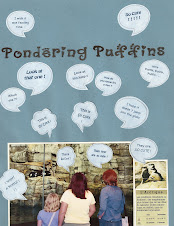
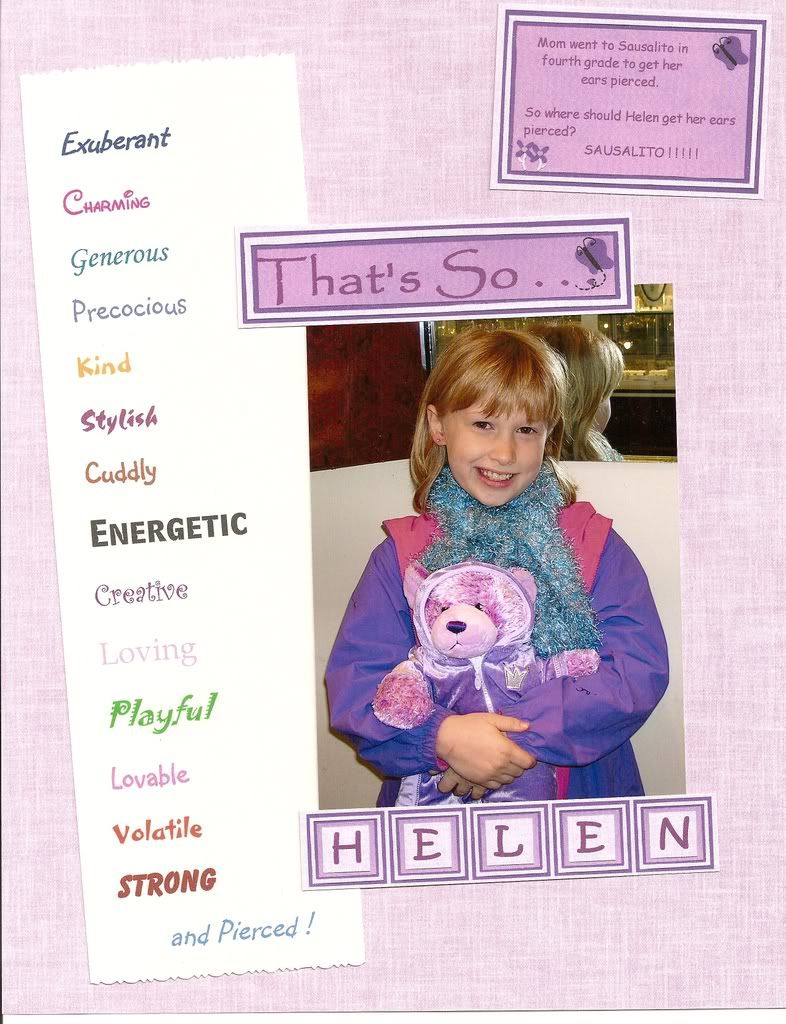
It seems hard to believe, especially since the dawn of digital cameras, but there are actually events that have not been documented in multiple photographic views. Memories of these events can be strong, funny, important, and ..........undocumented ? How can these memories be translated into a visual story ?
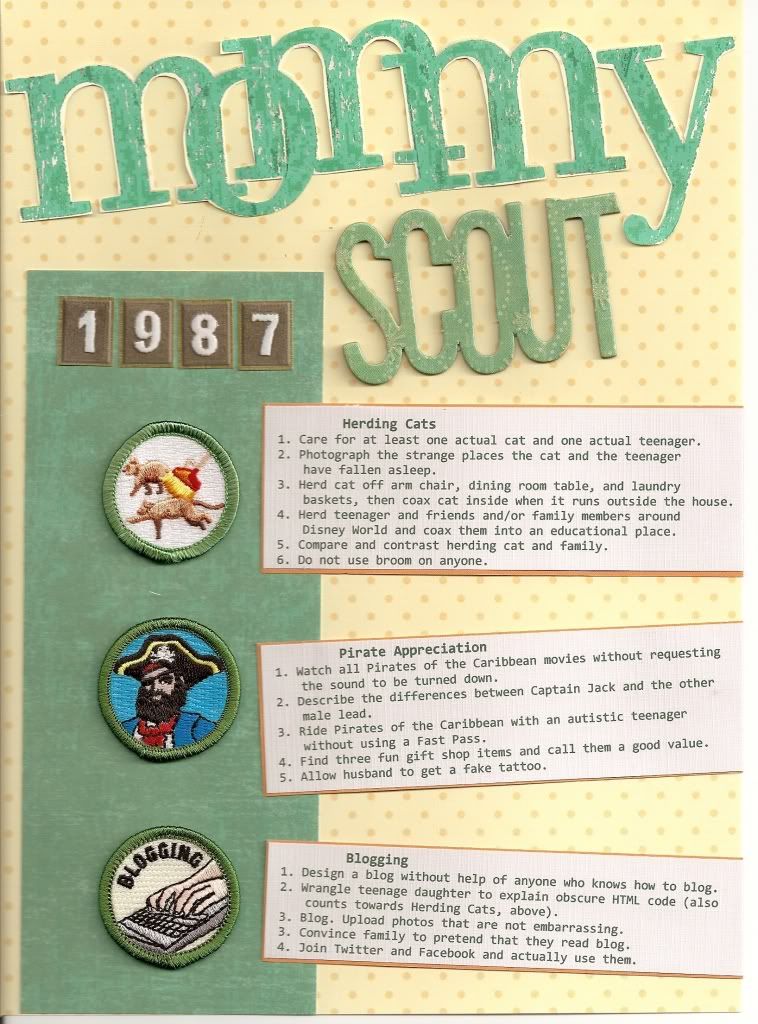
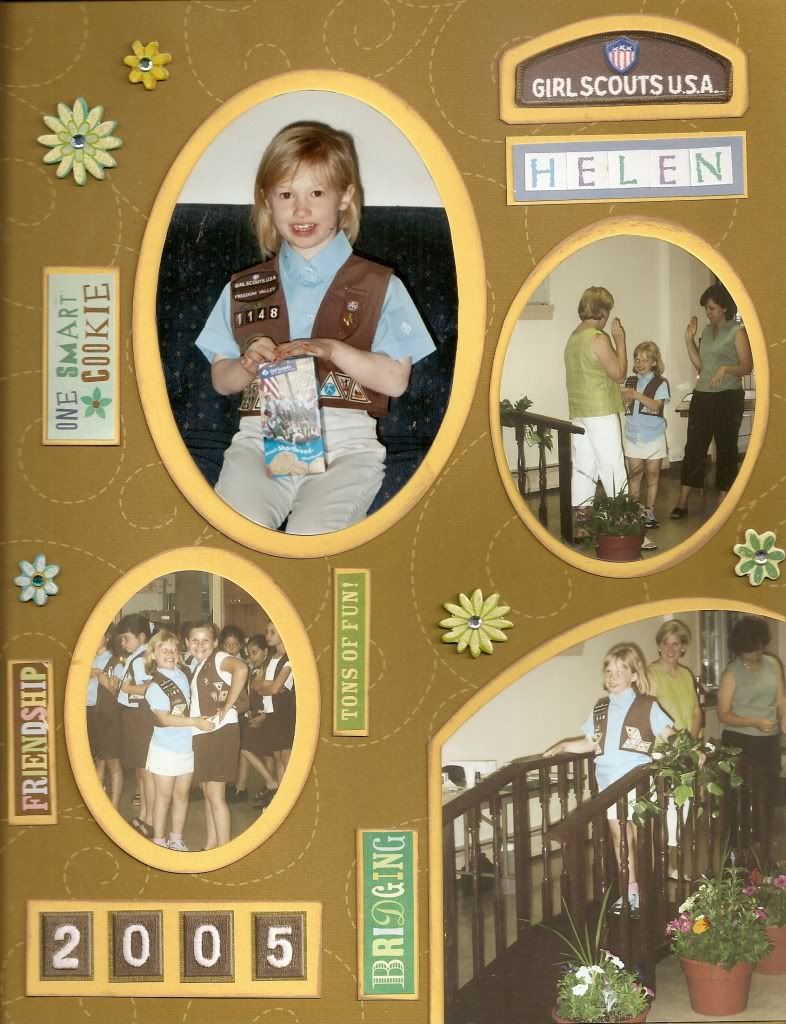
My daughter recently gave me three humorous "badges" for "Herding cats," "Pirate Appreciation," and "Blogging." She actually thought of me and my (quirky) impact on her life ! And she actually remembered to give them to me (eventually). So what to do ? Sew them on my jacket ? Stick them on my bedroom mirror ? Of course not.......scrapbook them ! She agreed to list some of the "requirements" that I can accomplished, and a page was born. We had done Girl Scouts in the past, so the page evoked a sash.
I am delighted with the result of spending a lot of time creating my favorite "Mommy Scout" title. I could not find a digital font, stickers, or die cut that I liked, so in the end I bought chipboard letters that were the "right" font but the "wrong" color and size, so I arranged, scanned, photoshopped, and adjusted. Not all that practical, but sometimes motherhood isn't. (If you have heard about the Cricket, yes, that would have been easier, but I am NOT going there).
7/04/2009
New pages with old photos
I always have more fun scrapbooking old photos of happy memories rather than immediately scrapbooking a recent event. I keep my photos in chronological order, and randomly flip through the files, and sometimes an event "strikes" me. I also have a file of "photos I want to do something with when I get inspiration."
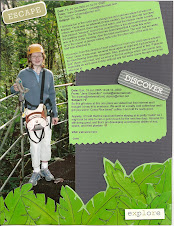
Recently my daughter and I escaped the heat by browsing the aisles in Joanns, a dangerous pursuit (but less risky than heatstroke or sunburn). Nothing fit my rule of only buying what I can use RIGHT NOW when I saw some Girl Scout stickers and embellishments. I immediately recalled unused Daisy and Brownie Photos and a few Girl Scout pages, so I could USE them and they were ON SALE. It took a little time to locate the photos, but less than an evening to put the page together. Eureka ! Practical scrapbooking at its best !
Recently my daughter and I escaped the heat by browsing the aisles in Joanns, a dangerous pursuit (but less risky than heatstroke or sunburn). Nothing fit my rule of only buying what I can use RIGHT NOW when I saw some Girl Scout stickers and embellishments. I immediately recalled unused Daisy and Brownie Photos and a few Girl Scout pages, so I could USE them and they were ON SALE. It took a little time to locate the photos, but less than an evening to put the page together. Eureka ! Practical scrapbooking at its best !
6/11/2009
The Best Embellishment to Buy
The best embellishment to buy is always the one that I know exactly how to use with the photos that need this very embellishment to make a perfect page.
I have warned about buying cute embellishments for the future. I bought my my oldest sticker set during a California trip in 2002. I still think they are adorable, and have yet to figure out how to use them.
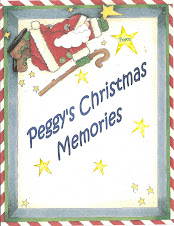
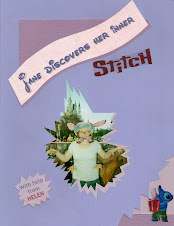
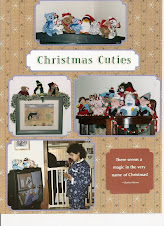
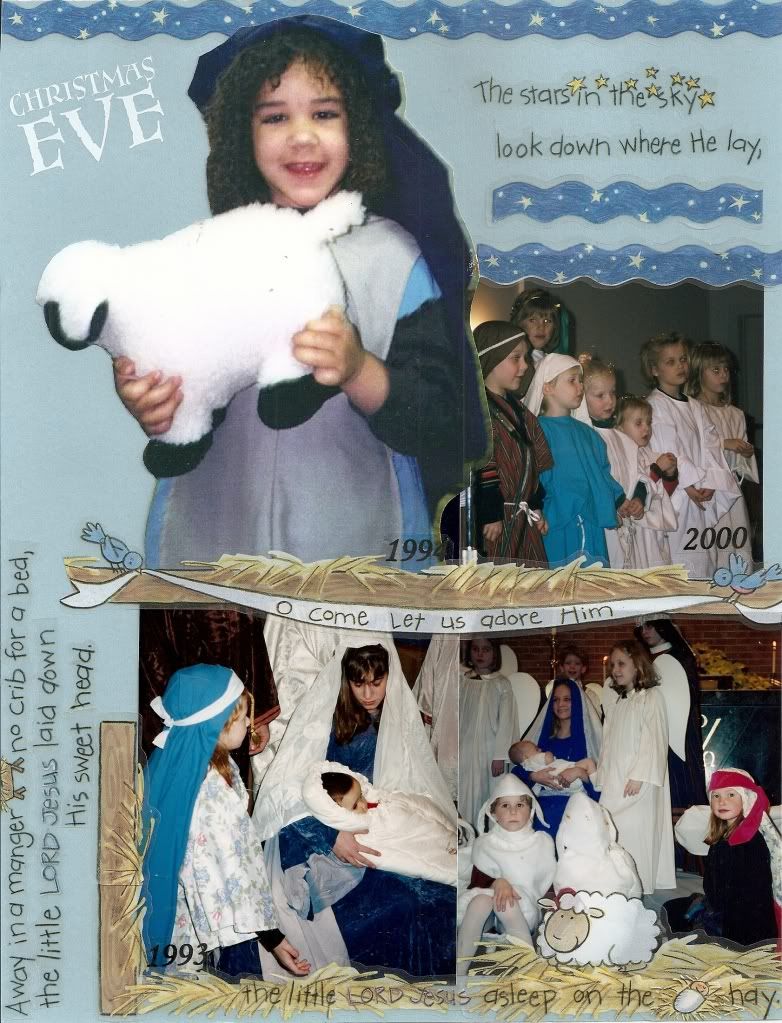
The eureka moment occurs when I see a set that solves a problem by providing the perfect caption, title, and decoration for photos that have been waiting for inspiration. My children's Christmas pageants were a challenge. I only had one or two per year, and the photos were not great. As soon as I saw an "Away in a Manager" sticker set, I could make the page. I enlarged one little shepherd, cut out her cluttered background, stacked the other three photos, and used the stickers to tie them together. The best sticker set ever !
I have warned about buying cute embellishments for the future. I bought my my oldest sticker set during a California trip in 2002. I still think they are adorable, and have yet to figure out how to use them.
The eureka moment occurs when I see a set that solves a problem by providing the perfect caption, title, and decoration for photos that have been waiting for inspiration. My children's Christmas pageants were a challenge. I only had one or two per year, and the photos were not great. As soon as I saw an "Away in a Manager" sticker set, I could make the page. I enlarged one little shepherd, cut out her cluttered background, stacked the other three photos, and used the stickers to tie them together. The best sticker set ever !
6/08/2009
Photobucket and Shutterfly and Flickr and Picassa Oh My !
"Of course" everyone remembers to backup their digital photos to an external device in case of a hideous PC crash. But what if the house burns down ?? Will the external device melt too ?? And all the paper scrapbooks will turn to ash...... A traditional paper and photo scrapbooker can find relief from these pessimistic worries in the internet.
I scan (not enough) of my favorite scans into my free http://photobucket.com/ account. It can also be used to share with others, but I use my blog for sharing...........My daughters tell me that photobucket is no longer "cool," but I understand the uploading and organizing steps, so I stick with it rather than switching to the "cool" and artistic http://www.flicker.com.
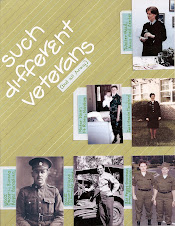
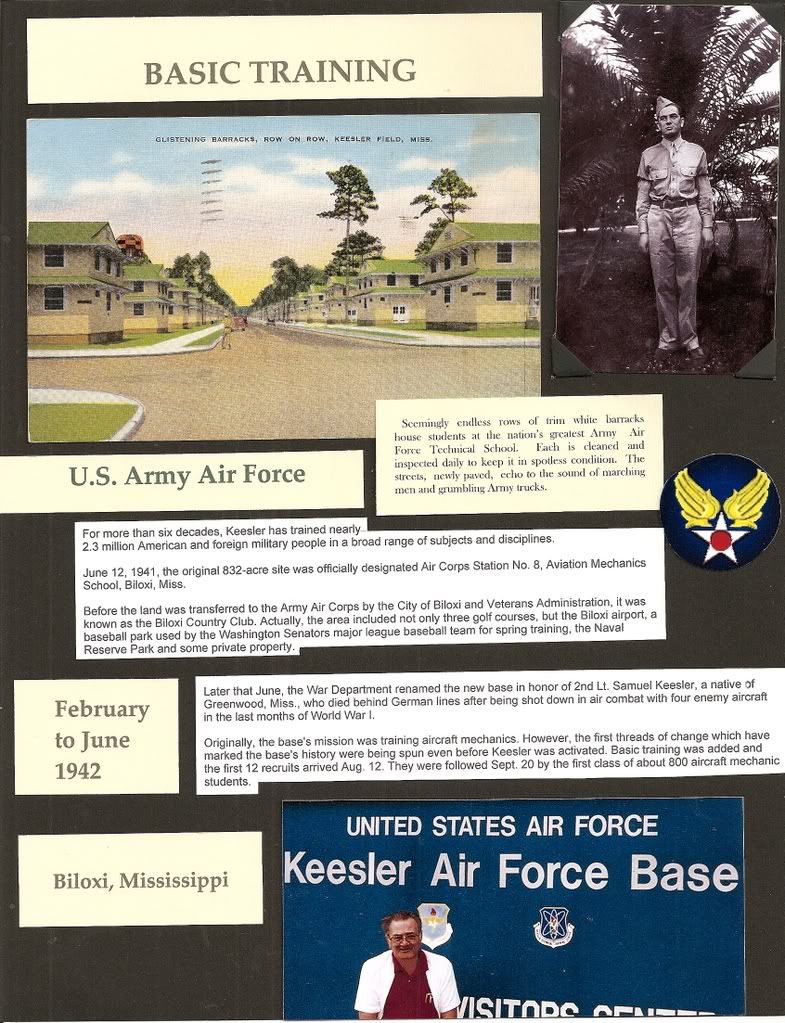
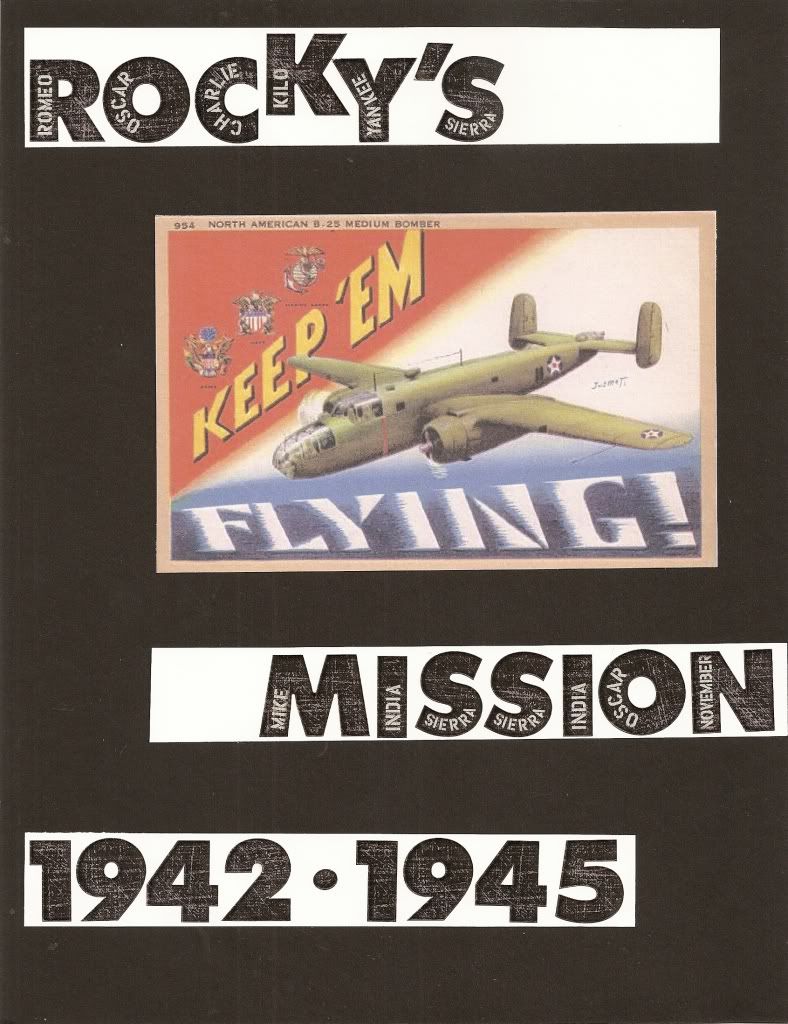
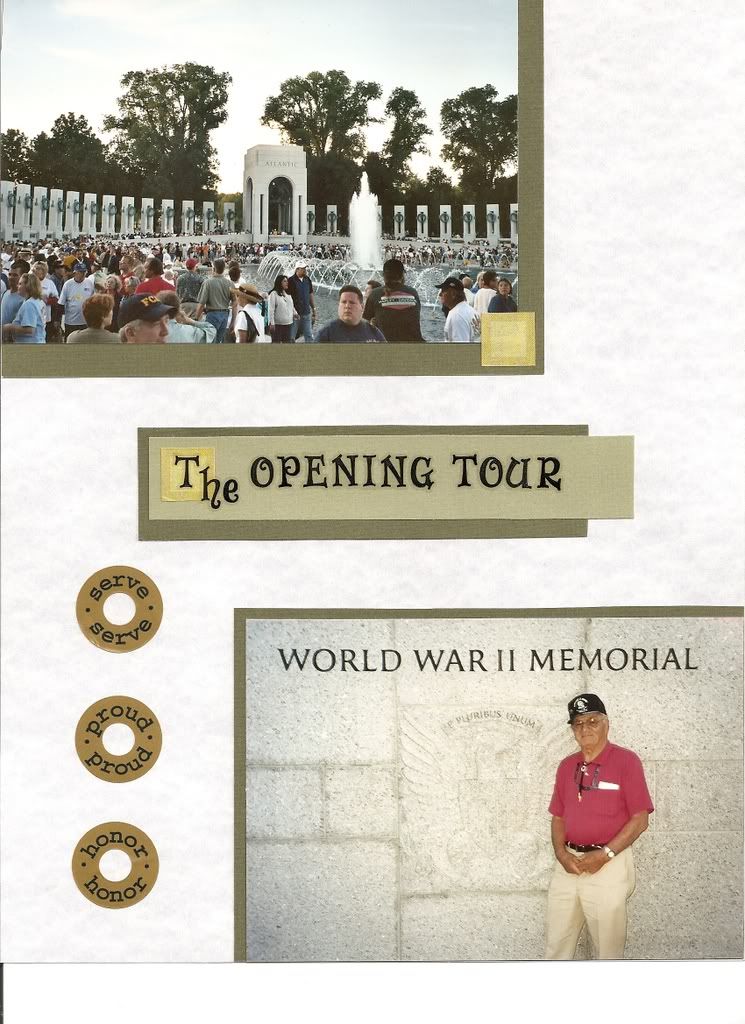
Many sites have photo products, but I love Shutterfly's. So far I have made calendars, photo announcements, photocards, and one photobook (yes, rather than a scrapbook) of my step-dad's WW2 B25 Mitchell bomber photos. My product purchases (great presents) can earn free photos by mail. I have two "share" sites. My http://vintageb25.shutterfly.com/ features all my WW2 restored photo work and my "Beloved B25 Bombers" photobook. My http://prettypicturespeggy.shutterfly.com/ features my family event photos. Of course Shutterfly is more than happy to sell my photo creations to visitors: profit for them and convenience for me.
I use Picassa to organize my photos on my PC. Picassa has a web album feature that I don't use. I do use Picassa to format sets of photos to send to http://www.walgreens.com/ for one hour printing. I like Walgreen's quality, and there's one down the road. Plus I can send photos to my mom's nearby Walgreens.
I use a "Click Free" Back-up system for my photos in case of another crash.
I try an alternate internet and real paper projects.
I scan (not enough) of my favorite scans into my free http://photobucket.com/ account. It can also be used to share with others, but I use my blog for sharing...........My daughters tell me that photobucket is no longer "cool," but I understand the uploading and organizing steps, so I stick with it rather than switching to the "cool" and artistic http://www.flicker.com.
Many sites have photo products, but I love Shutterfly's. So far I have made calendars, photo announcements, photocards, and one photobook (yes, rather than a scrapbook) of my step-dad's WW2 B25 Mitchell bomber photos. My product purchases (great presents) can earn free photos by mail. I have two "share" sites. My http://vintageb25.shutterfly.com/ features all my WW2 restored photo work and my "Beloved B25 Bombers" photobook. My http://prettypicturespeggy.shutterfly.com/ features my family event photos. Of course Shutterfly is more than happy to sell my photo creations to visitors: profit for them and convenience for me.
I use Picassa to organize my photos on my PC. Picassa has a web album feature that I don't use. I do use Picassa to format sets of photos to send to http://www.walgreens.com/ for one hour printing. I like Walgreen's quality, and there's one down the road. Plus I can send photos to my mom's nearby Walgreens.
I use a "Click Free" Back-up system for my photos in case of another crash.
I try an alternate internet and real paper projects.
5/11/2009
Simple page, simple problems; Complicated page, complicated problems
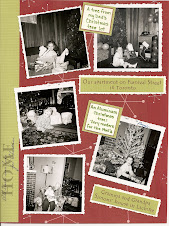
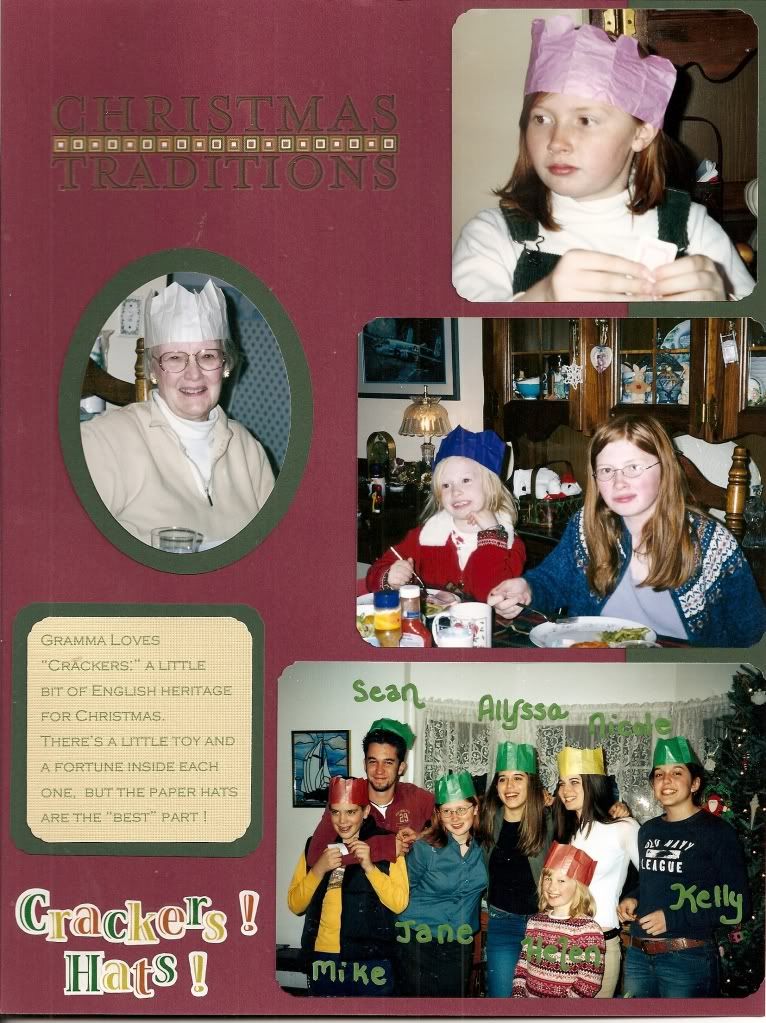
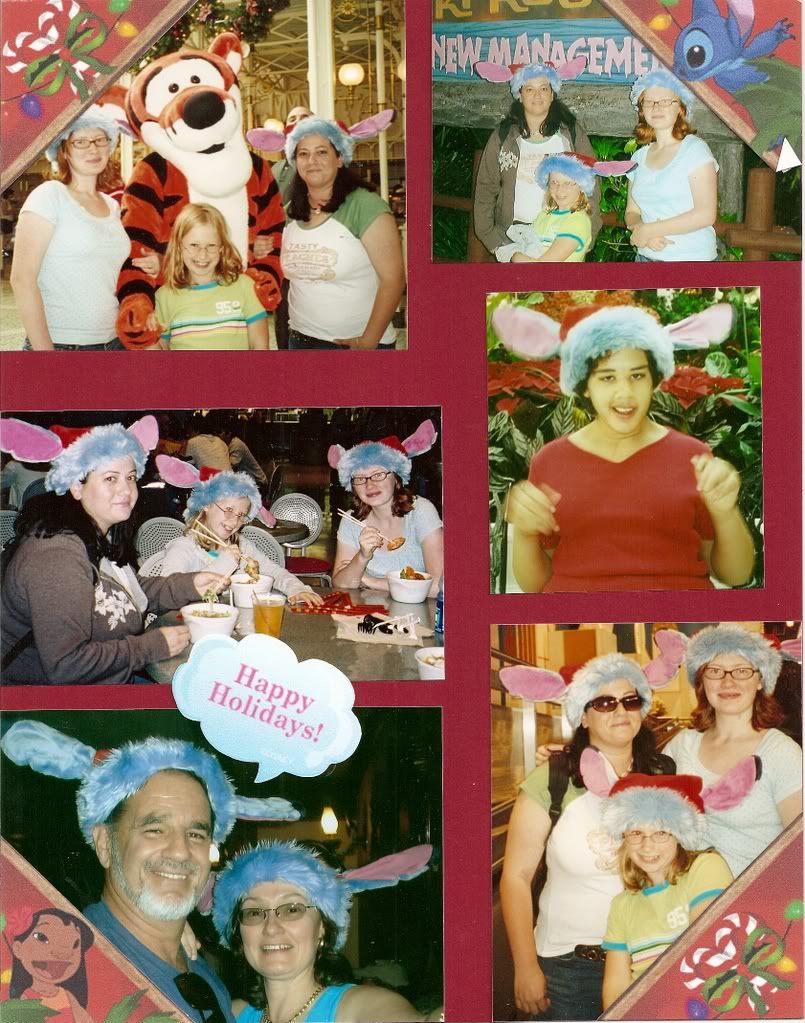
The festivity of Christmas makes me want to decorate my pages more, much more, than usual. I own more adorable and elegant embellishments than I could ever use. My usual practical style of producing pages can get bogged down trying to make festive pages. This month I obsessed and finished two festive Christmas pages that I almost like.
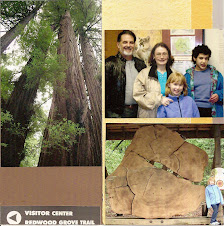
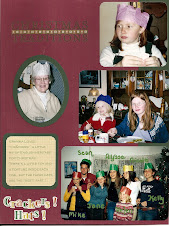
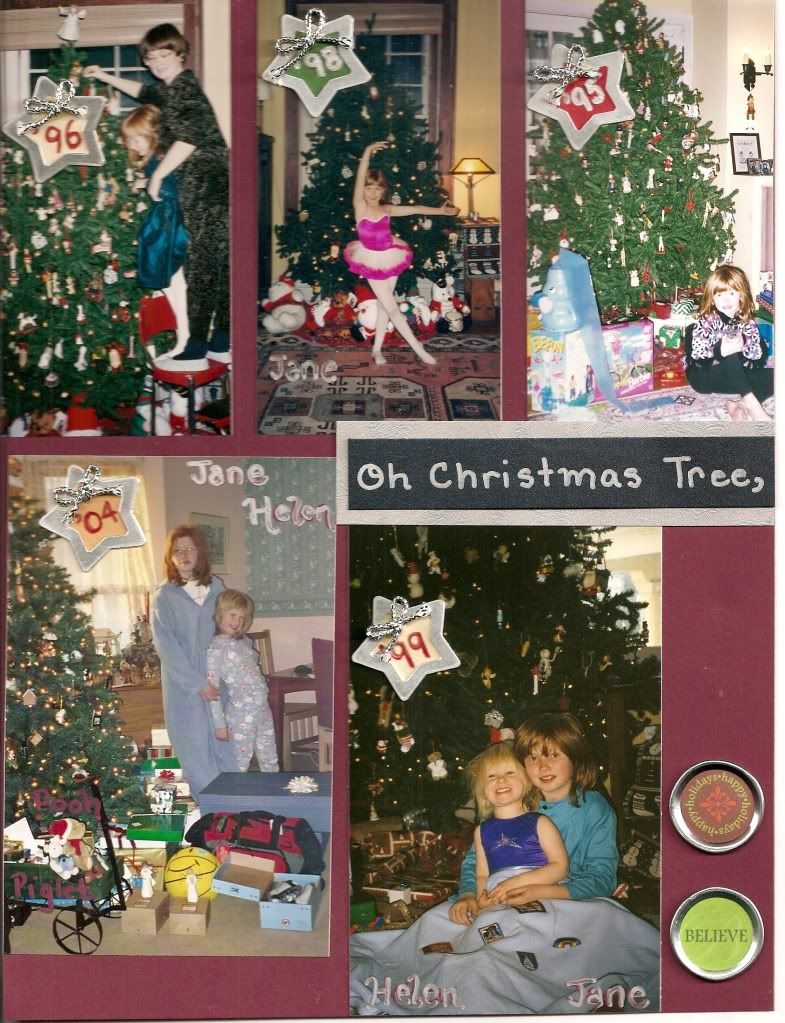
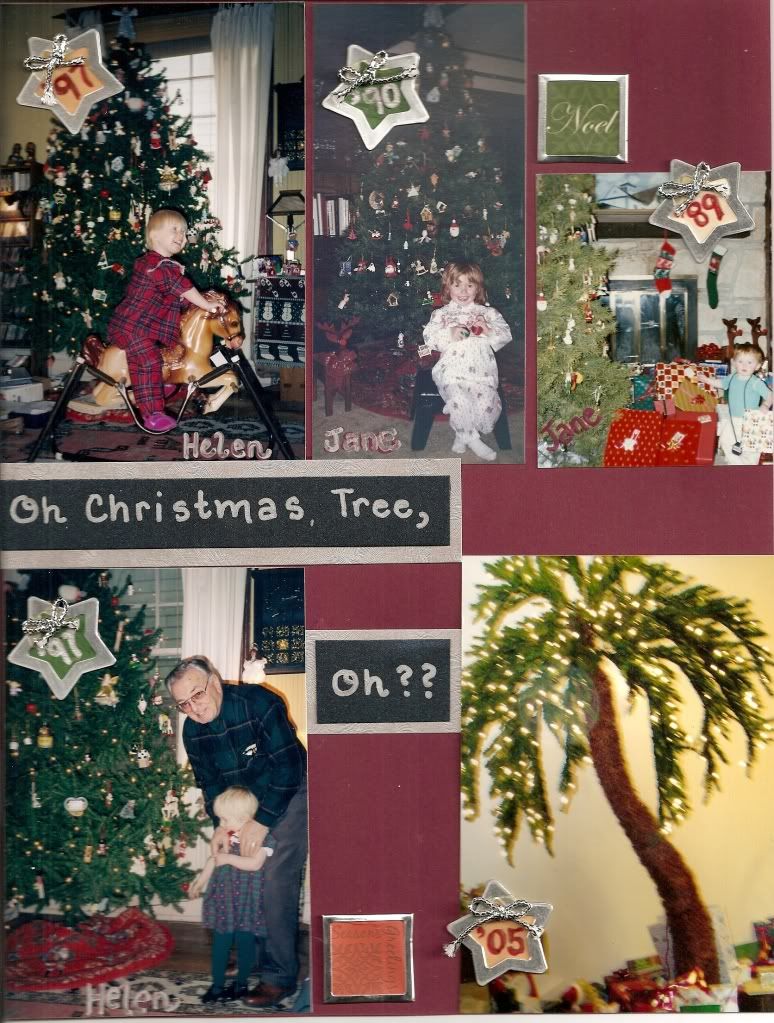
I planned a two page layout of our Christmas trees that I wanted to be festive (as if the Christmas trees would not convey the holiday). I fussed over cropping and arranging the photos into a nice collage that could be finished up quickly, but .........
Little paper labels would not be festive to put the year by each tree and label the small children, so...........
I bought some colored star tags with metal edges, but the strings were, well, stringy, so I searched for metallic string that would fit through the little tag hole. Alas, actually putting the string through the hole made the tag too lumpy and did not help with attachment. The tags alone had the disturbing little hole, so I tied little bows with the metallic string that I glued over the hole. So far, so good. Then I wrote the dates on the tags, making some errors and disliking (intensely) the shape of some of my numbers. NOTE FOR FUTURE: hand write first, and attach tiny hand tied bows second.
I bought red and green metallic photo pens to write names on the photos (strongly adhered to my maroon background), and I was unhappy the resulting pink and lime result. NOTE FOR FUTURE: Test first ! I actually used a silver Sharpie to write over the pink ink.
I printed my festive titles on clear adhesive sheets, trimmed them, adhered them to the maroon paper, and disliked them. They are unremoveable, so I needed to put my titles on paper to cover them up, not just paper but metallic festive paper, so I bought some nice green metallic paper that was actually turquoise when I got home. I like non-traditional Christmas colors, but not maroon and turquoise, so...........
After an unsuccessful search for metallic green paper, I bought some metallic navy paper on which to write my titles with the silver Sharpie that was of course now missing. So I bought another silver Sharpie.
I finished my pages. Thank goodness I was working on both at the same time. But then I noticed that empty spaces of maroon were more visually prominent. Those spaces need embellishment...................
Luckily in my cache of embellishment I found silver rimmed holiday sayings that I could fit into those maroon spaces.
Holidays can be overwrought, and so can holiday pages.
4/03/2009
Spring is my perfect time to work on Christmas
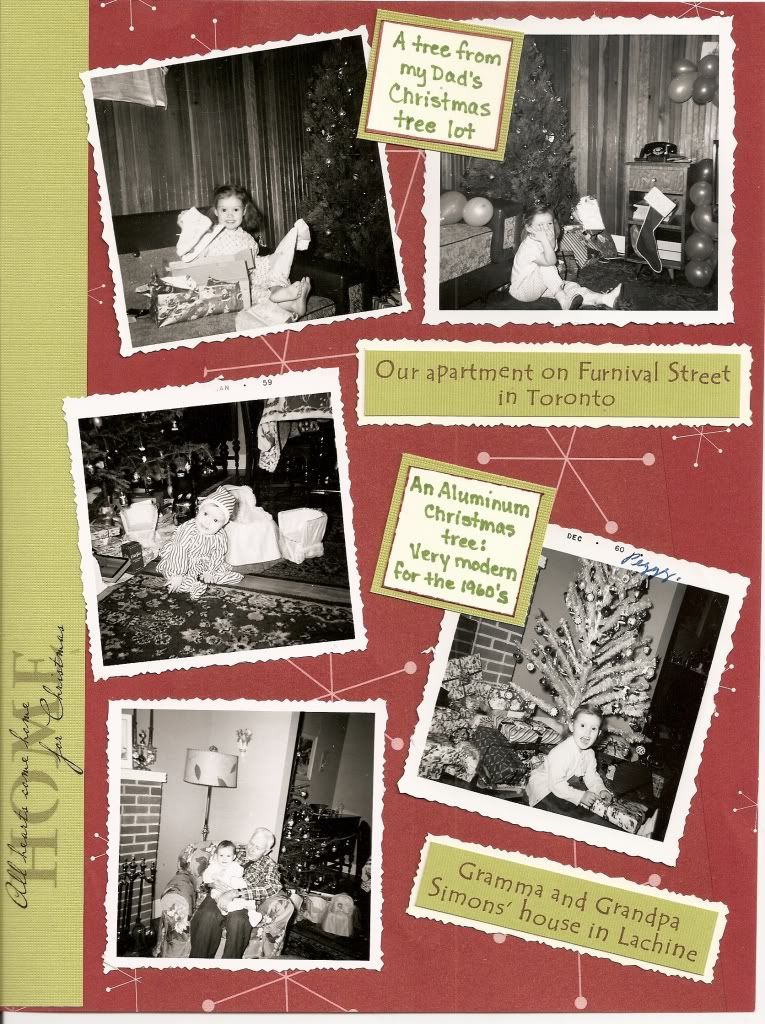
I have taken a break from restoring WWII photos to turn to my favorite Spring topic -- Christmas ! By Spring I am ready to upload my holiday photos from my camera into my computer, I think my Christmas paper and embellishments look new and festive, I enjoy looking at photos of Christmas past, and I'm ready to work on some pages. I just cannot do Christmas in January.
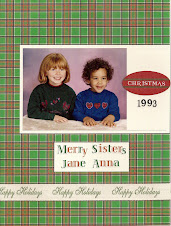
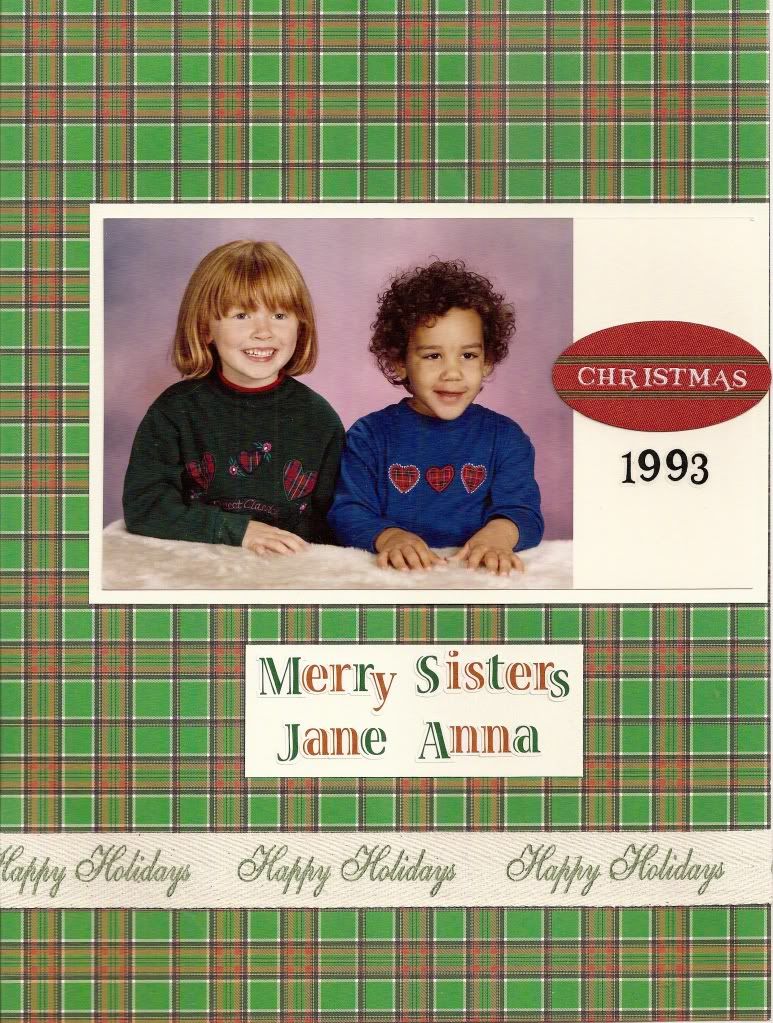
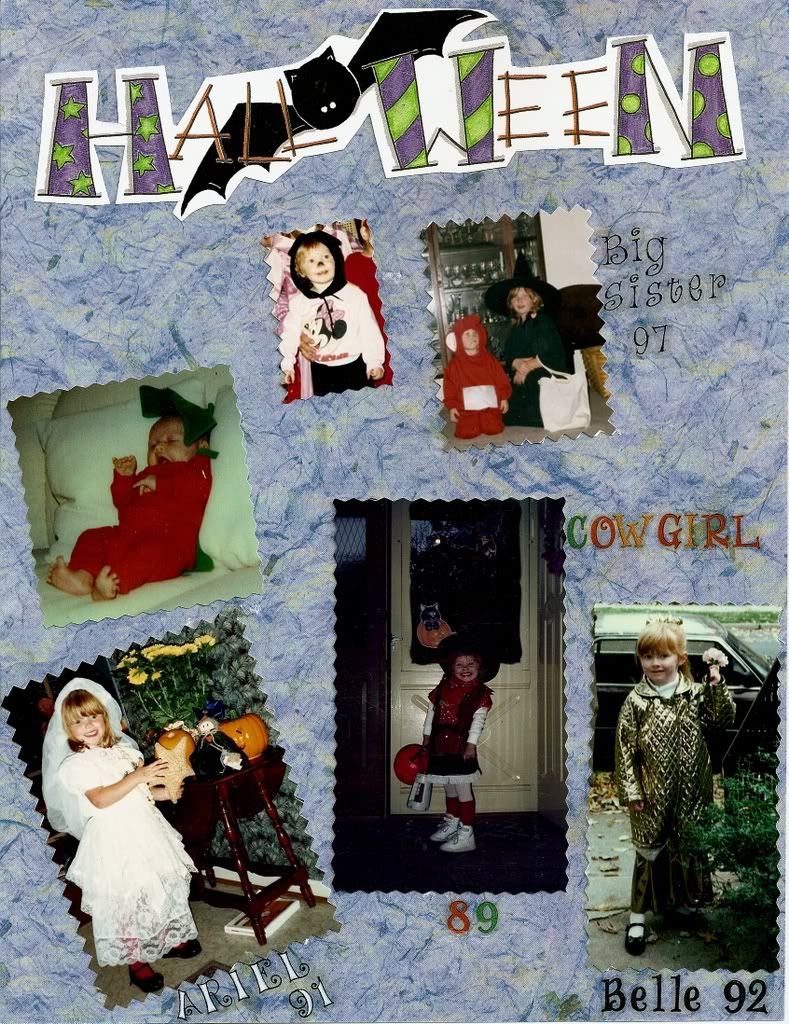
My Christmas photos are usually random candid or casually posed scattered snapshots from random holiday events. My favorite pages are collections of similar photos over the years. Yes, that style is my favorite for Christmas, travel, school, Halloween, whatever ........ so I am trying to find other styles and layouts. I already posted some pages that feature my favorite Christmas Cards (scroll down to my earlier posts).
I keep all my Christmas pages in one Christmas album that is roughly chronological from my childhood until "last year." By the summer I am "done" working on my pages, so I put the album away until it moves to the coffee table in November.
2/25/2009
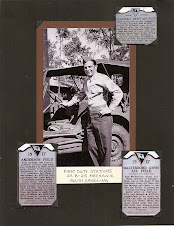
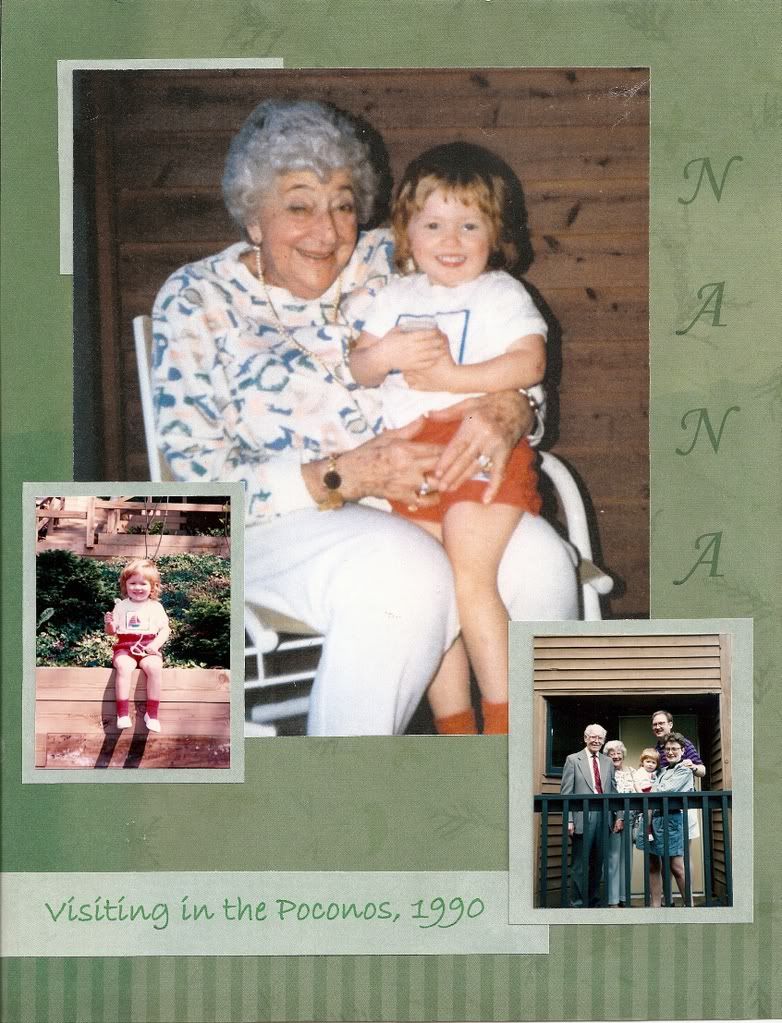
Tiny Back and White Old Snapshots
You can almost date photo snapshots by their size because they have been growing over the years. 4x6 photos are recent. In the 1980's, 3 1/2 x 5 prints were standard. In the 1970's most snapshots were 3 x 3 squares. In the 1960's the snapshots were smaller squares. 1950's snapshots were smaller. Many 1940's family snapshots are 1 1/2 squares or 1 1/2 x 2 1/2 rectangles -- truly tiny compared to today's monster prints.
These "tiny" snapshots should be copied before scrapbooking. I scan them at home, and two simple steps improve most photos. My scanner has a "restore color" option that works great even on black and white photos, and even ones that I do not think are faded. It's a check box, and so easy, so check your scanner. Most photo editing programs have a "convert to black and white" option that improves black and white photos too. I do these two steps on most photos.
For photos that are very damaged or faded, I use Photoshop Elements. My favorite book is Matt Kloskowski's "The P-S E Restoration and Retouching Book" that I bought at Barnes and Nobles. It is more useful for old photos than Barbara Brundage's "Photoshop Elements 5 The Missing Manual" that I also bought at B&N.
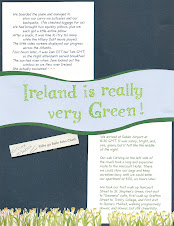
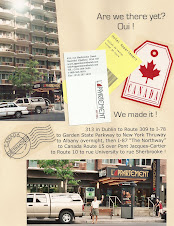
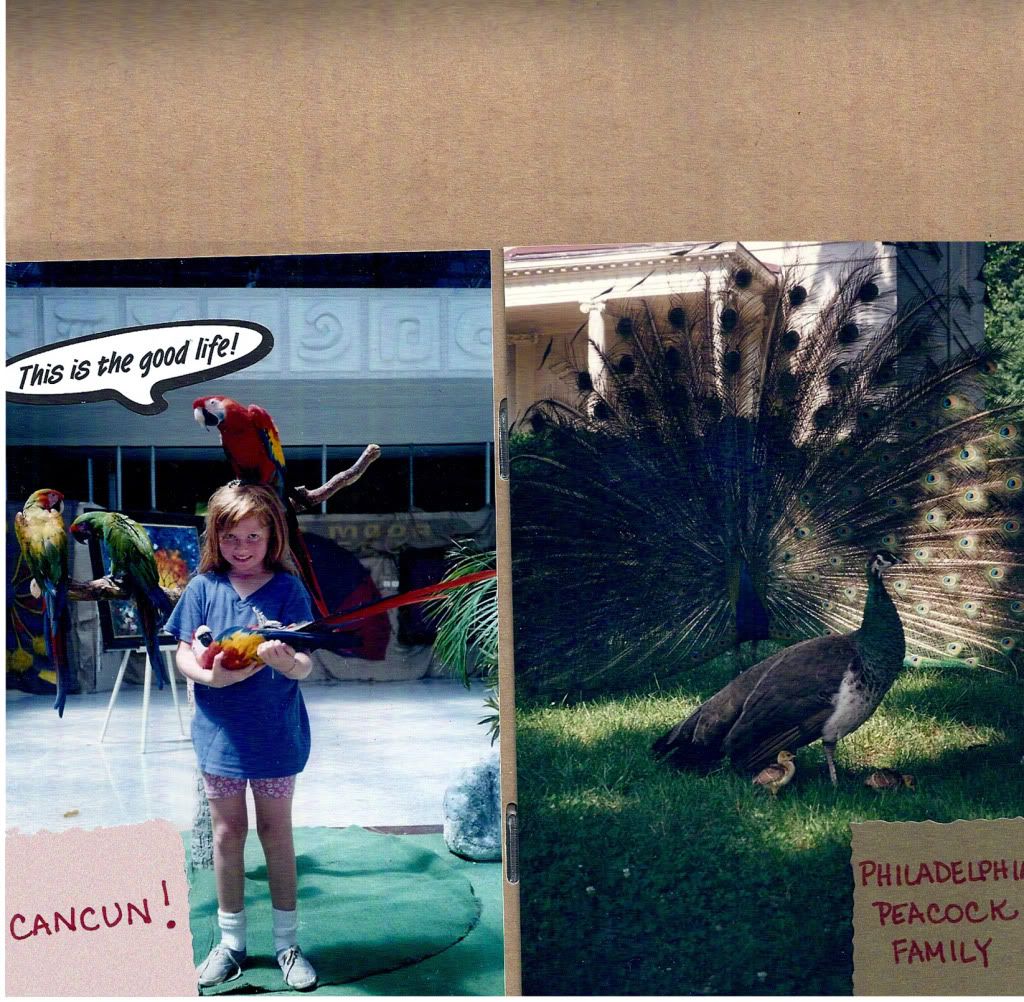
These little snapshots usually are not sharp enough to enlarge much at all. So it's easy to put several on a page. But what if there's only one for the event ? That leaves a lot of space to put a more recent photo of the same place / person, a vintage postcard, a photo from the internet, some remembrances or history, captions, and maybe all of it !
These "tiny" snapshots should be copied before scrapbooking. I scan them at home, and two simple steps improve most photos. My scanner has a "restore color" option that works great even on black and white photos, and even ones that I do not think are faded. It's a check box, and so easy, so check your scanner. Most photo editing programs have a "convert to black and white" option that improves black and white photos too. I do these two steps on most photos.
For photos that are very damaged or faded, I use Photoshop Elements. My favorite book is Matt Kloskowski's "The P-S E Restoration and Retouching Book" that I bought at Barnes and Nobles. It is more useful for old photos than Barbara Brundage's "Photoshop Elements 5 The Missing Manual" that I also bought at B&N.
These little snapshots usually are not sharp enough to enlarge much at all. So it's easy to put several on a page. But what if there's only one for the event ? That leaves a lot of space to put a more recent photo of the same place / person, a vintage postcard, a photo from the internet, some remembrances or history, captions, and maybe all of it !
1/21/2009
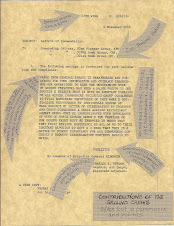
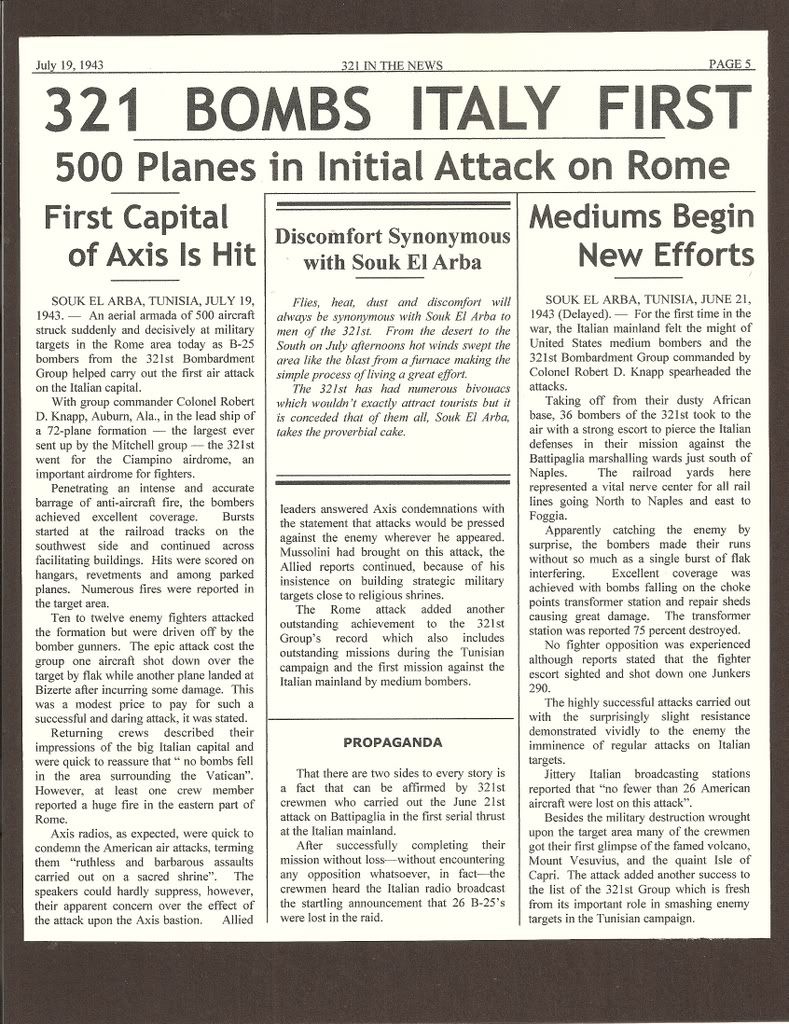
"Cleaning Up" yellowed newspaper clippings
Newspaper clippings yellow quickly because the paper has a lot of acid. To avoid this problem, I scan and reprint new clippings on non-acid paper. I spend a lot of time fixing yellowed (or orange) clippings as I scrapbook boxes of souvenirs from the 1940's. The process to "clean up" these clippings is pretty "easy" with Photoshop Elements or Picassa.
I scan the clipping as a .jpg file. Then I convert the clipping to black and white (one click), which turns the yellow background grey. I select brightness/contrast (another click) to move both the contrast and brightness sliders to the right until the grey disappears ! I like to leave a little bit of grey noise in the background to keep an "aged" look. Then I print the article on ecru paper because a vintage article on white paper doesn't look "right" to me.
Photoshop Elements is especially helpful in removing "bleed through" from the other side of the paper that sometimes lingers even after adjust the contrast and brightness. I use the "clone," not the erase tool. Newspaper photos may need the "descreen" tool and adjustments in lighting before printing.
1/05/2009
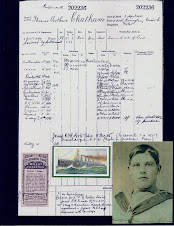
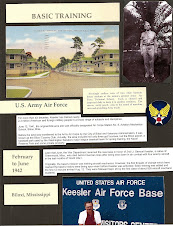
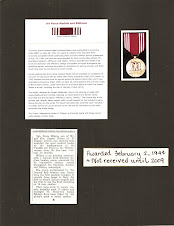
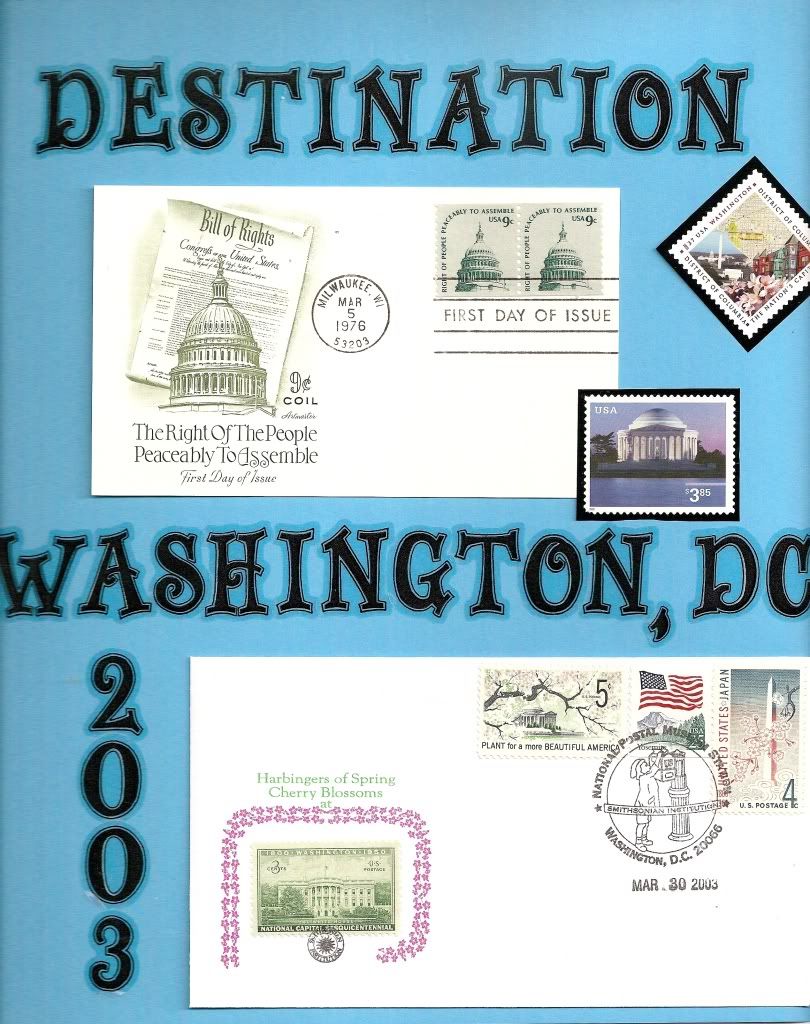
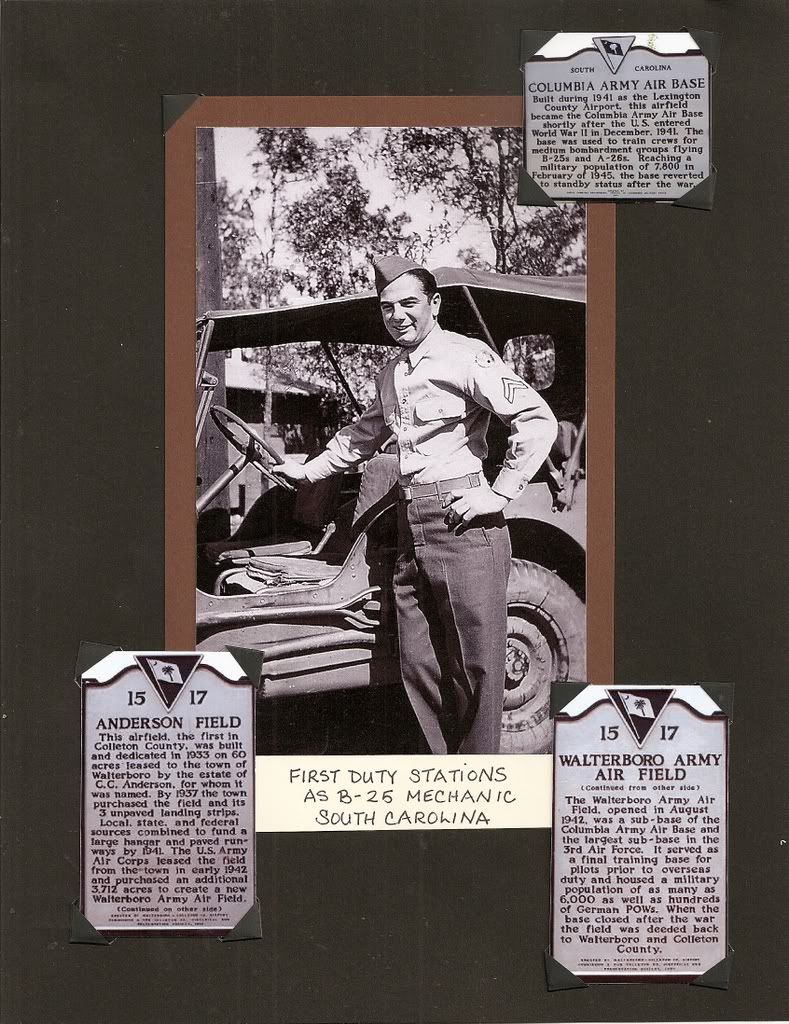
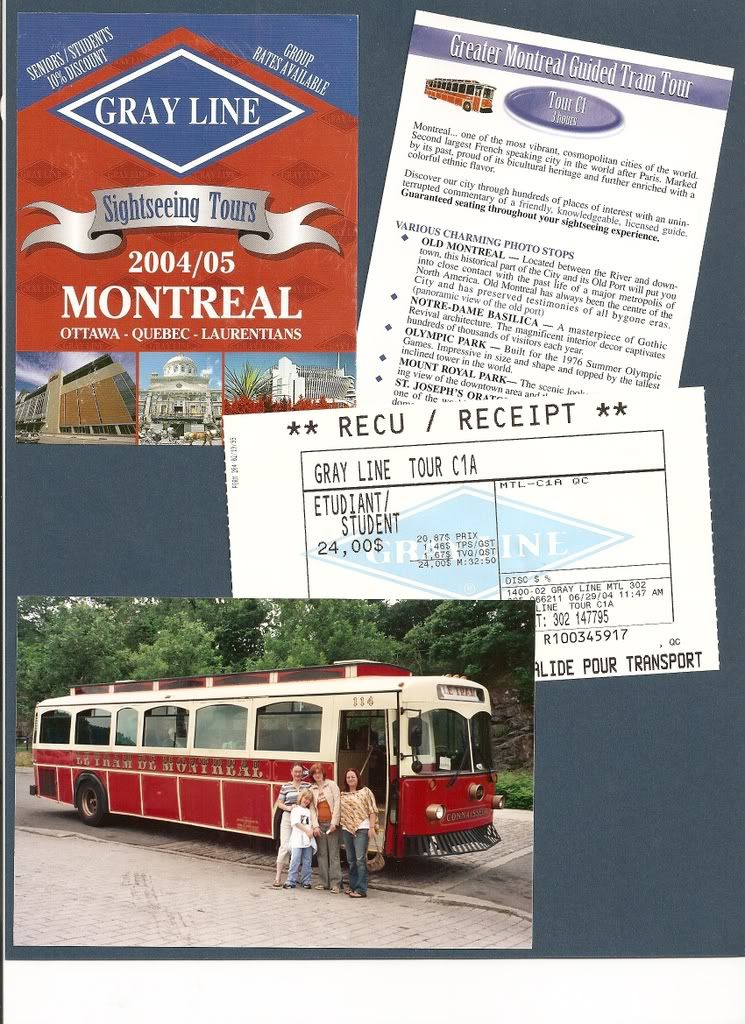
Captions for historical documents
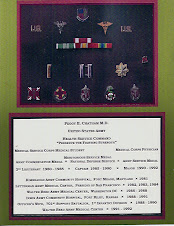
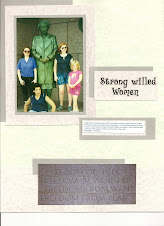
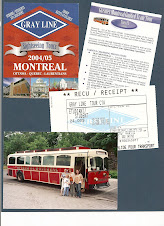
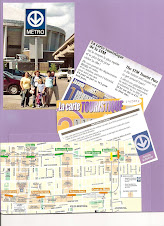
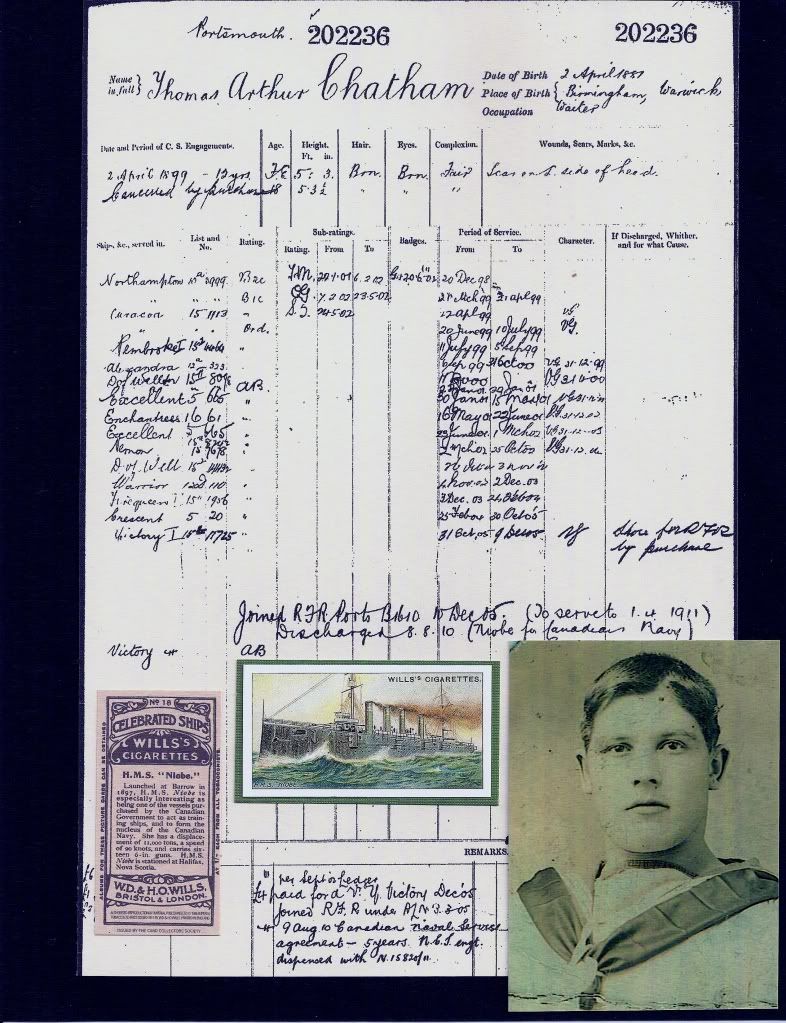
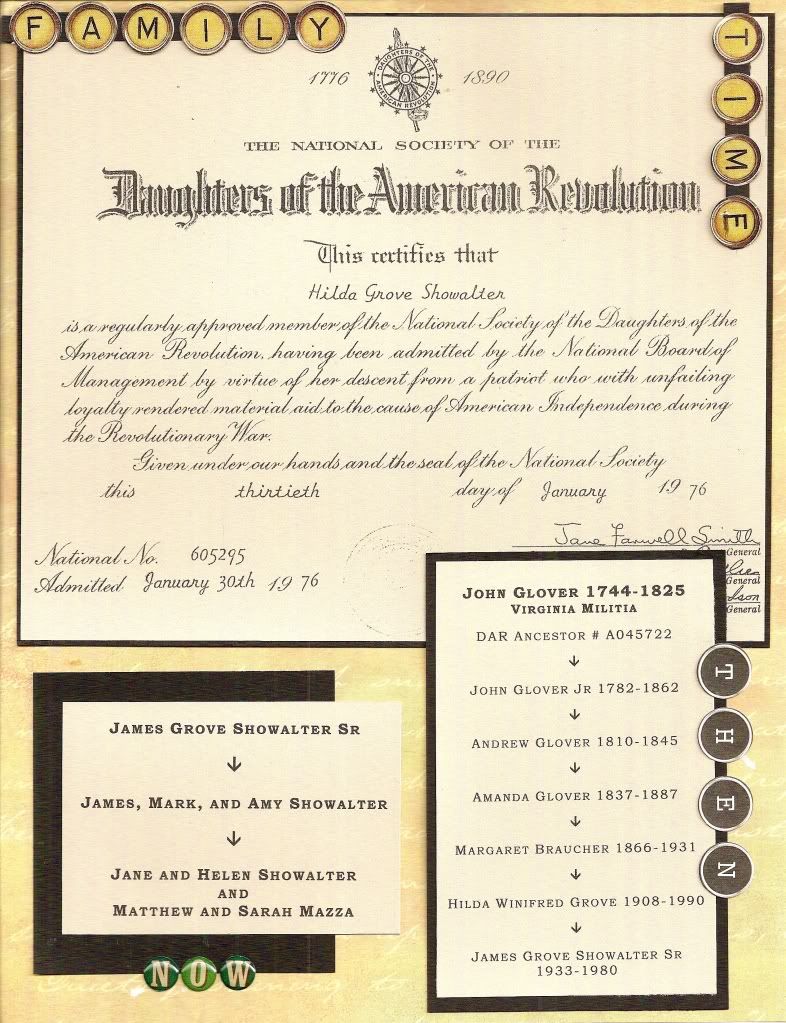
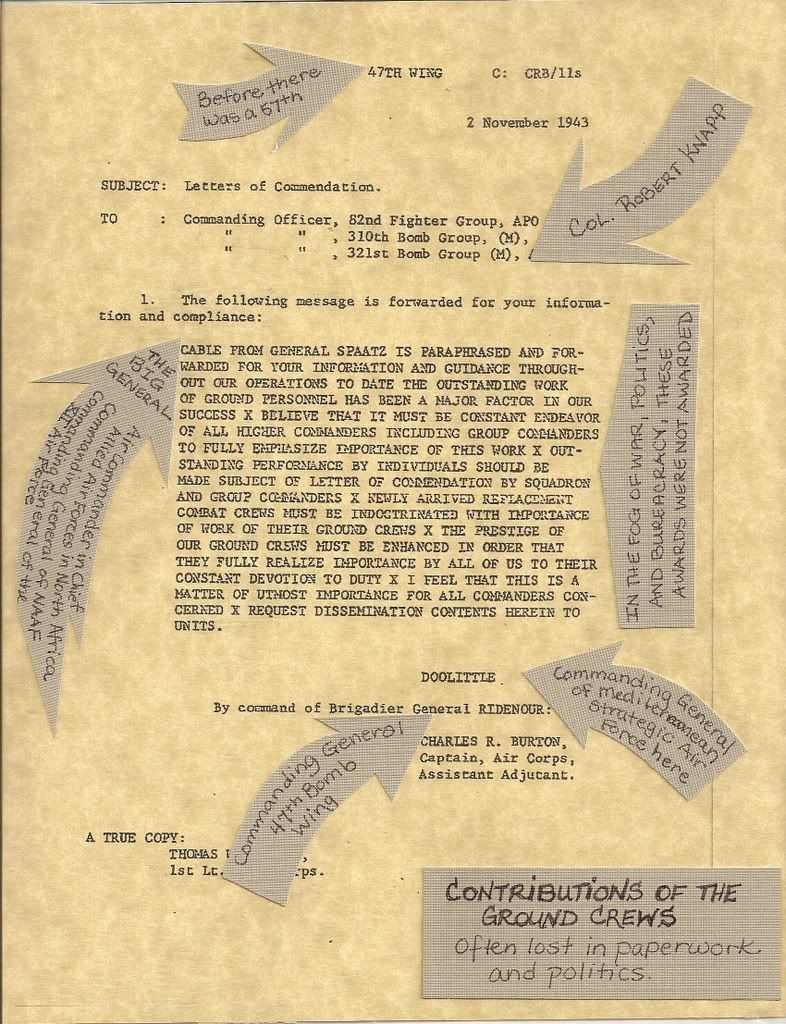
Some official documents that are important to tell the story in a scrapbook are a whole page and are not exactly exciting or self-explanatory, posing challenges for embellishments, titles, and text. Obviously, I always recommend using copies. The copies need to stay in one piece to look official and vintage. It is hard to attach comments or explanations to the document and not look cramped or not cover up an important part of the document itself.
My solution is to put the document in a page protector, then attach its captions and title on top of the page protector. I especially like adhesive "stack mat" card stock for the text boxes, titles, and captions that I place outside the page protectors. The back is entirely "peel and stick" adhesive to keep the items secure.
I especially like using arrows that both point out and explain interesting facts on the document. I the try to create a facing picture page relating to the subject of the document.
Subscribe to:
Posts (Atom)


