My hobby time has been fairly internet intense this fall working on next year's B-25 Medium Bomber calendar for my step-dad's WWII Bomb Group friends. Shutterfly.com has the best calendar programs of all. Almost too many choices. Very pretty. I highly recommend their site. Make a calendar ! Make someone happy. Or many people happy. My calendar involves much WWII photo restoration and an obsessive attention to including interesting facts on each day of the year that is probably unnecessary. Calendars can be easy.
Then I have been helping my mom connect with her Canadian cousins by trolling through the internet and Ancestry.com. Great fun. Somehow I met a woman who had kept an album of photos marked "Chatham photos" from her aunt who was some relative of my father's mother. My mother has been busy identifying them. I met a woman who gave us letters from my mother's father to her aunt and family photos from the 1890's and 1900's of people my mother knew when they were much older.
The internet is truly an amazing way to spend hours and hours and hours of time more productively than playing solitaire or words with friends or e-Bay, well more about e-Bay next time......
11/14/2010
8/07/2010
A simple scrapbook is not a photo album
My favorite simple 8 x 8 scrapbook page has two photos, a caption, maybe an embellishment, and not much journaling. Can a scrapbook get so simple that it becomes a photo album ? Perhaps close, but no.
Current photo albums have two or three sections per page to slide in the photos. There's a wide margin to leave blank or add some journaling, stickers, or embellishments. I have one photo album that I filled with decades of random animal photos, one album of my absolute favorite photos, and one album of Disney photos that I somehow didn't scrapbook (yet).
In photo albums, the photos are all the same size, so no cropping, and no layout composition (maybe switching some photos around). There is no selecting or fussing with background pages because the album is totally assembled. And that's the difference. I absolutely love deciding on the layout and composition in my scrapbooks. Making scrapbooks is my hobby. Assembling photo albums is creative organization.
6/28/2010
Single topics scrapbooks
On a lazy feeling day, I enjoy reviewing my "shoeboxes" of old photos for overlooked photos and memories that fit into existing or future scrapbooks.
I keep finding cake (birthday, baby shower, wedding, anniversary) photos to add to my collection spanning at least forty years of people cutting cakes, blowing out candles, eating cake (neatly or messy), and cake close-ups.
I have my folding file of photos until I am ready for a scrapbook day. I have sections for cakes, boats, grandparents, cousins in groups, sisters in groups, animals (so many random animal shots), cats, puppies, sleeping kids, and "interesting" hairstyles. I doubt I will be posting any interesting hairstyles on this blog though !
5/23/2010
Enjoying 8x8 albums
My 8 1/2 x 11 scrapbooks expand over time because my topics are ongoing -- each of my daughters, trips to Disney, trips to Canada, WWII history, Genealogy. I often go back to update and rework pages. It's easy to insert or reorder the pages. The albums never end and never "really" are finished.
Each of my 8x8 scrapbooks focuses on a single event or topic that I assembled and finished. They occupy a different shelf, and I have a totally different fondness for them. 8x8 pages are simple to assemble because there simply is not enough room to design a photo arrangement, title, caption, date, and embellishments. Two photos per page, maybe a caption or an embellishment: perfect for trip photos and more satisfying than a "brag book" or photo album.
My 8x8 single event scrapbooks:
special trips to California, Discovery Cove in Orlando, Dorney Park in Pennsylvania, Costa Rica, and China.
photos from a very busy fifth grade year with only one or two good photos per event. our wedding elopement
our formal five year vow renewal.
My 8x8 retrospective scrapbooks for topical photos I found while sorting through old phots:
all the cake photos from all the celebrations
all the rubber duckie photos with my duckie obsessed toddler to teen
all the animal shots in all the zoos, parks, farms, beaches, and backyards.
8x8 scrapbook albums often are packaged with coordinating pages. Theme pads of 8x8 coordinating paper are so handy because I assemble the whole scrapbook at once.
To complete an easy single topic scrapbook, 8x8 is the way to go.
4/10/2010
What did Gramma's House look like ?
My newest scrapbboking tool (and random time waster) is using Google Maps Street View and Google Earth Panoramio to find current photos of my family's "historic" locations. Some of these locations have no photos to scrapbook, and other locations have old photos that I would like to compare with a current photo for a then/now page (one of my favorite layouts).
Google maps has good instructions but requires some mouse practice to maneuver, and the resolution is good enough. Having a specific address is most helpful; yes, more information to obtain and save, along with those childhood friends' names.
Panoramino just needs a town, park, or church name, but its results are limited to whatever photos have been posted. I have enjoyed many beautiful random photos.
So far I have found photos of my childhood homes in Toronto and Vailsburg, my mother's childhood home in Montreal, my grandparents' home in Lachine Quebec, the cemetary where my mother's original Simons relatives are buried in Ireland Township Quebec, and the church where I was batpized. I am astonded by how little some houses have changed (or a lot == a grandparents' house is now an overpass).
At the moment cruising the world with Google has been more fun than practical (as in producing pages), but isn't a hobby supposed to be fun ?? And who knows what I might be inspired to do !
3/07/2010
Date Those Photos (and Label those People)
On pretty and artistic scrapbook pages, it's important to work in the who, what, where, and when (or at last write the info on the back). Memories for details do fade, years totally blend together, and cute toddlers look very similar.
I have been going through old pages to update scrapbook pages to label the who, what, where, and when, which has required some wierd family calculations -- such as
To calculate Helen's age in a photo taken on a trip with Jane in Jane's only year as a cadette girl scout in seventh garde if Jane started kindergarten at age 5, Jane would be 13 in seventh grade, so if Jane was born in 1987, the trip was 1999, so with Helen born in 1995, then she was four ! It would have been easier to date the photo, but perhaps less interesting.
Many more trips down memory lane are necessary to date other photos by figuring out what year did we have what curtains, which babysitter, what car.
1/20/2010
Scrapbooking Decorative and Commemorative Pins
It took quite awhile to decide what to do with my assortment of commemorative pins sitting in a box. A shadow box was obvious for my military insignia and crests, but how to explain what they mean ? How to scrapbook about them ? Those military insignia, girl scout pins, Disney pins, and miscellaneous souvenir pins all tell stories, but those pins and clutch backs are way too bulky to use in a scrapbook.
I assembled my military pins on a piece of scrapbook paper that I scanned and then used Photoshop to brighten some details. I could have photographed it with my digital camera on the "macro" setting, but I really love my HP Photosmart scanner, its options, and its quality. Then I printed a 5x7 for my scrapbook page. The originals will go on the wall when I find a shadowbox that I love.
Arranging my military set was so much easier than arranging the Disney pins, an ongoing puzzle for me. If the Disney pins were not so expensive, I would be tempted to clip off the back posts and use them as adorable embelishments. Hmmmmmm.
12/27/2009
Many Happy Holidays !
Happy Thanksgiving !
Merry Christmas Eve !
Merry Christmas !
Happy Boxing Day !
Happy New Year !
and Happy Epiphany and arrival of the Three Wise Men ! (if I don't post before then )
May 2010 be happy and healthy with happy times and time to scrapbook them (eventually) !
Love from Peggy
Merry Christmas Eve !
Merry Christmas !
Happy Boxing Day !
Happy New Year !
and Happy Epiphany and arrival of the Three Wise Men ! (if I don't post before then )
May 2010 be happy and healthy with happy times and time to scrapbook them (eventually) !
Love from Peggy
12/03/2009
The easiest collages ever !
I have assembled all my scrapbook page collages by trimming, arranging, and rearranging actual photos. The challenge is strangely fun. All the "easier" web and digital scrapbook collage templates that I tried were too tedious for me and actually took much longer. Then I stumbled onto Walgreens collages. Yes, Walgreens. I have not been this excited about a product since Mr. Clean Magic Eraser.
"Easy" is of course a relative term, starting at walgreens.com, clicking on the photo icon, and registering. Finding the collage section is a bit of a hunt by clicking on gifts, then clicking on collages. There are three sizes, 8x11, 5x7, and 4x6. Uploading photos is next and a bit tedious. For a 8x11, up to 12 to 16 photos seem best. The site creates the collage and the arrangement. You can select with width of the margins around the photos and scramble the photos, but you cannot rearrange the photos individually. Once you have an arrangement you like, you can have it printed within an hour at the closest store.
Then the collage is ready for any labels or embellishments to make a page.
10/28/2009
Bits and Pieces and Left Overs
When trying to organize my supplies, I gather up and give away the paper and embellishments that I know I will never use. Often these items purchases seemed inspiring when I purchased them or they are part of a larger set -- beware the combo packs unless you really want that one item enough to donate the rest. A partially used sticker sheet, random remaining letter stickers, and odd embellishments are harder to donate because they look so used, because they are.
On a rainy day when I feel obsessive (not very often), I have cut up the partially used sticker sheets into individual stickers that I put into a ziplock "grab bag" that seems so much neater.
Another option is using those left-over stickers. I liked the style because I used part of the sheet. One option is using similar stickers to make a personalized border for an essay, recollection, summary, title, or journaling page.
Another option is working these stickers into existing pages. Especially if I buy some new Disney embellishments for one page, the remaining stickers find a home on older pages. I bought a large set of spiritual and religious embellishments for our vow renewal pages, and the remainders were great for older baptism and confirmation pages I made when I could not find any embellishments that I liked.
9/20/2009
Why do I scrapbook ?
The summer of fourth grade, my mother had me scrapbook our road trip through New England.. Scrapbooking the Nixon-Humphrey campaign was a school project. I scrapbooked Apollo 11 all on my own. Then no more scrapbooks. My children's baby books were cute fill in the blanks styles.
Then in 2000 I visited my cousin Lynn who had plunged into scrapbooking. I was hooked, despite my stressful and chaotic life and job, I love my scrapbooks, my scrapbook paper, my supplies, and my tools. I love my scrapbook magazines. I love font websites. Why ??
- Scrapbook pages are more meaningful to me than the stored boxes of photos and bits and pieces of paper I collect
- Shifting through the boxes for material for my pages triggers memories I had forgotten.
- Compared to my day jobs, creating attractive pages gives me a challenge without real risks of pain, danger, death, or lawsuit.
- Applying design concepts learned in my past lives working in my father's typography studio and working in Dr. Cooley's college media production labs link my past and current lives.
- My interest in historical research can provide captions, embellishments, and style elements that are uniquely mine.
- My life requires a hobby that I can do anytime, with little travel, timetable, and relatively little cost for supplies (at least per purchase).
- Swapping scrapbook pages with my mom lets us collaborate despite our distance
- Scrapbooking has given me an identity in my family -- the photographer of photos for the scrapbook.
- Looking at the albums on the shelf reminds me that my life has been full of happy times.
- Occassionally my children actually look at them.
- Rarely my children actually show them to friends.
- When I am old, I will enjoy looking at them and forcing young people in my life to look at them with me.
9/07/2009
My Scrapbooks and Covers
This weekend I moved all of my 8 1/2 by 11 scrapbook pages into three-ring binders (from Staples, Home Depot, and Walmart) and out of the traditional "post and screw" style scrapbook albums (from the scrapbook stores). All those traditional scrapbook albums and all never used 12 x 12 scrapbook albums went to the thrift store.
Three ring binders open easily. Because I scrapbook based on my current mood and interest, not chronologically, with binders I can add pages in their protectors to the middle, the end. I can rearrange pages easily. Traditional post style albums require a screw driver and almost require an engineering degree to open and add more pages, and they do not open and lay flat like my binders while I rearrange my pages.
I start a scrapbook in a 1 inch or 1 1/2 wide binder, when it's full I move the pages into a 2 inch wide binder, and when it's full, then Volume II starts.
My oldest daughter has a 2 inch binder that includes her "younger" and "older" years and a 1 inch binder for her high school years. My middle daughter has a 2 inch binder. My youngest daughter has two 2 inch binders, and she just started high school and her volume III. I have been scrapbooking almost her whole life, and I have been catching up for her sisters.
I have one 2 inch binder full of Disney pages and one of Christmas pages, one 1 inch binder for DC trips, one for Canada trips, one for my step-dad's WWII memorabilia, and a 3/4 inch binder for our Ireland trip. Most of my single event scrapbooks are 8x8 albums, but Ireland was a great trip that needed larger pages to tell the story.
In 3/4 inch binders I just started a scrapbook of my life before daughters and a scrapbook of my college years, sprinkled with pages from whatever college events my daughter let me document. We both attended the same college, so "then and later" comparison pages are irresistible (to me, not my daughter who is very indulgent).
I buy binders with a clear "see through" cover and spine, so I can create a cover scrapbook page and spine design. I use a 12x 12 piece of scrapbook paper that I trim into the two pieces because the cover is about 9 1/2 by 11 1/2. When I "move up" to a wider binder, I can move the cover. Traditional scrapbook albums have solid or pre-printed covers and spines that cannot be personalized as much.
My one scrapbooker daughter crated on 12 x 12 scrapbook album, and I have not made a single one. Larger pages need artistic filling that is not my style.
I use 8 x 8 scrapbook albums as glorified photo albums for recent single events and trips with one or two photos per page, not as much cropping or techniques. It is easy to find pre-decorated theme scrapbooks in this size. My 8 x 8 trip scrapbooks are: trips to California, Costa Rica, China, and Discovery Cove. My event scrapbooks are Graduation Party, Fifth Grade projects, my Informal Wedding, and Vow Renewal five years later. I also have one album of "duckie" photos and one album of "cake" photos. More about them later !
8/29/2009
Spotlights should be oval
My final thoughts on ovals: Spotlights land on the stage in an oval shape. An oval shape also spotlights special photos. Those annual school portraits, reunion group photos, wedding photos, anniversary couples portraits, and even photos of kids on Santa's lap all are enhanced by being cropped into ovals. Layouts with one or two ovals seem the most balanced.
8/01/2009
Oval mats and frames
I use mat borders around most photos on recent pages. Cardstock mats are cut larger and placed under photos. Many photos have a thin mat border, others have one or two wider bands. White, black, contrasting colors, or even matching the background color, mats also add dimension and depth. Ovals and rectangles are my most versatile photo and mat shapes. Most of my pages feature people, and I think people fit best in ovals and rectangles. Plus ovals seem more elegant -- think old portraits.
Frames are cardstock ........ frames........placed over photos to make them look........framed. Easy concept, difficult technique. I like frames, but that are not worth the effort unless I want to photos to specially look framed. Why not buy a package of cardstock frames at the scrapbook store ? I have bought a few packages, and the color, or size, or width, or number of duplicates never has fit my page. Never, ever.
Cutting mats and frames myself has been the only solution to fitting to my photos and my imagination. Rectangle mats are easy to make with my paper cutter, but rectangle frames require a separate system I would not use enough to buy. Another reason to love ovals is that my one cutting system cuts oval mats (one cut) and frames (two concentric cuts -- cut the outer edge to make an oval, then cut the inner edge that makes the frame and an inner smaller oval to use elsewhere). My Creative Memories Oval Shape Cutter has four plastic oval templates and three cutting knives that can make 24 different size ovals. I always have the right size oval.
I love Creative Memories tools. They used to be sold at parties, but now they have a website and representatives. A little like Avon.
7/11/2009
Memories WITHOUT photos
It seems hard to believe, especially since the dawn of digital cameras, but there are actually events that have not been documented in multiple photographic views. Memories of these events can be strong, funny, important, and ..........undocumented ? How can these memories be translated into a visual story ?
My daughter recently gave me three humorous "badges" for "Herding cats," "Pirate Appreciation," and "Blogging." She actually thought of me and my (quirky) impact on her life ! And she actually remembered to give them to me (eventually). So what to do ? Sew them on my jacket ? Stick them on my bedroom mirror ? Of course not.......scrapbook them ! She agreed to list some of the "requirements" that I can accomplished, and a page was born. We had done Girl Scouts in the past, so the page evoked a sash.
I am delighted with the result of spending a lot of time creating my favorite "Mommy Scout" title. I could not find a digital font, stickers, or die cut that I liked, so in the end I bought chipboard letters that were the "right" font but the "wrong" color and size, so I arranged, scanned, photoshopped, and adjusted. Not all that practical, but sometimes motherhood isn't. (If you have heard about the Cricket, yes, that would have been easier, but I am NOT going there).
7/04/2009
New pages with old photos
I always have more fun scrapbooking old photos of happy memories rather than immediately scrapbooking a recent event. I keep my photos in chronological order, and randomly flip through the files, and sometimes an event "strikes" me. I also have a file of "photos I want to do something with when I get inspiration."
Recently my daughter and I escaped the heat by browsing the aisles in Joanns, a dangerous pursuit (but less risky than heatstroke or sunburn). Nothing fit my rule of only buying what I can use RIGHT NOW when I saw some Girl Scout stickers and embellishments. I immediately recalled unused Daisy and Brownie Photos and a few Girl Scout pages, so I could USE them and they were ON SALE. It took a little time to locate the photos, but less than an evening to put the page together. Eureka ! Practical scrapbooking at its best !
Recently my daughter and I escaped the heat by browsing the aisles in Joanns, a dangerous pursuit (but less risky than heatstroke or sunburn). Nothing fit my rule of only buying what I can use RIGHT NOW when I saw some Girl Scout stickers and embellishments. I immediately recalled unused Daisy and Brownie Photos and a few Girl Scout pages, so I could USE them and they were ON SALE. It took a little time to locate the photos, but less than an evening to put the page together. Eureka ! Practical scrapbooking at its best !
6/11/2009
The Best Embellishment to Buy
The best embellishment to buy is always the one that I know exactly how to use with the photos that need this very embellishment to make a perfect page.
I have warned about buying cute embellishments for the future. I bought my my oldest sticker set during a California trip in 2002. I still think they are adorable, and have yet to figure out how to use them.
The eureka moment occurs when I see a set that solves a problem by providing the perfect caption, title, and decoration for photos that have been waiting for inspiration. My children's Christmas pageants were a challenge. I only had one or two per year, and the photos were not great. As soon as I saw an "Away in a Manager" sticker set, I could make the page. I enlarged one little shepherd, cut out her cluttered background, stacked the other three photos, and used the stickers to tie them together. The best sticker set ever !
6/08/2009
Photobucket and Shutterfly and Flickr and Picassa Oh My !
"Of course" everyone remembers to backup their digital photos to an external device in case of a hideous PC crash. But what if the house burns down ?? Will the external device melt too ?? And all the paper scrapbooks will turn to ash...... A traditional paper and photo scrapbooker can find relief from these pessimistic worries in the internet.
I scan (not enough) of my favorite scans into my free http://photobucket.com/ account. It can also be used to share with others, but I use my blog for sharing...........My daughters tell me that photobucket is no longer "cool," but I understand the uploading and organizing steps, so I stick with it rather than switching to the "cool" and artistic http://www.flicker.com.
Many sites have photo products, but I love Shutterfly's. So far I have made calendars, photo announcements, photocards, and one photobook (yes, rather than a scrapbook) of my step-dad's WW2 B25 Mitchell bomber photos. My product purchases (great presents) can earn free photos by mail. I have two "share" sites. My http://vintageb25.shutterfly.com/ features all my WW2 restored photo work and my "Beloved B25 Bombers" photobook. My http://prettypicturespeggy.shutterfly.com/ features my family event photos. Of course Shutterfly is more than happy to sell my photo creations to visitors: profit for them and convenience for me.
I use Picassa to organize my photos on my PC. Picassa has a web album feature that I don't use. I do use Picassa to format sets of photos to send to http://www.walgreens.com/ for one hour printing. I like Walgreen's quality, and there's one down the road. Plus I can send photos to my mom's nearby Walgreens.
I use a "Click Free" Back-up system for my photos in case of another crash.
I try an alternate internet and real paper projects.
5/11/2009
Simple page, simple problems; Complicated page, complicated problems
The festivity of Christmas makes me want to decorate my pages more, much more, than usual. I own more adorable and elegant embellishments than I could ever use. My usual practical style of producing pages can get bogged down trying to make festive pages. This month I obsessed and finished two festive Christmas pages that I almost like.
I planned a two page layout of our Christmas trees that I wanted to be festive (as if the Christmas trees would not convey the holiday). I fussed over cropping and arranging the photos into a nice collage that could be finished up quickly, but .........
Little paper labels would not be festive to put the year by each tree and label the small children, so...........
I bought some colored star tags with metal edges, but the strings were, well, stringy, so I searched for metallic string that would fit through the little tag hole. Alas, actually putting the string through the hole made the tag too lumpy and did not help with attachment. The tags alone had the disturbing little hole, so I tied little bows with the metallic string that I glued over the hole. So far, so good. Then I wrote the dates on the tags, making some errors and disliking (intensely) the shape of some of my numbers. NOTE FOR FUTURE: hand write first, and attach tiny hand tied bows second.
I bought red and green metallic photo pens to write names on the photos (strongly adhered to my maroon background), and I was unhappy the resulting pink and lime result. NOTE FOR FUTURE: Test first ! I actually used a silver Sharpie to write over the pink ink.
I printed my festive titles on clear adhesive sheets, trimmed them, adhered them to the maroon paper, and disliked them. They are unremoveable, so I needed to put my titles on paper to cover them up, not just paper but metallic festive paper, so I bought some nice green metallic paper that was actually turquoise when I got home. I like non-traditional Christmas colors, but not maroon and turquoise, so...........
After an unsuccessful search for metallic green paper, I bought some metallic navy paper on which to write my titles with the silver Sharpie that was of course now missing. So I bought another silver Sharpie.
I finished my pages. Thank goodness I was working on both at the same time. But then I noticed that empty spaces of maroon were more visually prominent. Those spaces need embellishment...................
Luckily in my cache of embellishment I found silver rimmed holiday sayings that I could fit into those maroon spaces.
Holidays can be overwrought, and so can holiday pages.
4/03/2009
Spring is my perfect time to work on Christmas
I have taken a break from restoring WWII photos to turn to my favorite Spring topic -- Christmas ! By Spring I am ready to upload my holiday photos from my camera into my computer, I think my Christmas paper and embellishments look new and festive, I enjoy looking at photos of Christmas past, and I'm ready to work on some pages. I just cannot do Christmas in January.
My Christmas photos are usually random candid or casually posed scattered snapshots from random holiday events. My favorite pages are collections of similar photos over the years. Yes, that style is my favorite for Christmas, travel, school, Halloween, whatever ........ so I am trying to find other styles and layouts. I already posted some pages that feature my favorite Christmas Cards (scroll down to my earlier posts).
I keep all my Christmas pages in one Christmas album that is roughly chronological from my childhood until "last year." By the summer I am "done" working on my pages, so I put the album away until it moves to the coffee table in November.
2/25/2009
Tiny Back and White Old Snapshots
You can almost date photo snapshots by their size because they have been growing over the years. 4x6 photos are recent. In the 1980's, 3 1/2 x 5 prints were standard. In the 1970's most snapshots were 3 x 3 squares. In the 1960's the snapshots were smaller squares. 1950's snapshots were smaller. Many 1940's family snapshots are 1 1/2 squares or 1 1/2 x 2 1/2 rectangles -- truly tiny compared to today's monster prints.
These "tiny" snapshots should be copied before scrapbooking. I scan them at home, and two simple steps improve most photos. My scanner has a "restore color" option that works great even on black and white photos, and even ones that I do not think are faded. It's a check box, and so easy, so check your scanner. Most photo editing programs have a "convert to black and white" option that improves black and white photos too. I do these two steps on most photos.
For photos that are very damaged or faded, I use Photoshop Elements. My favorite book is Matt Kloskowski's "The P-S E Restoration and Retouching Book" that I bought at Barnes and Nobles. It is more useful for old photos than Barbara Brundage's "Photoshop Elements 5 The Missing Manual" that I also bought at B&N.
These little snapshots usually are not sharp enough to enlarge much at all. So it's easy to put several on a page. But what if there's only one for the event ? That leaves a lot of space to put a more recent photo of the same place / person, a vintage postcard, a photo from the internet, some remembrances or history, captions, and maybe all of it !
1/21/2009
"Cleaning Up" yellowed newspaper clippings
Newspaper clippings yellow quickly because the paper has a lot of acid. To avoid this problem, I scan and reprint new clippings on non-acid paper. I spend a lot of time fixing yellowed (or orange) clippings as I scrapbook boxes of souvenirs from the 1940's. The process to "clean up" these clippings is pretty "easy" with Photoshop Elements or Picassa.
I scan the clipping as a .jpg file. Then I convert the clipping to black and white (one click), which turns the yellow background grey. I select brightness/contrast (another click) to move both the contrast and brightness sliders to the right until the grey disappears ! I like to leave a little bit of grey noise in the background to keep an "aged" look. Then I print the article on ecru paper because a vintage article on white paper doesn't look "right" to me.
Photoshop Elements is especially helpful in removing "bleed through" from the other side of the paper that sometimes lingers even after adjust the contrast and brightness. I use the "clone," not the erase tool. Newspaper photos may need the "descreen" tool and adjustments in lighting before printing.
1/05/2009
Captions for historical documents
Some official documents that are important to tell the story in a scrapbook are a whole page and are not exactly exciting or self-explanatory, posing challenges for embellishments, titles, and text. Obviously, I always recommend using copies. The copies need to stay in one piece to look official and vintage. It is hard to attach comments or explanations to the document and not look cramped or not cover up an important part of the document itself.
My solution is to put the document in a page protector, then attach its captions and title on top of the page protector. I especially like adhesive "stack mat" card stock for the text boxes, titles, and captions that I place outside the page protectors. The back is entirely "peel and stick" adhesive to keep the items secure.
I especially like using arrows that both point out and explain interesting facts on the document. I the try to create a facing picture page relating to the subject of the document.
11/29/2008
Embellishments for vintage pages
Vintage embellishments in scrapbook stores are almost always Victorian or 1950's style, but many family history pages are not. I find great embellishments at the nearest antique mall or internet site in the form of vintage advertisements and postcards. Vintage postcards are often sorted by location, theme, or holiday. The postmark (if it was used) can give you its date if you want to be historically accurate. Ads are often sorted by product, manufacturer, or theme.
Internet auction sites like e-bay often have their images scrambled or distorted so the image cannot be printed, but I find a e-shop with several items I can use, then I buy them. Fair for the seller, and usually a bargain for me. An average postcard costs from 50 cents to 4 dollars, well within the range of a "new" vintage decoration, and are often a bargain. Ads range from 2 dollars to quite expensive.
On Google, I often type what I am looking for, and sometimes a public domain website pops up, for example "B-25 postcard" or "vintage B-25 ad."
11/09/2008
Pages with just my existing supplies (OMG !)
While my husband was grouting the tile in our kitchen backsplash, I planned to keep him company by scrapbooking two new pages -- one on the veterans in our family and one on my rapidly aging teenage daughter. I had not bought any inspiring paper or embellishments for these pages. Leaving him to cruise the scrapbook stores would break the spirit of togetherness. So I had to select from my existing supplies.
In my spirit of practical scrapbooking, I try to avoid buying "too much" of "just in case" special supplies, because the case never occurs. Avoiding those temptations still leaves me with quite a cache of basic colors of paper and stickers, plus lots of left-over bits.
I re-discovered some paper and used the remaining sticker letters in my current favorite font for my "Such Different Veterans" page. The letter "e's" are totally gone now. I had to use an upside-down 3 for my final e. I hate using numbers because they are so scarce, but could not think of a fewer e title -- my first thought was "Three Different Veterans" -- impossible. I wrote my captions by hand rather than using Microsoft Word in a fancy font.
My second page was "What A Difference 3 Years Makes" in a graffiti style using rub-on letters of mixed fonts. My daughter had bought (convinced me to buy) a big set and used exactly one "H." I like the page, and still have plenty of rub-on letters for some future unknown project.
It seems odd that I used Different/ Difference in two titles in one day -- perhaps because it was so different to actually use my supplies ! OMG my daughter would say (Oh MY Gawd) Enjoy !
11/02/2008
Don't buy a set of six (or 12 or 16) decorative scissors because you'll only use two or three of them.
I finally gave most of my decorative scissors to the crafts lady at my daughter's after school program. I kept the four pairs I used the most, which isn't often. Trimming photos or mats with a "decorative" edge can be distracting or gimmicky. Edges should not be the highlight of the page.
My favorite scissor is the small jagged / deckle / crinkle edge that really softens the edges of a photo or a mat.
I use my zig-zig / pinking ( I don't know why it's called that) scissor on the least important or boring edge of a photo. Zig-zagging all around looks too much like a school-project for my taste and causes stress because it's impossible to make the corners neat.
I have a perforated / stamp edge scissor that I use to cut white margins or mats for my 1950's or 60's photo copies. Those vintage photos usually have white margins with crinkle edges that I can reproduce with these scissors because I never put originals in my scrapbooks.
I kept the lacey edge scissor because I am sure that I will successfully use it someday on a vintage or princess page. I can't cut a mat on all four sides and get the corners right, and I have not created a one edge design yet. Time will tell if it should have gone to the school too.
9/27/2008
"Historic" Family Documents
I have been busy chronicalling my step-dad's WWII duty in Africa, Italy, and Corsica.
We have some small (2x3) B&W photos, a few newspaper clippings, and his discharge paper.
Through the wonderful internet, I have found old Stars and Stripes and New York Times newspaper articles and several documents relating to his service in 1942 to 1943. I found his disabled father's draft card from 1942. Similarly, I have found the census record for my husband's grandfather (as a boy)'s family, my grandfather's Canadian Army discharge paperwork, and other really interesting family documents. www.ancestor.com has been worth the $19.95 for one month's worth of searching (maybe two months).
I want to scrapbook these original and downloaded "documents" in a vintage style. I started by printing or copying them on different shades light tan, beige, or parchment cardstock. Although the original paper may have been white, now the originals (if I had them) would be aged, and all the documents would not be the same color paper. I tried to size the document so I could trim it smaller than 8 1/2 x 11 to mount on black cardstock because vintage scrap books are almost always black.
No pages are totally complete yet, but many are in progress................
8/31/2008
Pre-packaged titles and borders -- another product I wish that I didn't buy.
Soon after I started scrapbooking, I bought a package of adorable titles and a package of borders. They were so cute. I had kids. How could I not use them ? Let me count the ways.
The titles never "fit" in theme, color, or size on a page I was assembling. I finally (a year or two later) decided to design a few pages around them.
Then I realized that the borders and titles were printed on white paper, and I don't use white background paper. I cut away as much white as I could, and used them, creating some mediocre pages that "someday" I will re-do.
I decided never to design a page around one embellishment because I prefer to have my photos be the focus. To confirm that decision I bought a package of lovely pastel Victorian borders that at least were not printed on white.
All the borders are now donated to a local school program. Beware of cure products.
I now tend to think about products and buy them when I have thought of way to use them in a page design I love. I do buy products that I love that I use a lot.
8/12/2008
Brads -- a product I wish I only bought once.
Brads are updated paper fasteners with adorable shapes replacing the plain brass buttons. What scrapbooker could not use paper fasteners ? Apparently, me. My daughter and I bought several sets. To my suprise, I then found only one opportunity to fasten papers on a scrapbook page. As an embellishment, brads are too much work for me.
To use a brad, you first punch a hole (with a large darning needle or a specialty tool) for the brad because just pushing the brad through will rip the paper in an unattractive way. Spreading the wings on the back of the paper to fasten the brad makes the page lumpy.
After using eight brads on one page, I have at least 98 more to go. I should knew not to buy supplies "just in case" it get inspired to use them. I knew not to buy the eyelets. I did buy colored staples, but I feel optimistic that I will find a use for them.
7/12/2008
Collages and Mosaics
Most of my "regular" pages have two to four photos and show the background page. Collage and mosaic pages have many more photos that virtually cover the page. For me, a collage contains photos that overlap at odd angles, and often include other paper "ephymera." A mosaic has photos in a specific pattern that "fit" together. No particular event seems most appropriate for a mosaic -- except that it has to be an event or a subject with lots of photos !
Making a mosaic is very similar to assembling a jigsaw puzzle or a patchwork quilt. I need a stack of photos to move around the page and select those that "fit" together. Trimming has to be done very carefully. Too much trimming and the photo is too small for its space. Any text can fit in its own rectangle, but I often skip the text box and just use a title box.
Almost all my mosaics are composed of different size rectangles with an occassional square. I made a few with different sized curved pieces. I have seen some mosiac pages in scrapbook magazines that are composed of one inch (or two inch) squares of different photographs. I have yet to figure out how to get my photos to fit into those patterns, but I am watching.
7/06/2008
Six months of blogging, six years of scrapbooking
Blogging has made me think about my scrapbooking processes: not only what I do, but why I do it the way that I do. For six months I have posted my methods and described how I assembled some of my favorite pages.
Do I have more experiences to share ? Oh yes, I do. Out of my six years of scrapbooks, some of my favorite aspects of scrapbooking that I will describe next include:
Do I have more experiences to share ? Oh yes, I do. Out of my six years of scrapbooks, some of my favorite aspects of scrapbooking that I will describe next include:
- pages that feature mosaics of photographs.
- reworking and updating lay-outs.
- pages and scrapbooks of vintage photographs and "family trees." My mother's family and my husband's mother's family have photographs that date back into the 1880's for me to organize and scrapbook. We also have photos from our parents' pre-children lives.
- starting a scrapbook of my own "pre-children" life.
- scrapbooking our postage stamp collections.
- deciding what to scrapbook and when
- my topics for a 8x8 scrapbook rather than my usual 8 1/2 x 11 size.
As I spent this three day week-end cleaning and organizing my craft half of the laundry room, I also have given quite a bit of thought recently on these topics:
- tools that I bought and never used (or used once and twice and never again)
- organizing my paper supply
I'll post again soon as soon as I decide which topic to discuss next.
6/15/2008
Layouts with One Large Photo
Some photos tell enough of a story themselves that they can fill a scrapbook page alone with a title. This requires a print bigger than a 5x7, and making 8x10 enlargements is expensive, especially so I can try a design or a cut-out. I started using the enlargement feature on the photocopiers at Kinkos or Staples for "rough drafts" for these pages. A 4x6 is enlarged about 35% to fill most of a vertical page (portrait view) and almost 65% to a horizontal page (landscape view). Some photocopiers have a "photo" setting too. I make a regular copy first to make sure the sizing is correct before I make the more expensive color copy.
Then I discovered that for most pages, the enlarged photocopy was perfect enough even for my final page. I like a soft resolution, but if the original photo is not in focus, the large photo becomes "too soft." I now have a photocopier that makes great copies, but ink prices are an issue, so I usually still head to Staples.
Then I discovered that for most pages, the enlarged photocopy was perfect enough even for my final page. I like a soft resolution, but if the original photo is not in focus, the large photo becomes "too soft." I now have a photocopier that makes great copies, but ink prices are an issue, so I usually still head to Staples.
6/08/2008
Copying Scrapbook Pages
After finishing a scrapbook page, it may fit into more than one of my scrapbooks. One page from a trip scrapbook may focus on one of my daughters, so I may want to put it in her own book too. My mother has her own scrapbook, and we send pages back and forth.
I do not want to totally re-make the page, so what to do ? Scanning and printing is one option, but it can get expensive. I have found great results with the color photocopier service at Staples or Kinkos. I especially like the self-service centers. Usually there is heavier weight acid-free paper available. The quality is excellent.
If I know in advance that I will be copying the page, I will buy and extra set of embellishments to put on the copy for the "3D" look that I like.
Copying someone's design is "scrap-lifting," an entirely different process. Most magazines have a section with design suggestions.
5/30/2008
I love my sharp little scissors.
Literally cutting images out of photos is one of my favorite techniques. Cutting away the background allows the image, usually a person, to stand out. With big photos, the background is big too, and so are any distractions in the background.
I have my favorite pair of "Bumblebee" brand cutting scissors. To cut an image out, it is best to keep the scissors relatively still and move and turn the photo. Practice makes perferct. Hair is really hard.
I do not totally cut people out of the photo, but leave some of one side or the bottom of the photo. Otherwise the people seem to be floating on the page, and I have not had a page layout yet for floating people.
I photgraph and cut out a lot of signs for titles and embellishments.
5/12/2008
"Through the years" pages
Assembling pages of related photos taken in different years are a great use of duplicate photos, especially favorites. It does not matter if some of them are repeats from other pages if they make me smile. Sometimes a lovely photo that does not fit anywhere will find a place in this type of page.
I love assembling a page of my daughters cuddling together as infants, toddlers, tweens, and young adults. I made several pages.
Other photos to group for a "through the ages" page:
I love assembling a page of my daughters cuddling together as infants, toddlers, tweens, and young adults. I made several pages.
Other photos to group for a "through the ages" page:
- Girls of all ages in increasingly stylish Easter dresses.
- Girls curled up with a good book as they grew up.
- Girls napping in interesting places from high chairs to airports.
- Girls on amusement park kiddie rides to roller coasters.
- Girls on the first day of school, increasingly tall and "cool."
- Girls on increasingly large and fast horses.
4/30/2008
Evolving Scrapbook Pages
Some rare pages I love as I assemble them, love as soon as they are completed, and love everytime that I look at them in my scrapbooks. These rare pages are (usually) finished forever.
Part of my fun with my scrapbook hobby is that my scrapbook pages usually evolve over time, a little or a lot. As I look over my pages, I can have new ideas for titles, captions, text, and journaling.
I may have found a new embellishment or another photo to work into the layout.
Inspiration for the text often eludes me, and my pages often have room in their layouts to work in some journaling when (if) inspiration does occur.
A page that seems dated or "off" becomes a target for renovation. Many of my old alphabet sticker captions are being replaced with printed Word titles throughout my scrapbooks.
While I fuss over most pages until they are "good enough" to put in the scrapbook, some pages I just know will be re-done "someday" when I find a better background paper ........or a better idea.
4/26/2008
"Then and Now" pages
Some of my favorite scrapbook pages are my "then and now" pages -- pages that highlight people at the same place in different years.
These photos could be taken intentionally (that my daughters have learned to tolerate) or total surprises while sorting photos.
I love making these scrapbook pages. In looking at my collection, I discovered that I use three basic layouts:
These photos could be taken intentionally (that my daughters have learned to tolerate) or total surprises while sorting photos.
I love making these scrapbook pages. In looking at my collection, I discovered that I use three basic layouts:
- two photos the same size
- a collage of several photos
- one larger photo and a second accent photo -- either the older or the more recent photo works well as the larger photo -- sometimes the quality of the photos.
Great topics for "then and now" comparisons include people:
- at the same vacation spot at the beach, Disney, cottage, skiing
- with the same Disney character -- even Mickey changes over the years
- on the first day of school, especially the same school
- visiting Santa -- one child through the year -- or several children at the same age
- graduation photos of gramma, mom, and daughter
- in their Halloween costumes through the years
- in different hairstyles
- returning to a childhood home or neighborhood
- with all the babies who used a family highchair or baby bouncer.
My absolutely favorite scrapbook pages are those that highlight family similarities. I matched childhood photos of my daughters to childhood photos of me that my mother gave me. We are doing almost the same thing in the same pose at almost the same age, but thirty-ish years apart. Total co-incidence !
4/13/2008
Organizing photos
My photos are the focus of my scrapbooks.
Keeping my photos organized -- in the camera, the computer, and print envelopes neatly filed in my photo box files -- keeps production of my scrapbooks smooth and fun.
While assembling a collage of my daughter Anna at Disney, I spent most of my time looking in files and places that were not my Disney, Anna, or best Disney files. "Summer 2004" was not the best label.
So, my past two weeks have been devoted to photo organizaiton. I have been looking at three years of files, renaming some, and dividing some others on my PC. Plus I did a back-up !
I enjoyed sorting and filing many envelopes of prints that had migrated through-out my house.
Rumaging through several years of photos was fun. I enjoyed reviewing some very happy memories, and I thought of some brand new page ideas.
Keeping my photos organized -- in the camera, the computer, and print envelopes neatly filed in my photo box files -- keeps production of my scrapbooks smooth and fun.
- I try to download my photos soon after every event, do basic edits, and make prints to share and put in my future pages file.
- I use Picassa, downloaded free from Google, for my basic editing and filing, and I use Photoshop Elements, not free but worth the money, for my serious photo restoring and artistic manipulation.
- I send my prints to my nearby Walgreens and can pick up a batch in an hour.
- I keep files organized by event in my PC and my photo boxes. I also put original and print copies in files for special subjects -- great photos of each of my daughters get their own file, my favorite Disney photos have a file, and cousin shots, best Christmas, cake shots, Halloween costumes, grandparent shots have .
While assembling a collage of my daughter Anna at Disney, I spent most of my time looking in files and places that were not my Disney, Anna, or best Disney files. "Summer 2004" was not the best label.
So, my past two weeks have been devoted to photo organizaiton. I have been looking at three years of files, renaming some, and dividing some others on my PC. Plus I did a back-up !
I enjoyed sorting and filing many envelopes of prints that had migrated through-out my house.
Rumaging through several years of photos was fun. I enjoyed reviewing some very happy memories, and I thought of some brand new page ideas.
3/22/2008
My Favorite Fonts
Fonts are styles of type. I love using different styles to convey different moods and emotions.
I spent time working for my father in his typesetting business that set the type for advertisements and brochures. I was fascinated by the choice of different styles of typefaces with different ads.
Besides the fonts that come with my Word program, I browse http://www.fontface.com/ and the shopping section of http://www.creativekeepsakes.com/ for ideas and downloads. Fontface has the most free fonts. The variety on both sites can be both fun and overwhelming.
Although I have some favorite fonts for titles and captions, I try to use a very wide variety of fonts, some used only once to fit a specific page.
While many scrapbookers handwrite their text boxes and journaling, I prefer to type. I have several favorite fonts that I use frequently because they are readable and resemble hand lettering. I probably use "Bradley Hand" most frequently. "Comic Sans" and "Andy" are good for informal and children's pages. "Papyrus" is a little exotic but quite readable. Two or three yers ago I bought a Creative Keepsakes CD of 30 elegant fonts "for special occassion" that work well for many narratives.
3/10/2008
Using panoramic photos
It's obvious that panoramic shots are perfect to capture beautiful horizons or tall buildings. Now that many digital cameras have a panoramic setting, it is easy to experiment with panoramas of unlikely settings -- a person, a group, or a crowd. A panoramic photo makes a great border for a 8 1/2 x 11 scrapbook layout because it can be trimmed to fit edge to edge. The wide perspective of the panoramic makes a great companion for a close-up or a journal entry (or both).
A panoramic setting is the best way to get a large image of an entire people (head to toe) within some of the surroundings. With regular settings, an image of an entire person is dwarfed by the surroundings.
A panoramic setting is the best way to get a large image of an entire people (head to toe) within some of the surroundings. With regular settings, an image of an entire person is dwarfed by the surroundings.
2/25/2008
Practical is not Always Simple
As a practical scrapbooker, I prefer simple uncluttered scrapbook layouts.
Most of my scrapbook pages have a solid background, three or four matted photos or elements that flow from upper left to lower right, with geometric borders, captions that work as titles and few embellishments. I buy lots of embellishments, but use a strategic few to avoid looking cluttered or fussy, From that simple formula, I have created many different scrapbook pages that do not look simple.
Some energetic photos and events, however just demand busier layouts. I have no formula for my busy pages; they are all different, but in general if I use a brightly patterned background scrapbook paper, I try to use double mats and fewer photos.
I have fun making these busy pages, but not too often.
2/22/2008
Greeting Cards in Scrapbook Pages
Greeting cards are often too cute, funny, beautiful, memorable, or touching to throw out.
Putting my favorite greeting cards in a scrapbook layout is much preferred to storing them in a drawer or a box.
Displaying both the cover and the inside is solved by cutting along the card's fold. The inside sentiment and signature can have extra way be cropped smaller. If there is print on the inside cover, then the photocopier comes to the rescue.
Photocopying the back of postcards and gift tags also makes them good scrapbook elements.
- All the pieces of the deconstructed greeting card can be used as elements in a scrapbook layout.
- Remember to use matting, especially for the white inside sentiment.
- It works well to include a photo of the person who gave the card, especially for holiday, birthday, christening, or graduation parties.
- Titles and captions seem less necessary on greeting card pages.
Finally, images or quotes from greeting cards can be used as embellishments without including personalization or signatures.
2/10/2008
Creating Titles with Word
Most pages need a title, but not big type that stretches across the top of the page like a headline.
- Most of my titles are phrases or captions that fit somewhere within the layout. Some cute titles are stickers or die-cut designs I purchased and worked into the design.
- I have created some titles by using sticker letters. Sticker alphabets limit letter choices (can't use too many a's or e's) and aligning the stickers is pretty work intense, so using stickers keeps the titles short. Now I use stickers only for unique letters.
- Most of my titles and captions (well, and journalling too) are created with my Microsoft Word program that I use for my "regular" word processing. Word has features that I never used for my "regular" typing but are great for scrapbooking. I have seen and bought scrapbooking software, but for my text I always return to Word.
Word has great versatility in typeface (font), size, and color. The word toolbar shows the choices. Specialty fonts can be downloaded for free or purchase. My daughters introduced me to http://www.fontface.com/ that has its own free fonts (many of which are "look-alikes" of famous brands or logos) and has links to other sites. With so many free fonts, I have never bought a font. - After typing the title, then I try difficult sizes and fonts to match the style of the font to the style or mood of the page. A font size of 28 to 48 is a good start. Dividing the title into two or three lines often fits on the page better than one lone line. The top line can be in a bigger (or smaller) font size for emphasis. Some words can be bold, italics, or both for effect.
Other features to try
- The "Word Art" feature (found under insert, picture, word art) can produce some very weird or attractive titles, and it takes some practice.
- The border feature (found under format) can be put a border around a title, text, or caption.
- The title can be printed in black or color on cardstock or clear sticker paper and then attached to a scrapbook page. Sometimes I print directly on the scrapbook page, but alignment can be tough.
Experimentation is easy with Word, and my first choices of font, color, size are rarely my final choice.
2/07/2008
Buying Paper
My new job is an easy stroll from a JoAnn's during my lunch time. Browsing Joann's scrapbook supply aisles is always fun, but today was a paper sale: fun and dangerous. A practical scrapbooker like me knows that solids and simple tonal patterns make layouts easy, but many pretty patterned papers are so tempting to buy.
I know that if I buy pretty or dramatic patterned paper with a specific project in mind, the paper gets used in a layout. When I buy the pretty or dramatic patterned paper without a specific plan, I get to admire the paper for months or years in my paper filing cabinet (yes I have a filing cabinet for paper) without ever finding the inspiration. in my photos to actually use the paper on layouts.
At Joann's I found padded "Stacks" of Christmas paper at a large discount. Pads of solid cardstock are a great bargain because the colors are useable year and theme round. I can cut the 12x12 to 8 1/2 x 11 and use the extra for trim and mats. Pads of 4x6 cardstock is a great bargain too. Two easy purchases. My struggle is "The Stack" of assorted solids and prints, with solids and subtle prints, a few some prints I would never use, and so many adorable printed papers that I have no idea how to use as background for a layout. Does my filing cabinet need more paper ? But it's cute paper.........to buy or not to buy.......I'll decide during my lunch walk tomorrow.
1/30/2008
Text for travel scrapbook pages
When assembling a scrapbook about one trip I usually include the month and year on the cover. It's boring to include the date on every page, but I try to sprinkle dated receipts, programs, and pamphlets throughout the pages.
It's also boring to identify every person on every page, especially when it's the same family group, but I have been surprised at how I have later misidentified a child in an unlabeled photo. Using people's names in titles and captions is helpful and less monotaneous than listing everyone.
Some people like to write about their experiences while travelling. They can write (save, and not lose) descriptive paragraphs while travelling or later write recollections or insightful summaries. Their handwritten, typed, or e-mailed travelogues can be copied or printed onto cardstock for inclusion into the scrapbook, either as a textbox or the main page itself with an embellishment.
There are some techniques to help those like me who do not write interesting or entertaining travel descriptions:
- ask people to save the postcards you send them, photocopy the message and mount with the picture side of the postcard
- print-out e-mails you send or receive along the trip
- print the itinerary in a large interesting typeface
- compose lists and print them in large interesting types faces
- collect quotes along the way and include them in the pages
- write down your impressions on menus, bills, programs, tickets as you collect them for later use on your pages
- assign children to write about their day, save their writings to include in pieces or whole.
- fill-out customer satisfaction forms in great detail, then don't turn the forms in.
There are many ways to fill in the details of a trip that are not told by the photos !
1/25/2008
What can I do with these photos ?
A practical scrapbooker can always put four cropped photos on a page with captions and mats to make a pretty page, but even a practical scrapbooker sometimes may want to put a little more drama or with their photos on a page.
Flipping through the pages of an actual scrapbooking magazine is a pleasant pastime that has given me ideas, inspiration, and some help. I enjoy magazines that have layouts and suggestions that are plausible to do if I had the time, supplies, and interest.
My two favorite scrapbooking magazines are Simple Scrapbooks and Scrapbooks Etc. I prefer the paper magazines to their websites that are very full and busy and a little overhwelming with ideas; but their websites are my favorite websites.
1/23/2008
Assembling the scrapbook into an album
After creating some pages, the scrapbook can be assembled.
- The pages need to be put in order and slipped "back to back" into page protectors. Facing pages need to be compatible but not matching. Often shuffling is necessary. I leave some blank colored cardstock for "future pages" that I may have in mind.
- Most of my scrapbooks are kept in 3-ring binders. The cover of the binder is larger than 8 1/2 x 12, so I trim a 12 x 12 piece of paper that will slip into the front "clear view" pocket. I create the cover and decorate the spines of the scrapbook.
You can buy 8 1/2 x 11 scrapbook albums of an expandable "post style" with pre-printed, fabric, or leather covers. I find shuffling and adding pages more difficult, so I use the post style scrapbook albums for completed projects that I do not expect to modify much in the future (but I could, and have, and will). I only did one scrapbook that was spiral bound -- too much pressure to have the pages and order correct from the start !
1/21/2008
What is matting photos ?
Matting photos is a way to put a colored margin around the photo to make it stand out from the background paper and also raise the photo a tiny bit to add some 3D dimension to the page. I mat. A lot:
- usually 1/8 or 1/16 of an inch looks good to my eye. Wider margins are good for writing a caption. Much wider margins can be very artistic. A slightly wider bottom margin helps "ground" the photo.
- Mat colors of white, grey, light blue, cream, and black seem to work best. 4x6 pads of neutral color cardstock papers are good staples. After cropping photos and selecting the background page color, try different colors to see which color seems to complement the photos and the background color.
- To actually mat the photo, adhere the photo (I use one photo adhesive square on the back of each corner) to the lower left of the mat, keeping the left and the lower margins equal. Then only the right and top margins need to be actually trimmed.
I use special matting is used less frequently to keep it "special:"
- Double matting a stacking a neutral color close in a thin margin close to the photo and a more vibrant wide color on the bottom.
- Asymmetrical matting of the left and top margins thinner than the wider right and bottom margins really frames photos that you want to be the center of attention.
- Very bright mat colors work with very bright photos and subject such as children's parties or Disney theme parks.
- Cropping photos square, matting in white, then trimming with "perforated edge" scissors creates the look of "vintage" 1950's and 1960's snapshots.
- Trimming mats with lacey or scalloped edge scissors creates a fantasy or princess look.
1/19/2008
What's that tool
Sometimes I know from the start that I want to add borders, graphics, embellishments, or other extras. Browsing scrapbook store supplies can provide a lot of inspiration or intimidation. Being intimidated sucks all the fun out of the hobby. I make small purchases. Individually owned stores provide a lot more personal attention and help, especially if you are feeling artistic. Using any technique too frequently makes pages seem gimicky or dated later on. Here are some supplies to investigate --
- decorative edge scissors -- use to trim the edges of photos, mats, or borders. I am partial to my "torn edge" or "jagged" scissors. I use scalloped and other patterns on occassion.
- stickers -- highly addicting, should enhance the page, not clutter it. it is ok to use just two off of a page.
- die cuts -- decorative paper shapes that you have to adhere yourself.
- ribbon -- for a border or a decoration. Some is self stick, others needs two sided tape to adhere it.
- corner punches -- my favorite is used rounds the corners, create dovetail corners, or intricate lacey patterns for paper corners.
- shape punches -- for decorations -- I often find use a specific punch for a specific page once, then never again.
- equipment that cuts photos into ovals and circles should be tested first to see if you find it as easy as advertised. After lots of searching, I love my Creative Memories brand cutting system. The only shape I use with any frequency is the oval. I find circles hard to use.
Only use the tools and techniques that are simple and fun for you !
1/18/2008
Text -- Titles, captions, and "journalling"
The amount of my text on the scrapbook page -- titles, captions, and "journalling" varies from page to page. Text can be placed directly on the scrapbook page or created on separate paper, cropped, then applied to the page. More and more frequently I use the "create it separately" method to create my scrapbook text because that method is more flexible and forgiving.
Text can be created by hand writing, word processing, applying alphabet letters, using stickers or die cuts, photocopying or downloading descriptions, photocopying the message sections of postcards, printing out e-mail, copying letters, painting, embossing, and probably more ways.
My handwriting is almost never lovely enough for me when I use a marker to write a caption. I prefer word processing, especially the ability to try different fonts, colors, wording, spacing, and sizes before I adhere the final version to my scrapbook page.
I use my standard Microsoft Office Word program -- it has so many features useful for scrapbooking -- few of which I ever used while typing my reports for work or school. With word and my color printer I happily can create most of my text.
I use alphabet stickers to create titles or captions only when the stickers are so unique that I can't resist or when I can't easily re-create the style or patterns with Word. My daughter loves Photoshop Elements for creating elaborate titles, but so far I only use it for special photo editing projects.
Scrapbook stores have abundant supplies of cute, touching, witty, elegant, historical, whimsical, and topical captions with matching graphics. Each store often has a different selection. Browsing the selection for inspiration is a favorite pastime.
1/16/2008
Mixing photos and souvenirs
Mixing pamphlets, handouts, brochures, maps, postcards, and tickets from our travels with photos on a scrapbook page helps to tell the story of your trip or event. Often one page or part of a brochure is best for visual impact or information sharing. I color photocopy it page onto white acid-fast scrapbook paper. Some ideas are
- A collage of tickets or a large menu on a scrapbook page may include only one photo to help personalize the otherwise impersonal paper items.
- A logo can be cut from a photocopied brochure or even a paper napkin (they often have cute logos printed on them) to use as an embellishment or decoration.
- Postcards often show views that the average tourist or traveller cannot take. A postcard can be cropped and used as one photo on a layout.
1/13/2008
Arranging photos on the scrapbook page
An easy to assemble scrapbook page holds one to four cropped photos. Moving the photos around the page and leaving "some" space for text and title helps me decide which layout arrangement looks best. No lay-out is "wrong," but some arrangements do look "better."
Some pages may need a lot of space for a lot of explanation or story. For some pages brief captions or dates are enough. The more text, the fewer photos will fit comfortably on the page. I rarely write long journal entries and prefer to "stick to the facts," often from a humerous perspective. Only a few pages of my pages seem to need a big title across the top. Here are some of my favorite layout basics:
Some pages may need a lot of space for a lot of explanation or story. For some pages brief captions or dates are enough. The more text, the fewer photos will fit comfortably on the page. I rarely write long journal entries and prefer to "stick to the facts," often from a humerous perspective. Only a few pages of my pages seem to need a big title across the top. Here are some of my favorite layout basics:
- In general a layout looks "correct" when photos seem to flow on a diagonal along the page from the upper left to the lower right. That leaves space in the upper right (and sometimes lower left) for text.
- Many photos look better against the edge of the scrapbook page, and others look better with the scrapbook page serving as a border.
- If you have a photo with sky, it often looks best flush against the top edge of the scrapbook page, so no color shows between the edge of the sky and the edge of the page.
- Similarly, if you have a photo with half a head, tree, or building on one side, put it flush against the page edge.
- Some photos look better "grounded" against the bottom edge.
- You may need to crop some more (small slices at a time !) so the photos fit on the page and the areas around the photos be uniformly spaced.
1/12/2008
Selecting a page color
Comparing a group of photos on different colored papers helps decide which page color makes the photos "pop" off the page. Solid colors or subtle patterns are easiest. I avoid "matching" the photos to page color because they will blend together too much.
If there is a small interesting item with a distinctive color in the photos, try that distinctive color as the page color. The color of a shirt, sign, flower or sneakers may be a color choice. Try a page color that is complementary to the main color in your photos. Complentary (or contrasting) color pairs include shades of green/red, yellow/blue, green/purple, and blue/orange. You can search for a "color wheel" of 12 colors ito download to use as a guide.
If there is a small interesting item with a distinctive color in the photos, try that distinctive color as the page color. The color of a shirt, sign, flower or sneakers may be a color choice. Try a page color that is complementary to the main color in your photos. Complentary (or contrasting) color pairs include shades of green/red, yellow/blue, green/purple, and blue/orange. You can search for a "color wheel" of 12 colors ito download to use as a guide.
1/09/2008
Cropping / trimming existing photos
Placing a blank piece of paper to cover the sides of a photo can give you some idea of what the photo will look like after parts have been cropped / trimmed / cut off. The final photo should be a nice rectangle or square photo that has the subject of the photo about one third up the photo. Very tall and narrow photos or very long and short photos should be used sparingly. A panoramic photo can be trimmed to 8 1/2 x 4 to create a page border.
To crop / trim a photo, position it against the top of the paper cutter / trimmer to trim a thin slice off the selected side with the blade. Reposition and take thin slices off any other sides. Taking several thin slices gives you more ability to adjust your result.
While arranging the photos on their page, some additional trims can be made.
It is very easy to get too enthusiastic about cropping photos and take out too much background, chop off an important person or item, or make the photo too small. It's essential to enjoy cropping, but not get carried away.
1/08/2008
Cropping is cutting or trimming photos
Cropping existing photos is best done with a paper cutter/trimmer and removing thin slices from the edges. Cutting is permanent! There are so many computer programs that crop and correct digital or scanned photos. It is not practical to scan, correct, enhance, crop, and reprint in various sizes all my photos from the pre-digital days. The photos that are worth the full digital treatment are collected a day devoted to scanning, Picassa, and Photoshop Elements. I never physically cut a "priceless" photo. I scan it and work on the copy. For most existing photos, physical cropping will improve them by trimming to
- remove patches of bad lighting
- eliminate unnecessary clutter
- remove a distracting building, head, sign, or pedestrian at the side or corner
- remove sky, grass, beach, or pavement that overwhelms the subject
- put horizons at a line one third or two thirds across the photo (never across the middle)
- make several photos small enough to all fit on a page.
Sometimes I group photos for a page, then crop them. Sometimes I crop a whole stack of photos and then select the groups for each page. Sometimes I flip between the two strategies.
1/06/2008
From a stack of photos to first draft
After buying the basic supplies for your scrapbook, it's time to start sorting and placing the photos on each page to create a first draft of your scrapbook. Place each piece of colored cardstock into a page protector and put it into the 3 ring binder. At this point, the order of the colors does not matter. Then it's time to deal with the stack of photos that you selected for this scrapbook. The general process is:
- Cropping each photo with the paper cutter / trimmer: your photos will end up different sized rectangles and squares. That’s quite fine. More about cropping later on.
- Placing the photos in chronological order for the "story" that the scrapbook will tell.
- Grouping photos that belong together on each page.
- Selecting a background color for each set of photos for each page.
- Placing the photos into a page protector with your selected color. Don’t use both sides of the cardstock, because it becomes too hard to shuffle and re-order the pages. Don't worry about arranging the photos on the page yet.
- Putting the page protectors back in the binder in the correct order.
Now you have your photos on their pages in the correct order for your first draft. Go back and flip through the pages. Is the order correct to tell the story you want to tell?
Full page memorabilia is put in their own page protectors and inserted into the binder at the correct point to tell your story. If any memorabilia or document is priceless I make a color photocopy.
For smaller pieces of memorabilia, they and background piece of cardstock go in the proper place in the binder. I like to mix smaller photos and paper keepsakes on the same page, especially a photo that includes the item and a person.
Now the first draft of your scrapbook is done !
1/03/2008
What scrapbook supplies to buy ?
My basic scrapbook style is photos and other "elements" ("things") mounted on 8 1/2 by 11 (standard size) paper in 3 ring binders. This is a classic (old-fashioned) and very versatile style for practical scrapbookers. My tween daughter loves newer and trendy 12 x 12 paper for her very artistic pages. I find 12 x 12 harder to use because I print some titles and text directly on the page, and 8 1/2 by 11 fits in the printer and 12 x 12 paper requires its own special printer. I have made some 8 x 8 scrapbooks of single events.
Basic "starter" supplies can be bought at large chains such as Target, Joann Fabrics, AC Moore, Michaels, some KMarts, and even some CVS stores. I do not buy basic items on-line unless I have seen the them in person first. For some items there are better selections and prices at office supply stores. Local scrapbook stores tend to be more artistic, and I use them for embellishments (decorations), unique papers, and special tools.
Scrapbookers need paper, specifically "acid-fast," so no construction paper or printer paper.
To start, buy packages of SOLID colored paper labelled "card stock" or scrapbook paper:
- one package of blues
- one package of neutrals
- one package of colors that suits your fancy and your scrapbook event or topic -- jewel tones, pastels, browns, or brights.
There is a bewildering assortment of a la cart papers. Buying and accumulating too much pretty paper for a future undefined project is a real risk. Simpler paper is easier to work than patterned paper. I usually avoid "stacks" of assorted papers because I end up not using a sizable amount. I do buy a "stack" of neutral 4 x 6 cardstock to mat photos.
A large package of 8 1/2 x 11 page protectors is necessary so each piece of paper goes into a page protector in a 3 ring binder as the "working" scrapbook. The one inch size binder is easy to handle. Some have a clear front sleeve for inserting a title page. Pages can be re-arranged very easily.
A significant and important purchase is a paper trimmer /cutter to use for paper and photos. It is almost impossible to trim straight and square with scissors. The trimmer/ cutter should be sturdy, simple, and big enough to cut 12 inch paper. I use an office style.
The final item is appropriate adhesive. I find 1/2 inch square adhesive "photo squares" the simplest to use. They come on a roll of 250 or 500 or 750, and there are several brands. Just one is good for tacking. The "repositionable" ones are handy in case you need to reposition.
I try to avoid the cute titles, stickers, letters, trims, ribbons, pens, and punches without a specific project in mind, but they can be hard to resist. The basic supply list is:
- packs of solid card stock
- page protectors
- a 3 ring binder
- adhesive squares
- a page trimmer
1/02/2008
What to scrapbook ?
Deciding "what to do" can be a hurdle when starting a scrapbook. One approach is to pick a topic, then search for the photos and mementos or other material that fit the topic. Another approach is to select a stack of photos and then scrapbook them. Broad topics such as "everything my child has ever done" or "all my world travels" easily become overwhelming. It's possible that several albums will eventually accomplish such a big goal, but it is easier to think simple: one event: a grade, party, holiday, service, or trip.
It is tempting to try to organize ALL the photos and then scrapbook. That's a decision to never scrapbook, because all the photos will never be organized. Scrapbooking a pile of photos is one less pile to file away. While looking through photos, I collect all photos of a topic in its own stack: cat or car or beach house or boat or Halloween photos. Collecting photos for a topical scrapbook album is rarely an afternoon or weekend activity.
I started my first scrapbook in 2001. So far I have (in no particular order) scrapbooks of :
- our trips to Disney World in one scrapbook, starting with my first trip to WDW in high school in 1974. Mickey Mouse evolves and my kids grow through this scrapbook.
- our trip to Washington DC with our parents for the opening of the World War II Memorial includes photos, programs, articles about the opening, and some of my step-dad's WWII photos.
- trips to Washington DC including our 2003 family trip, some 20 year ago day trips, a 1995 Girl Scout trip, and some historic postcards I collected along the way.
- our 2004 family trip to Montreal with my parents that includes photos from my childhood there for comparison.
- our 2005 family trip to Ireland
- trips to California in 2005 and before.
- my college daughter's trip to Costa Rica and her trip to China. She's an artistic soul and a writer, but she cannot get herself interested in scrapbooking. She gave me her photos with post-it notes on the back and miscellaneous ticket stubs and pamphlets. I printed her e-mails on colored paper to use as her travelogue.
- birth to high school scrapbook and and then high school scrapbook for each of my daughters. These scrapbooks expand as I find photos and "stuff" and get bright ideas.
My "theme" scrapsbooks are always expanding:
- all the cat photos I find, starting with my mother's cat "Duffy" in 1950, and including all the (sarcastic) greeting cards that our house cats cats have sent me.
- decades of "cute animal" photos taken at parks, zoos, forests, beaches, backyards, and fairs. It's popular when kids visit.
- decades of "cake" photos from birthday parties, weddings, showers, and graduations along with photos of many people blowing out candles. My step-dad has never seen a cake that did not deserve its own photo, usually taken from above while standing on a chair.
- Santa, Christmas tree, and Christmas morning photos starting with my parent's childhood with a smattering of Christmas cards over the years.
- "then-and-now" photos of different generations doing the same activity.
1/01/2008
Happy New Year
My blog is for anyone else who wants to
- keep a New Year's Resolution to "do something" with your photos and paper mementos ?
- use your photos to show the history of your family, relationship, children, pet, travels, events ?
- rescue photos from dreary magnetic photo albums ?
- focus on your photos and their story ?
- display photos in a visually pleasing documentary style ?
Scrapbooks help me feel creative, productive, and happy. My kids and family spontaneously pick up the albums to recall past memories and share them. My tween daughter has even shown them to her friends. I have some graphic arts experiences and talents that I like to channel through my pages, but my focus has always been on telling our stories through our photos in our scrapbooks. As I have browsed through many scrapbook stores, websites, and magazines, even I have been a little intimidated by the focus on the "art" of scrapbooking. My style of scrapbooking is good for people who don't want
- complicated artistic processes
- large investments in supplies (although there will be a shopping list)
- a close relationship with a consultant / seller of supplies
- feeling intimidated by racks of expensive paper, albulms, stickers, and tools.
I hope that you enjoy revisiting your happy memories through scrapbooks too.
Subscribe to:
Posts (Atom)
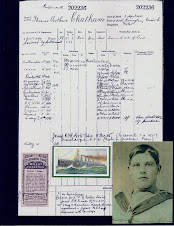


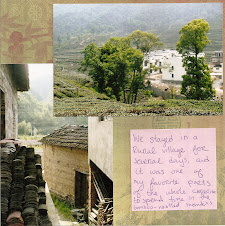


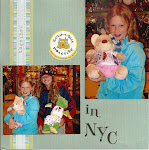
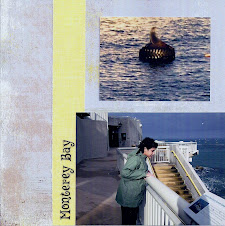
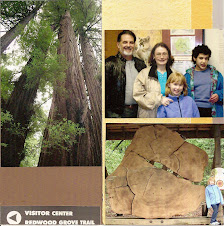
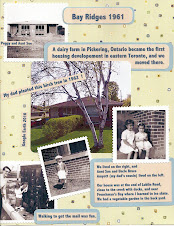
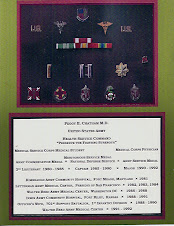

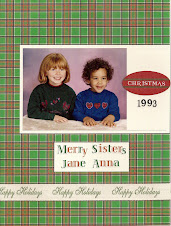
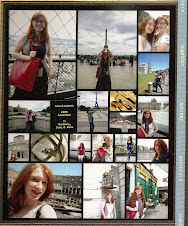


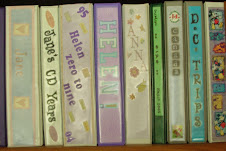
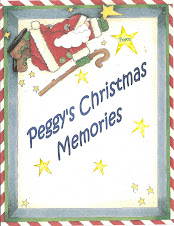

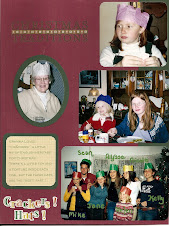
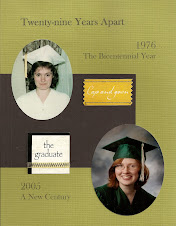

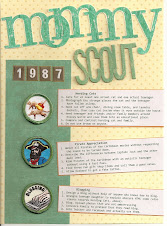


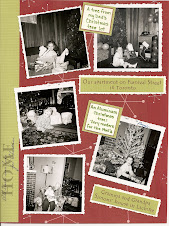
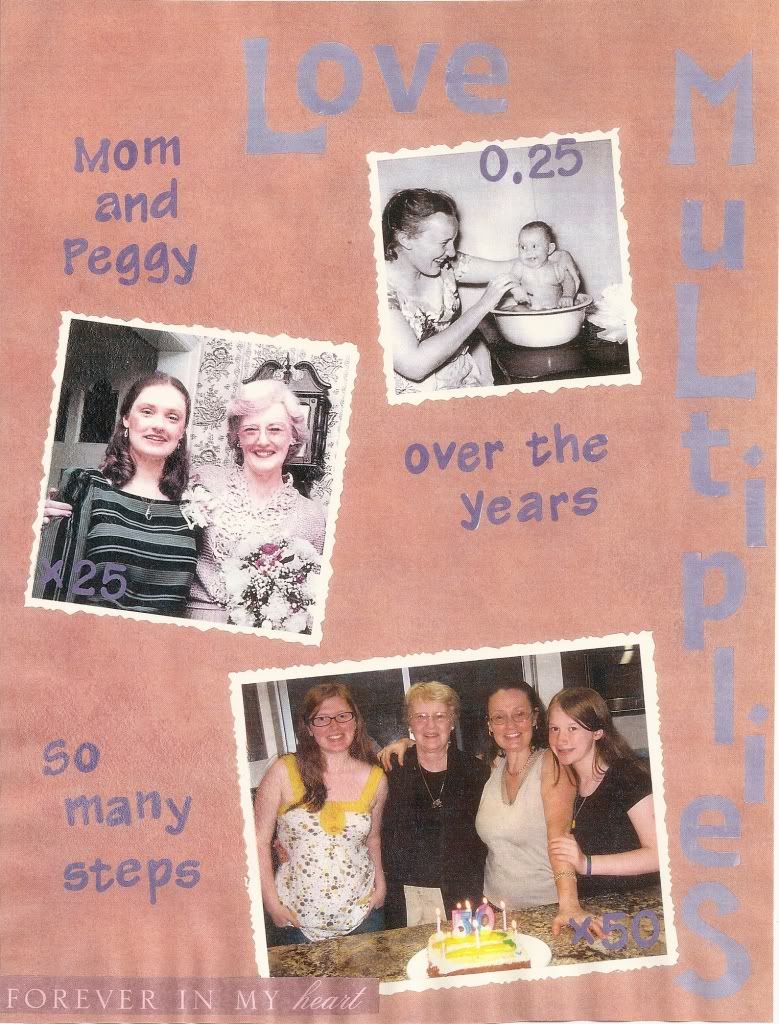
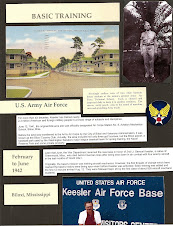
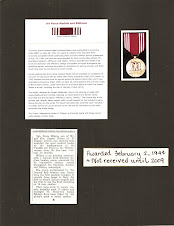
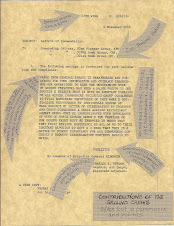
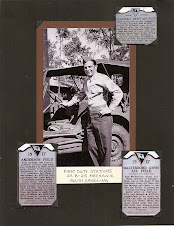

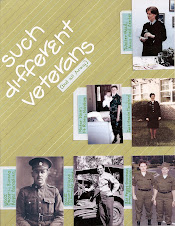


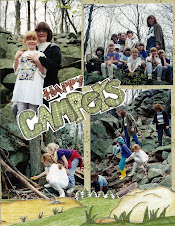

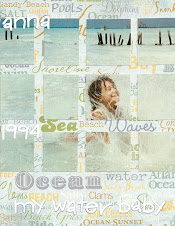
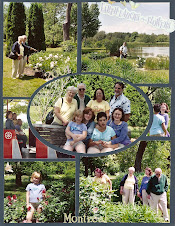
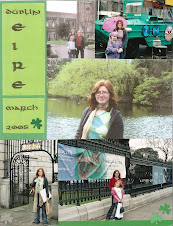

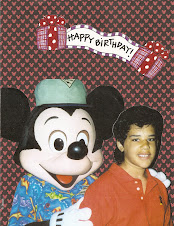


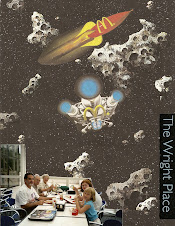


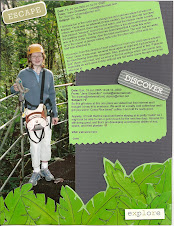

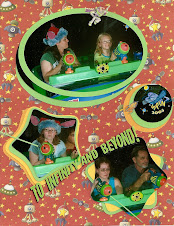
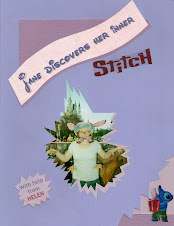


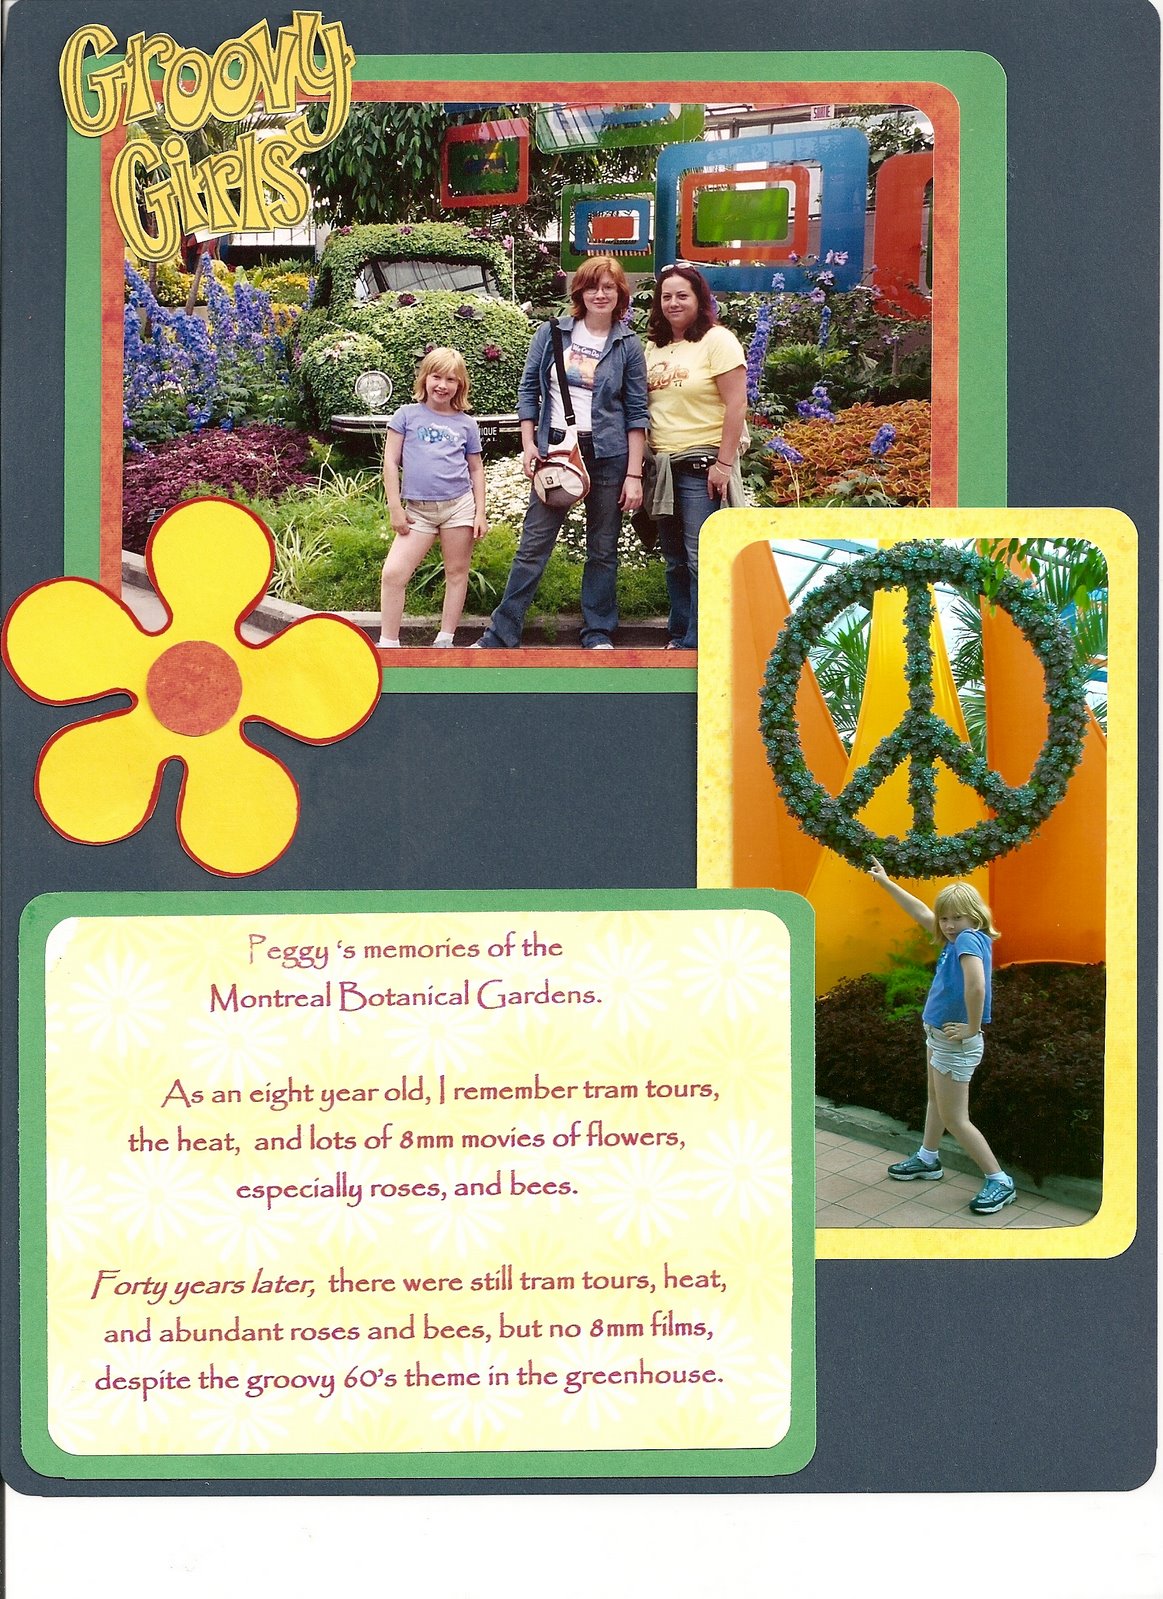
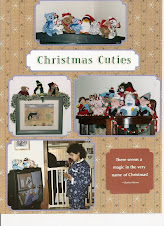
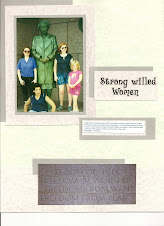
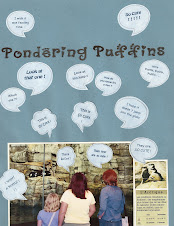

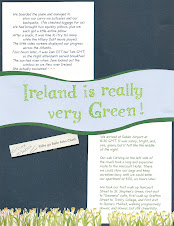

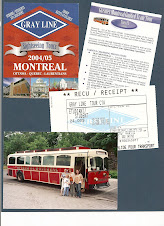
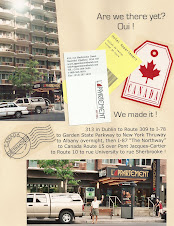
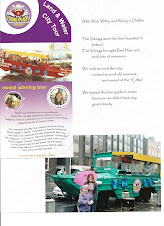
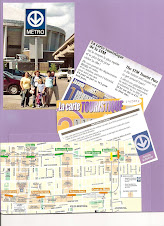


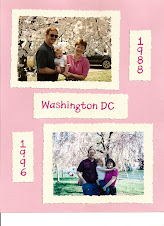


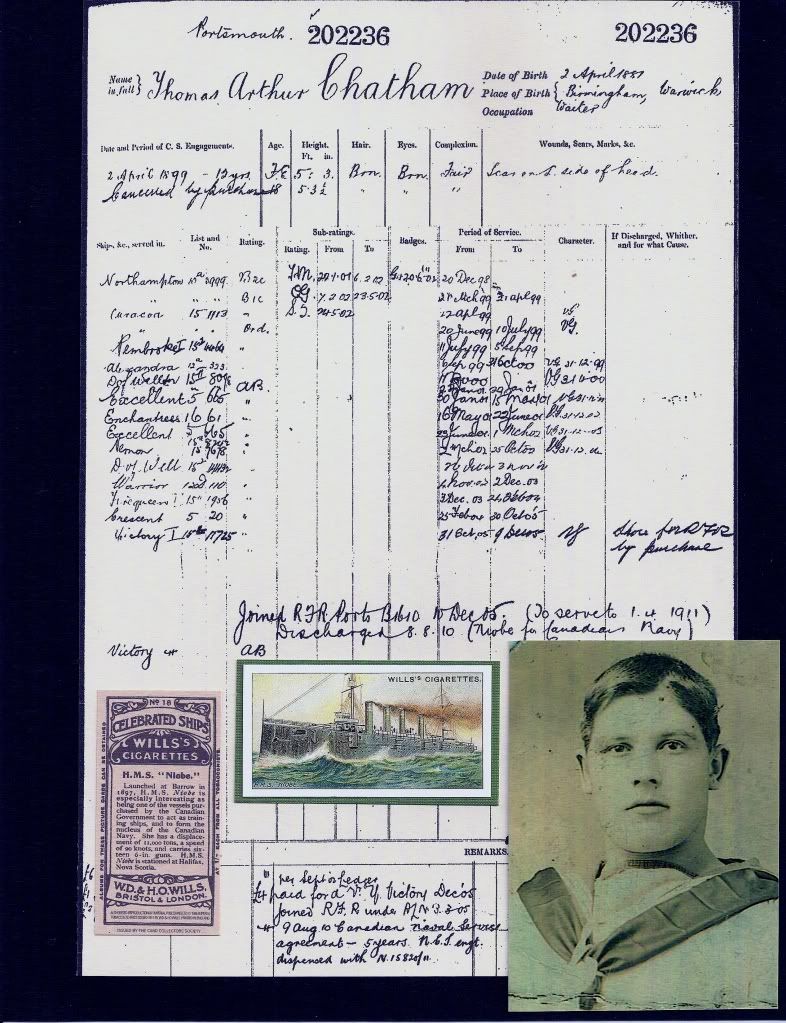
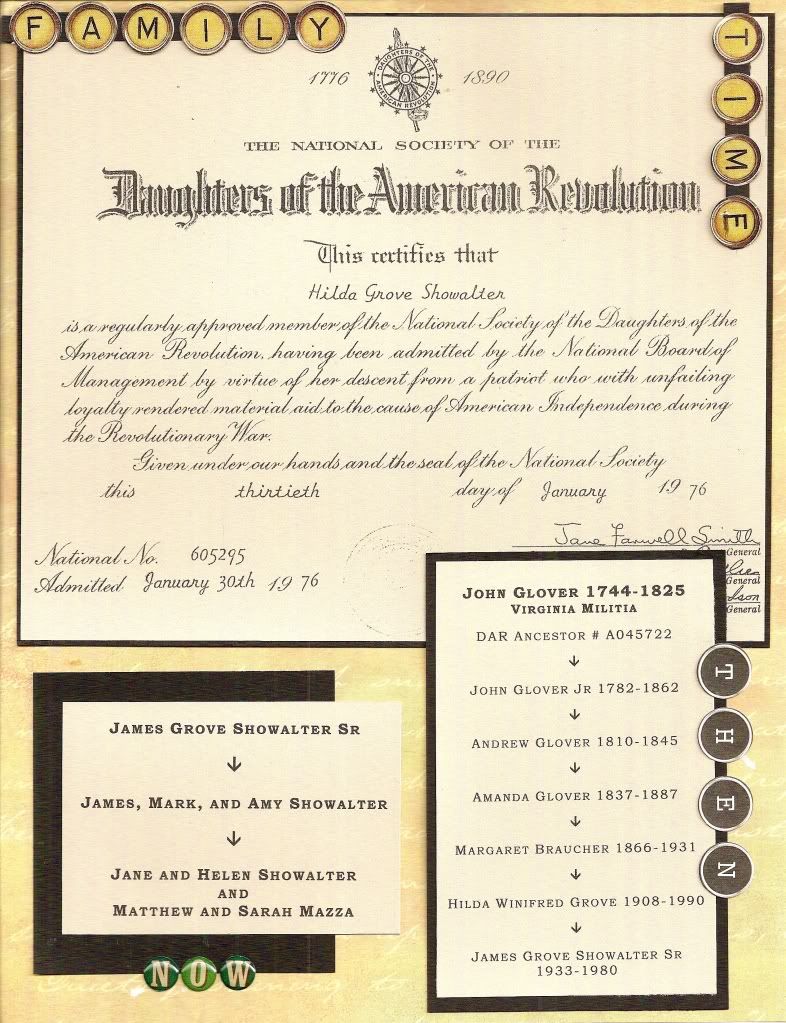
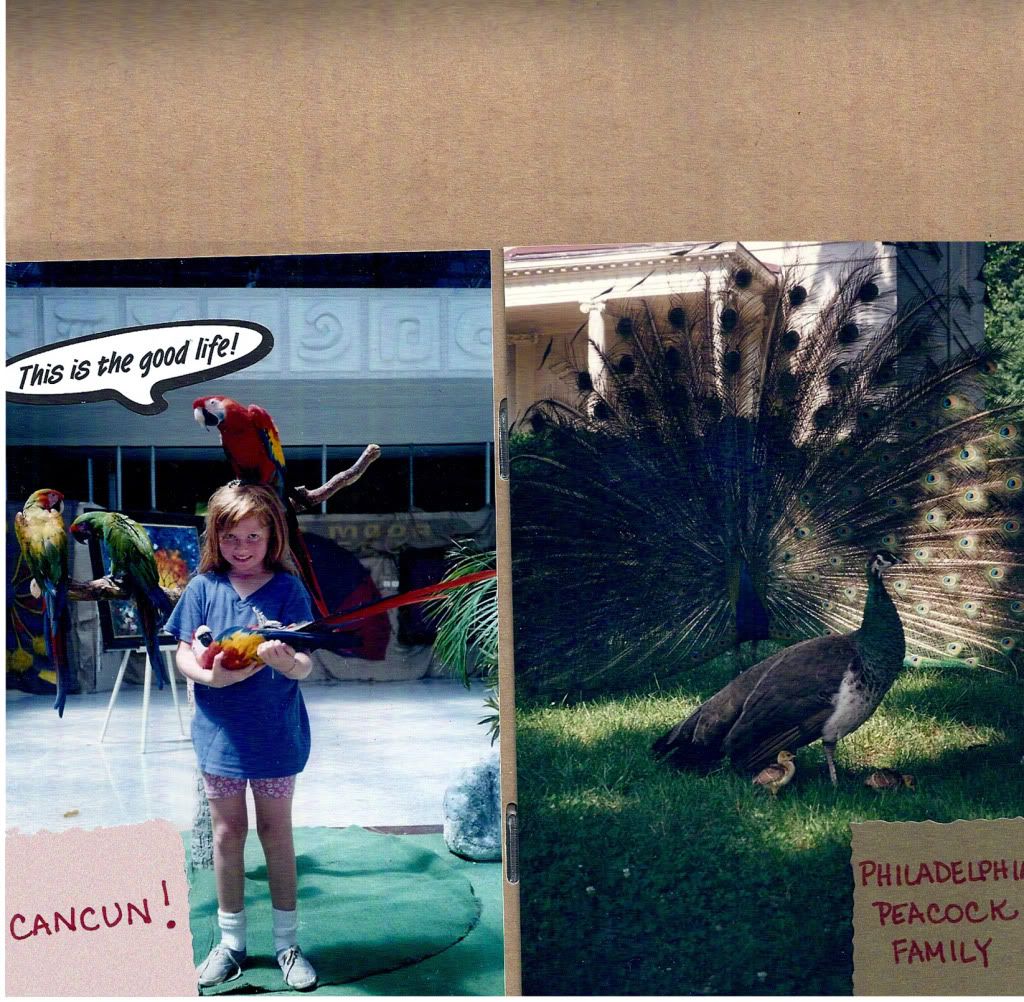
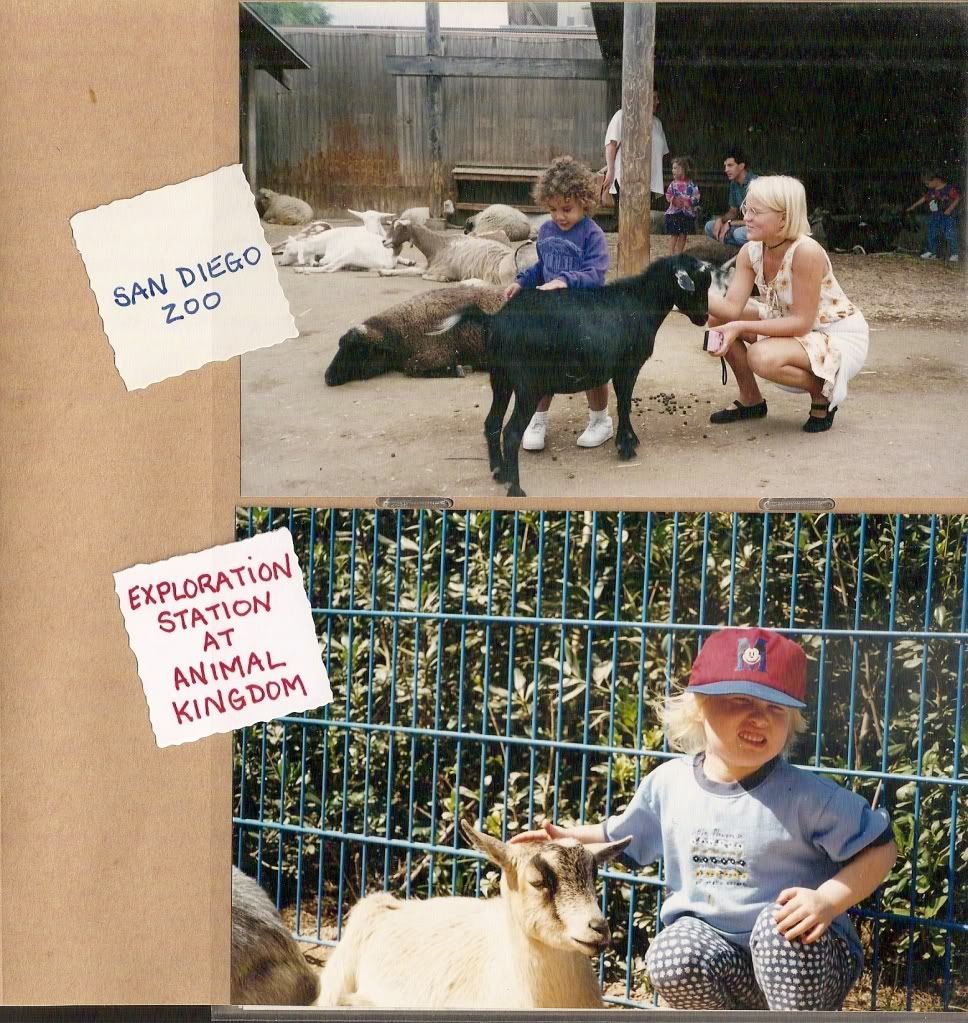
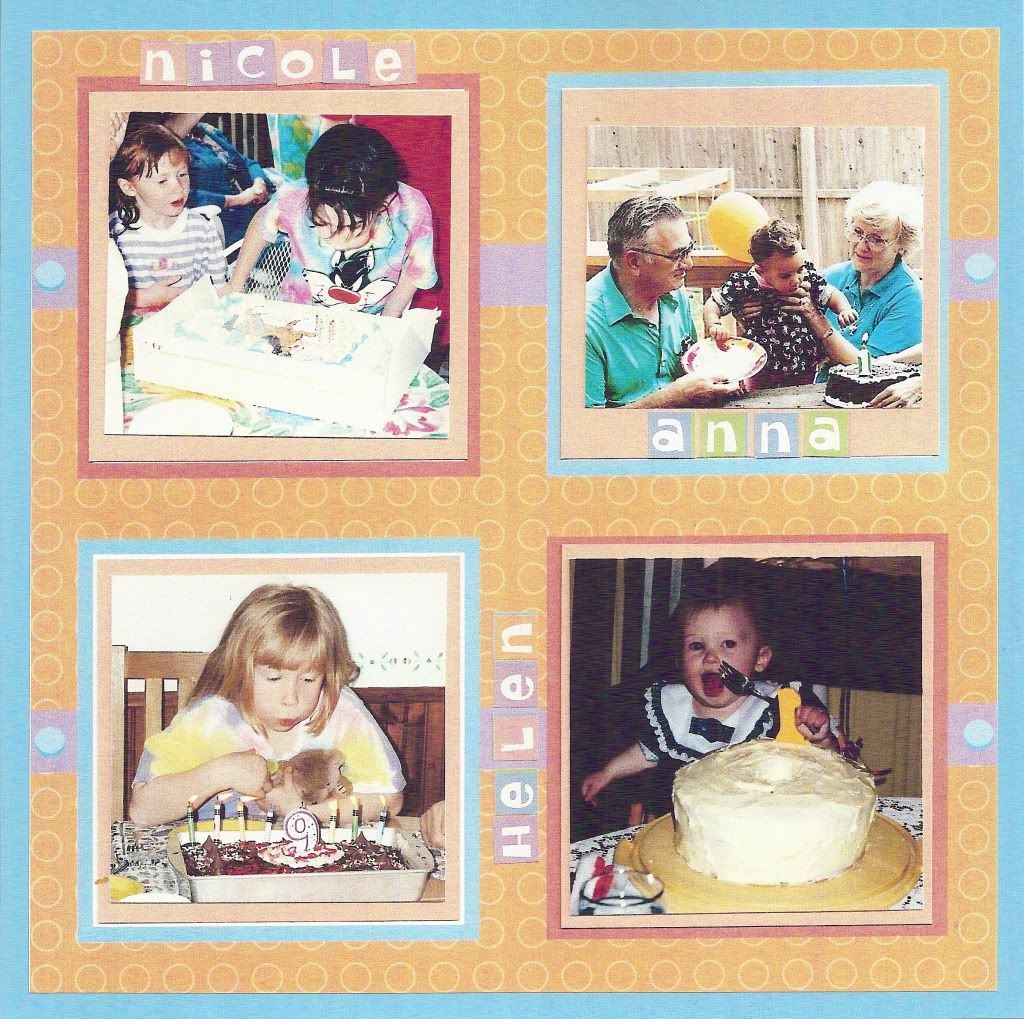
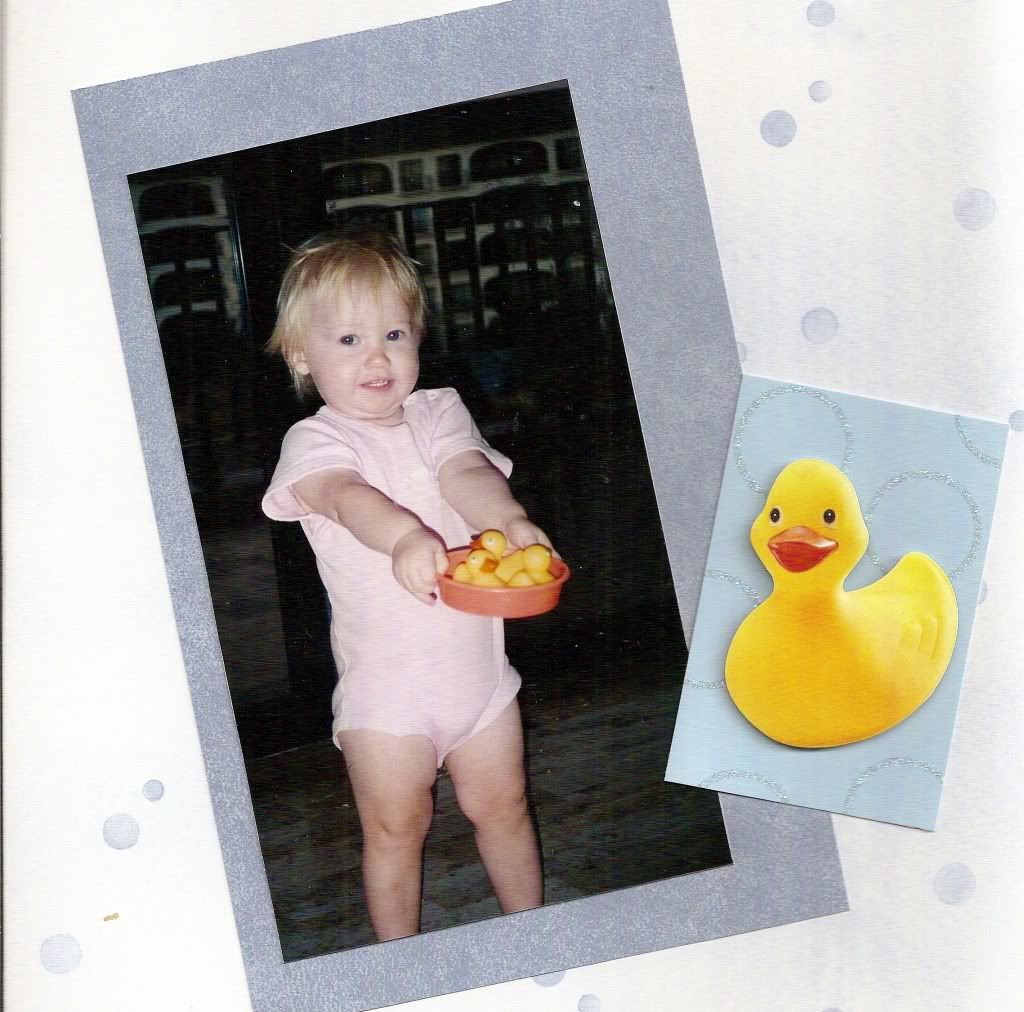
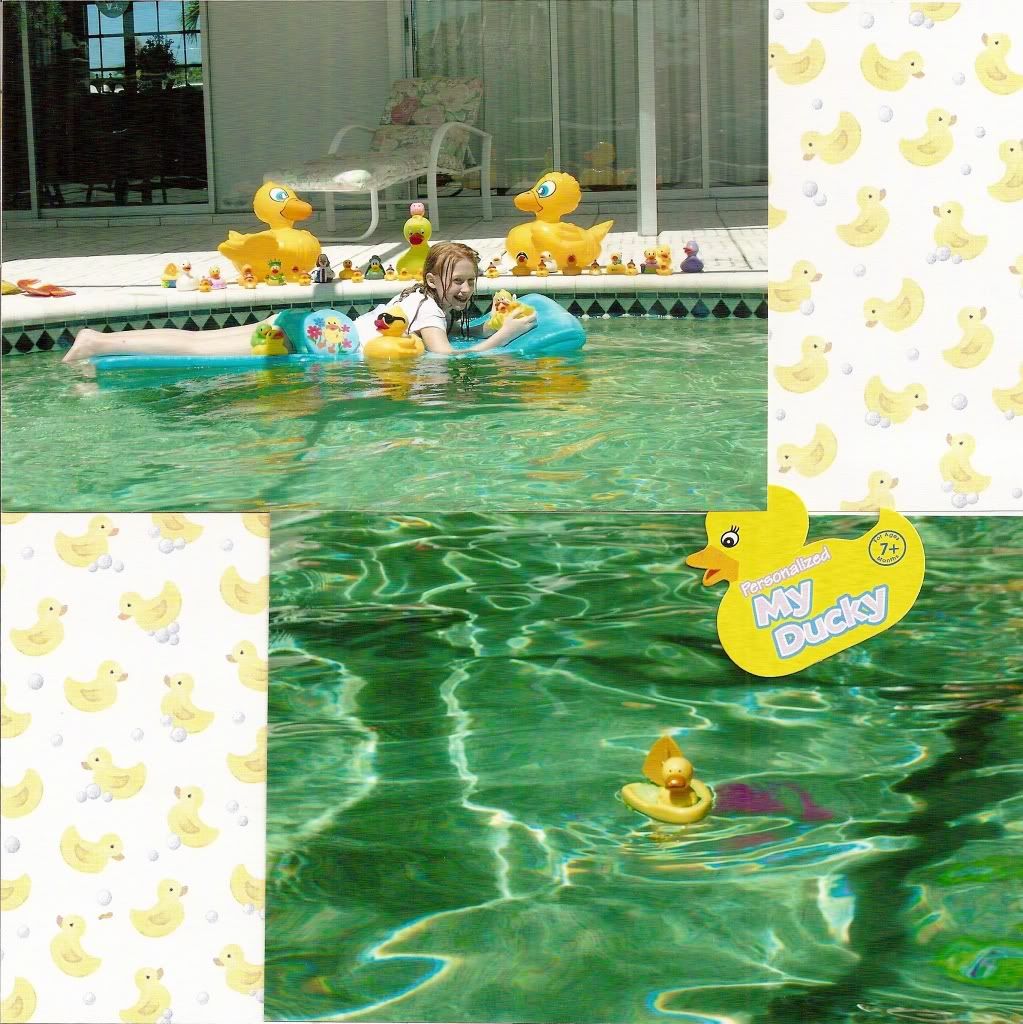
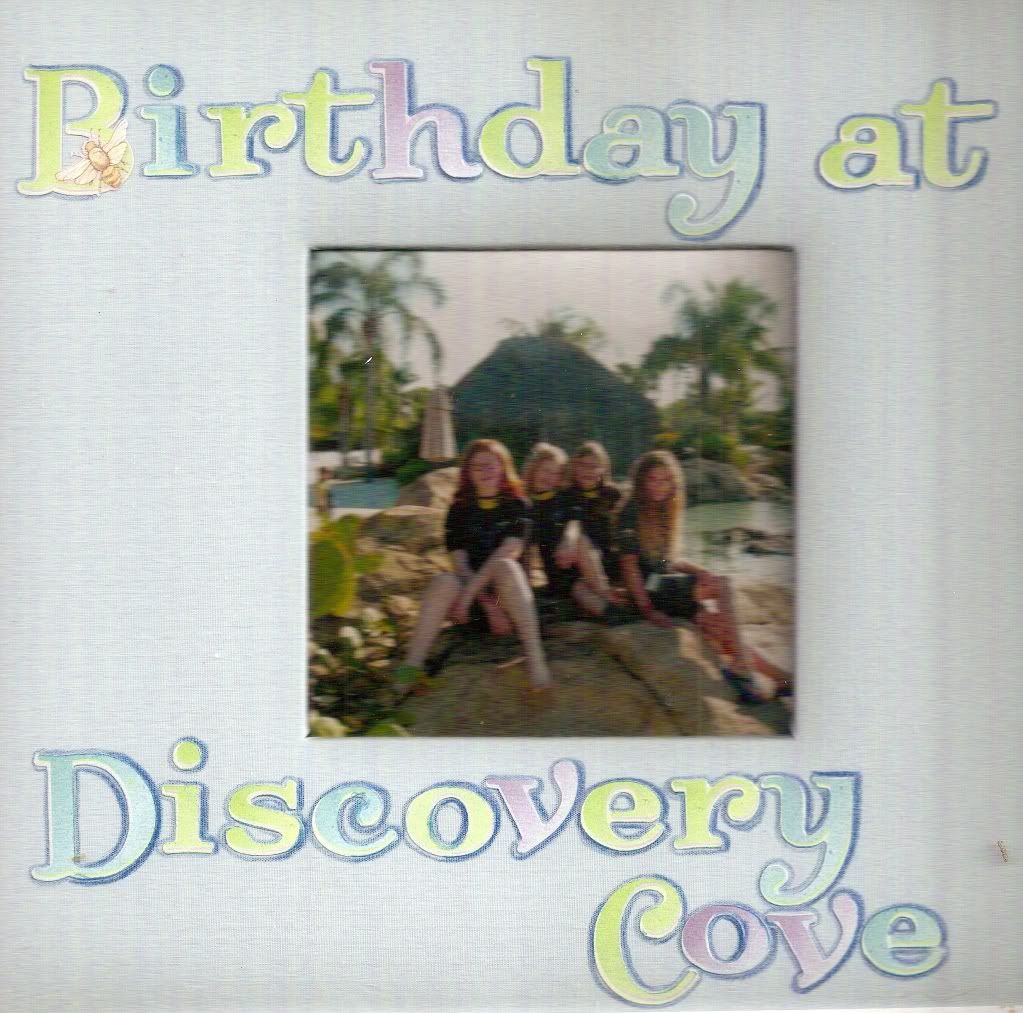
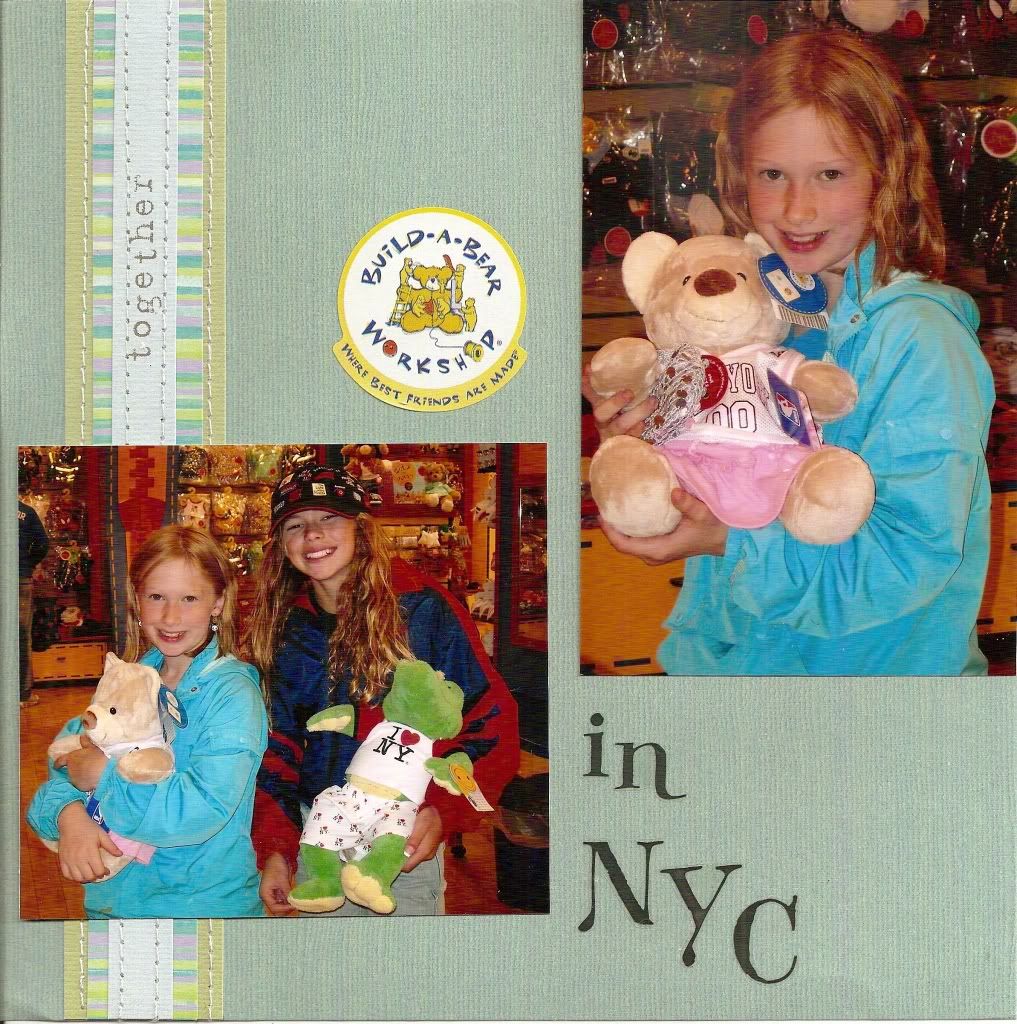
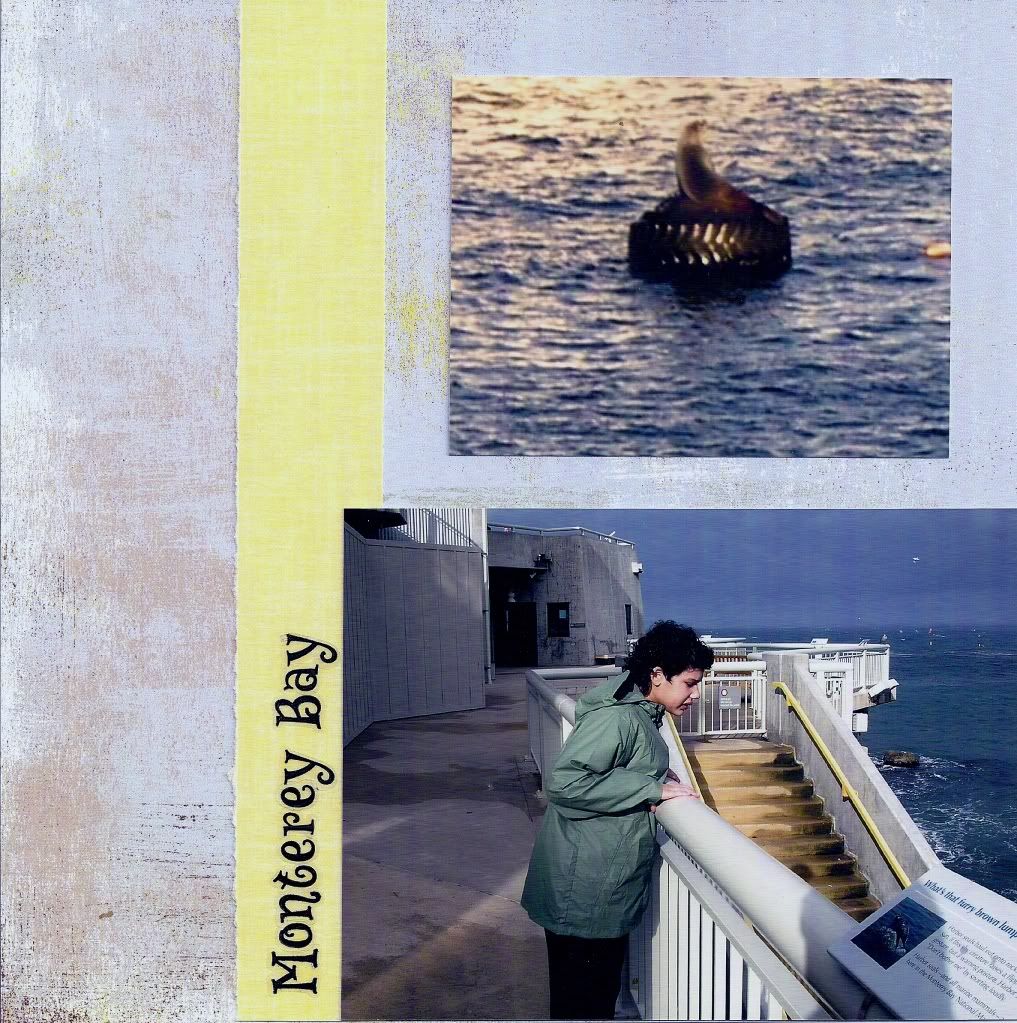
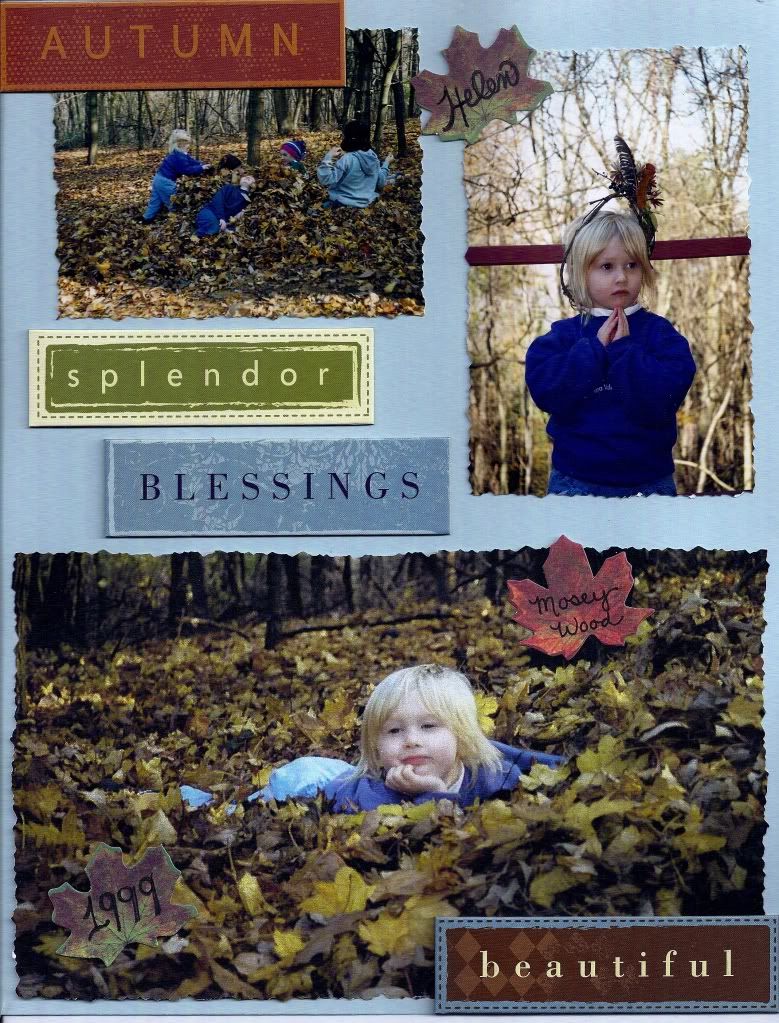
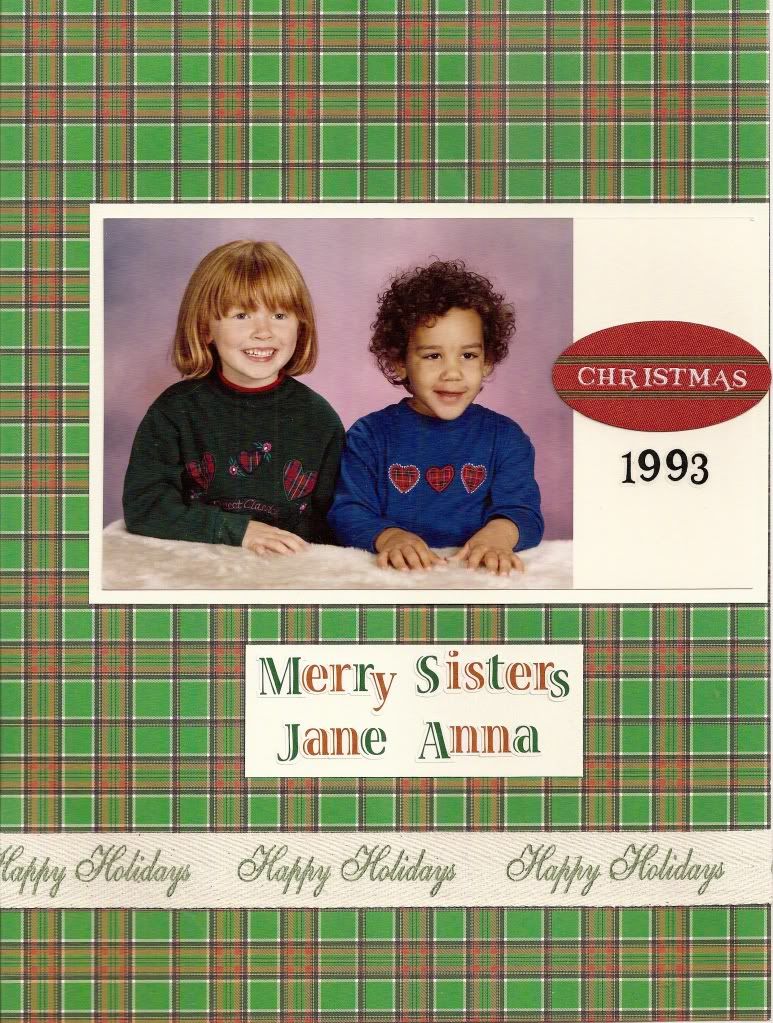
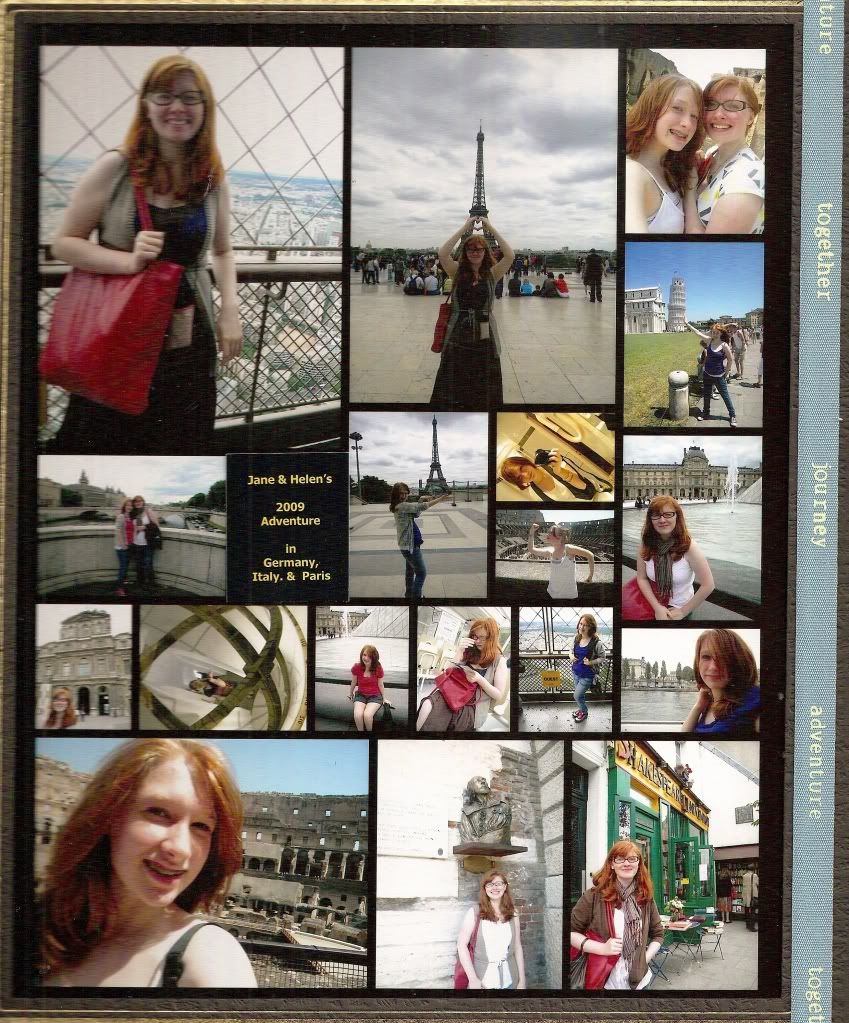
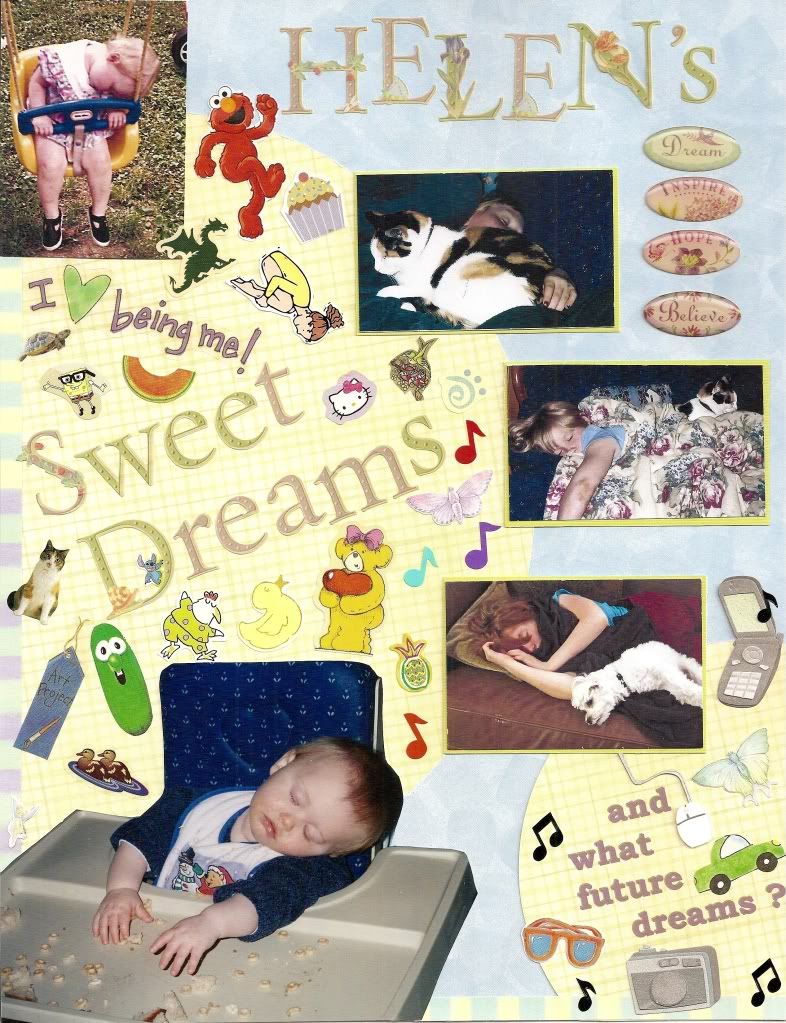
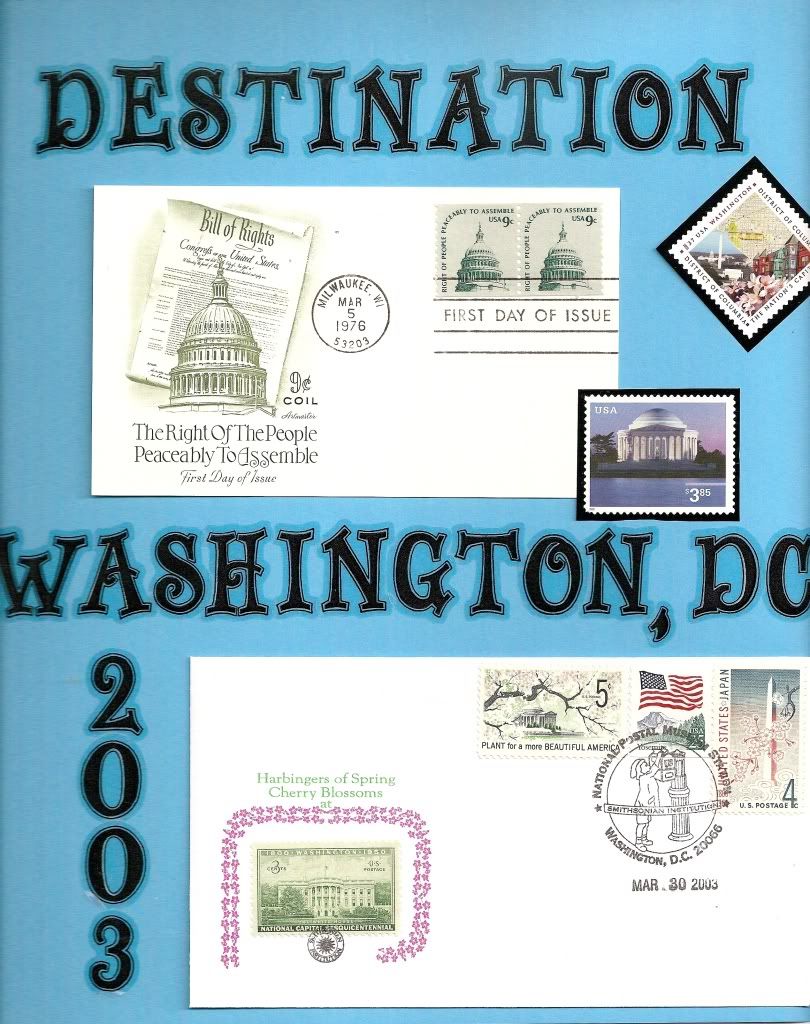
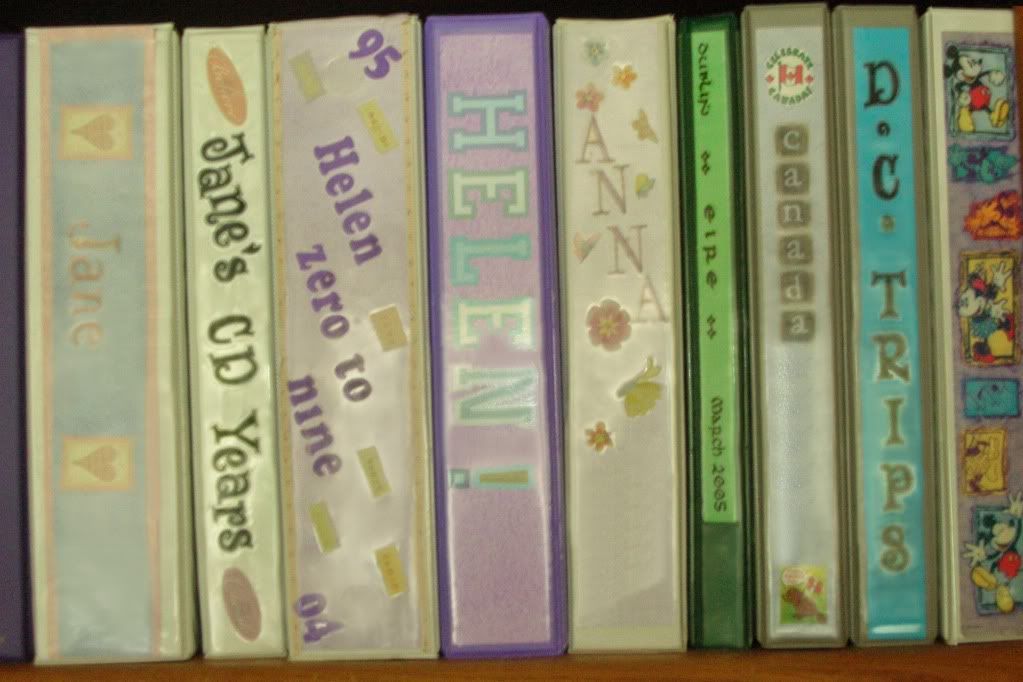
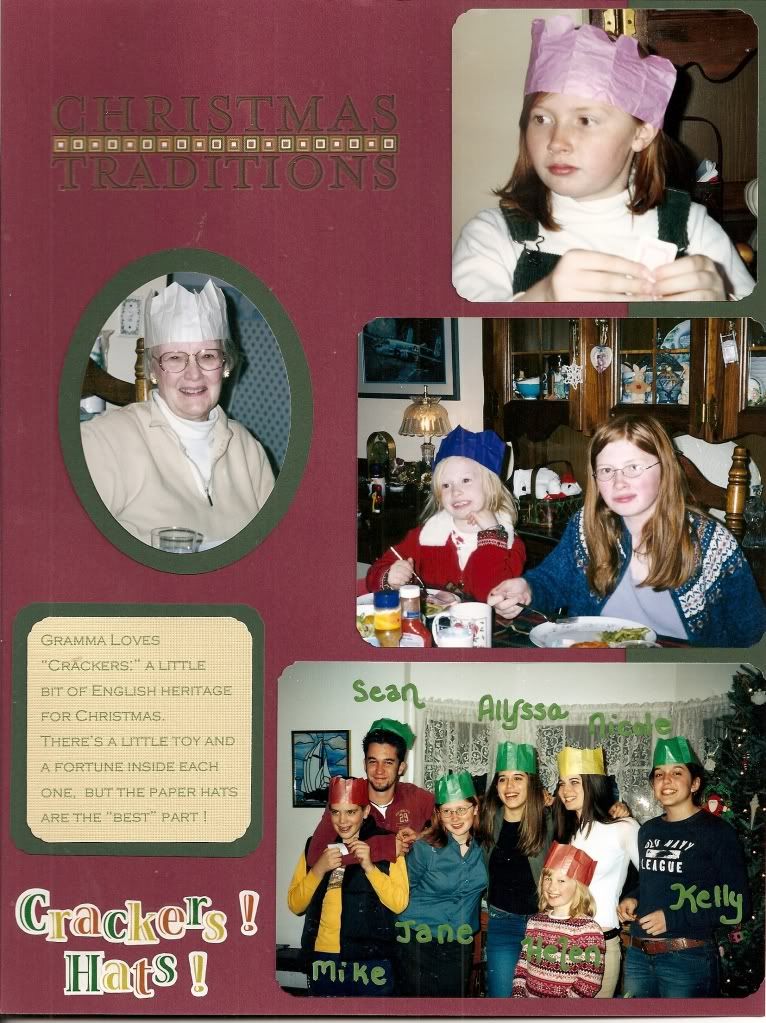
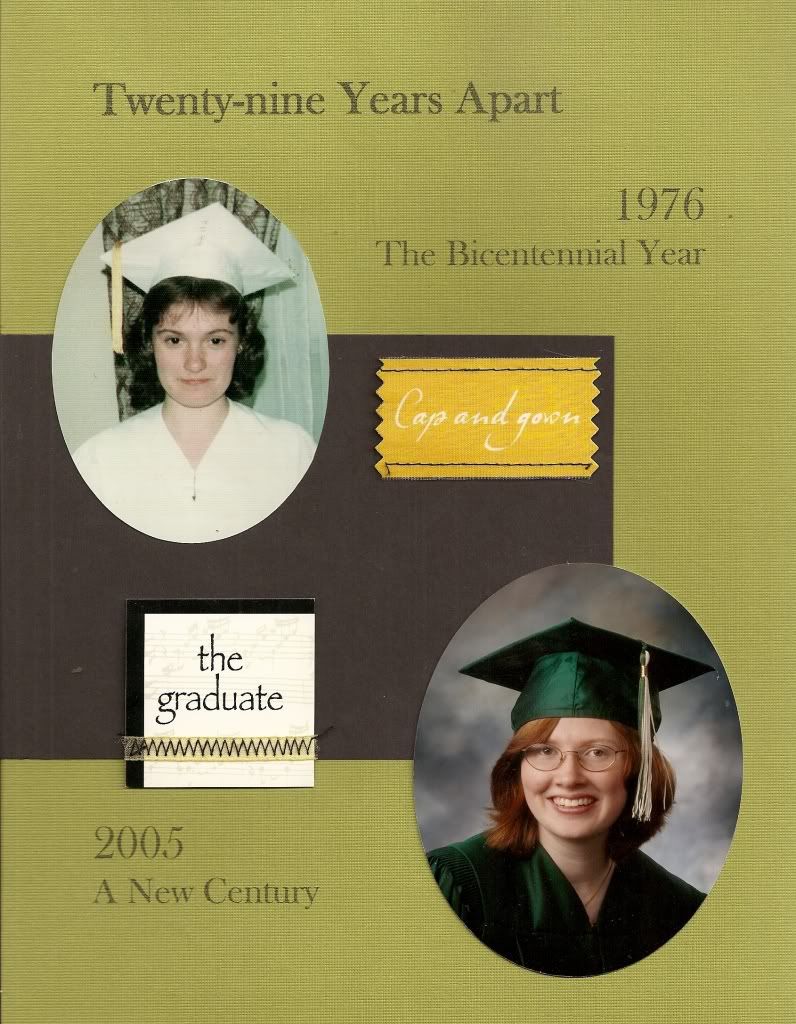
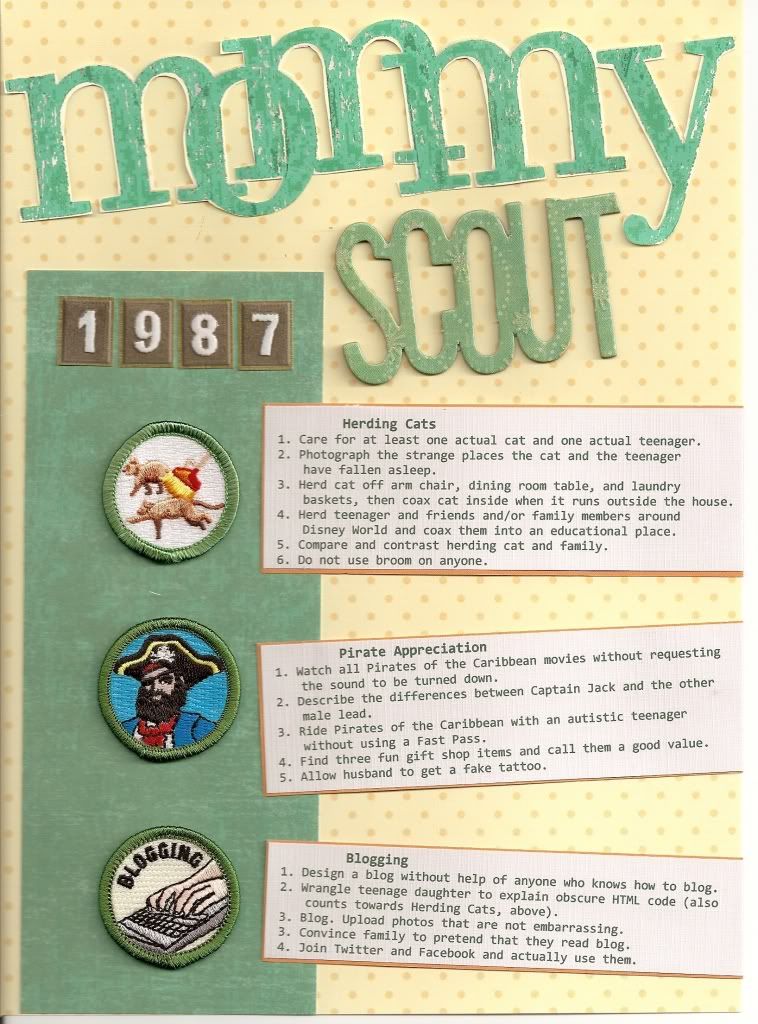
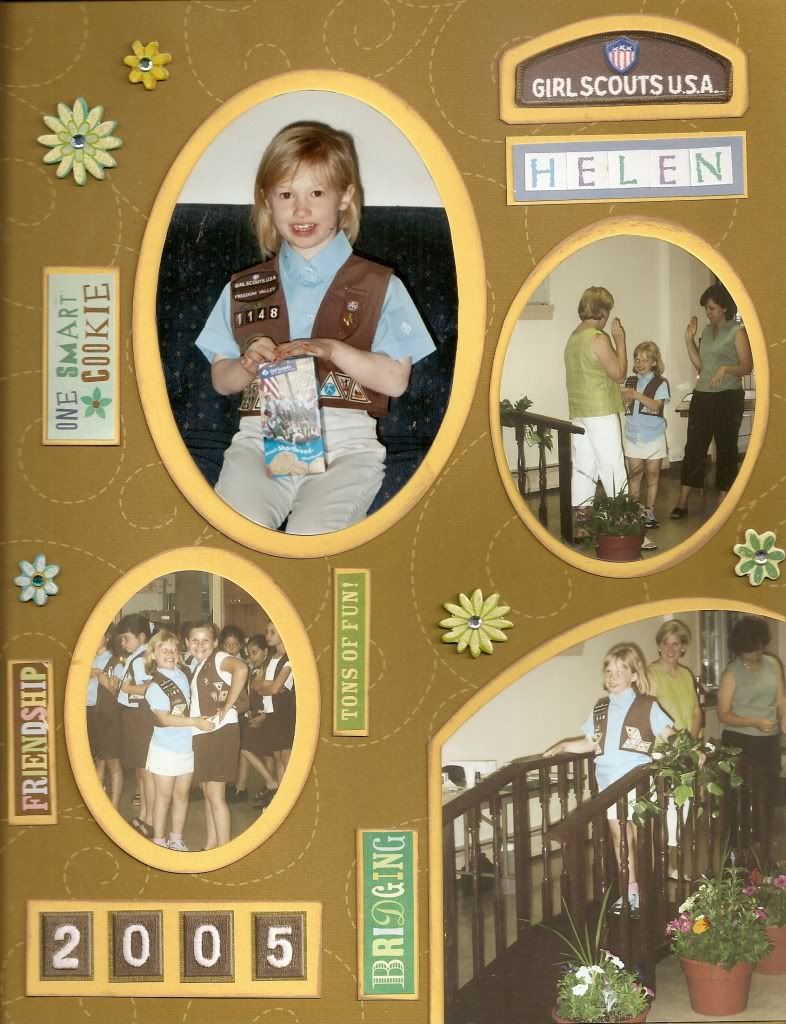
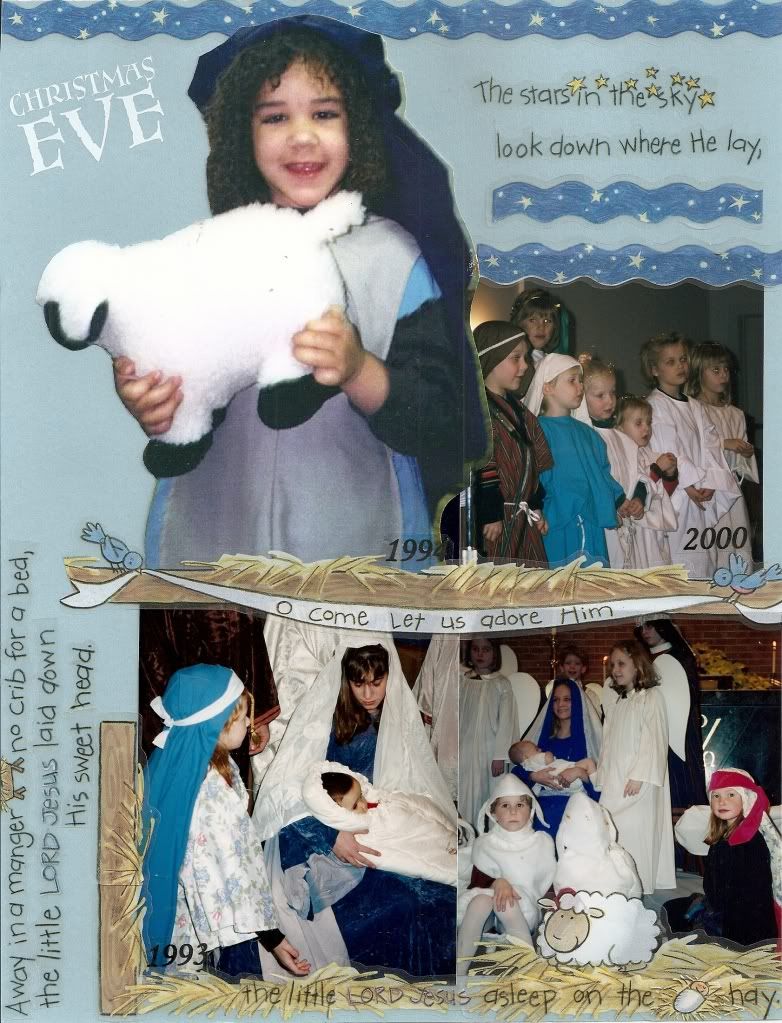
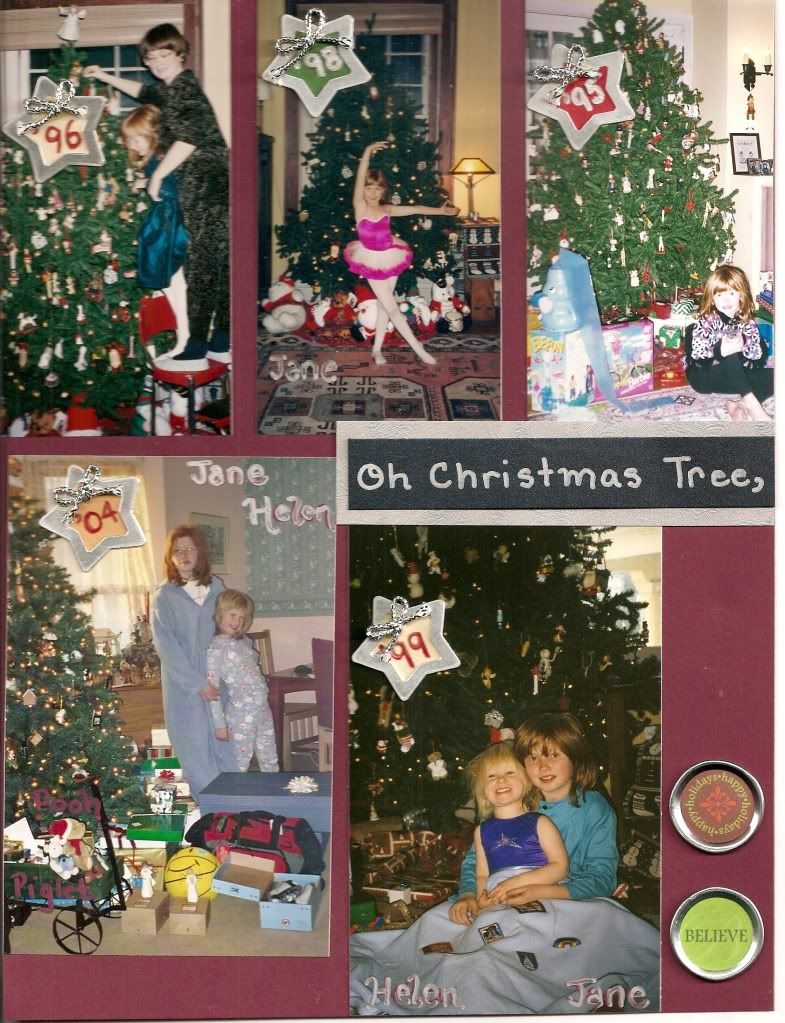
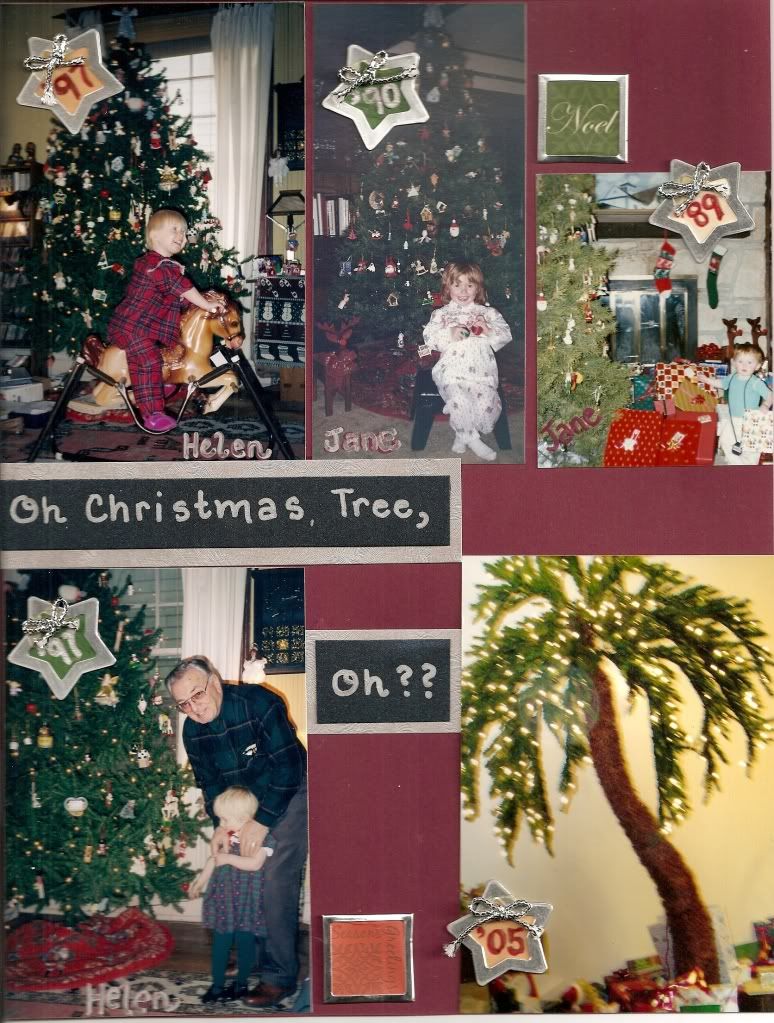
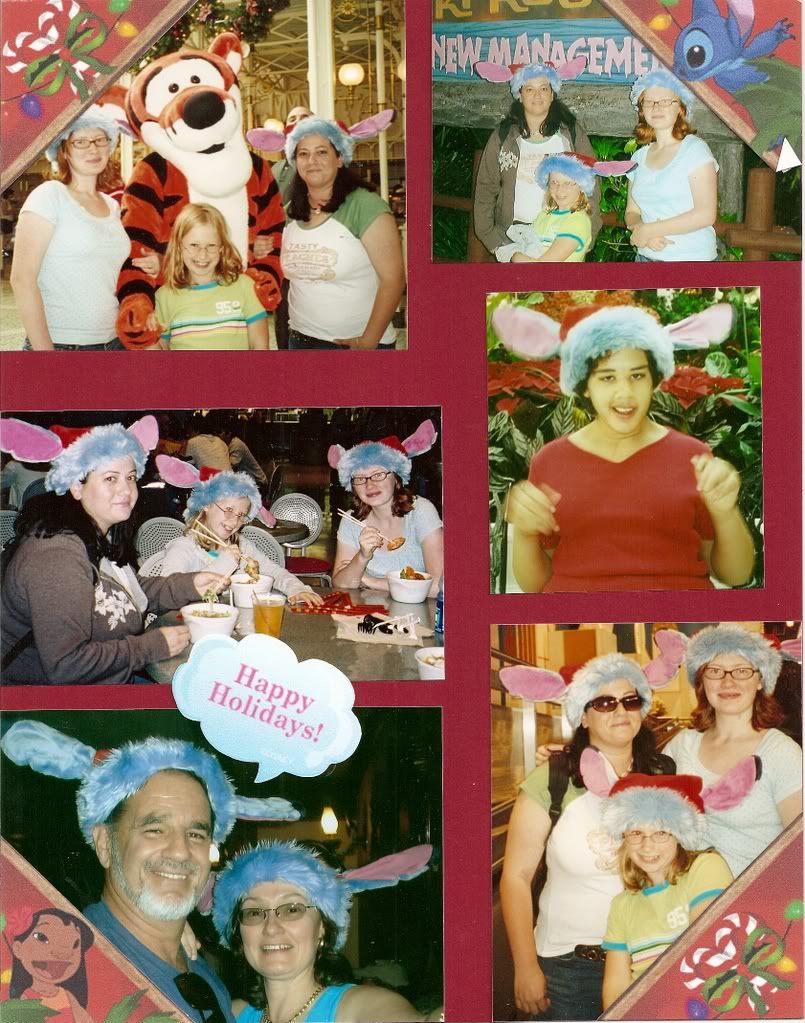
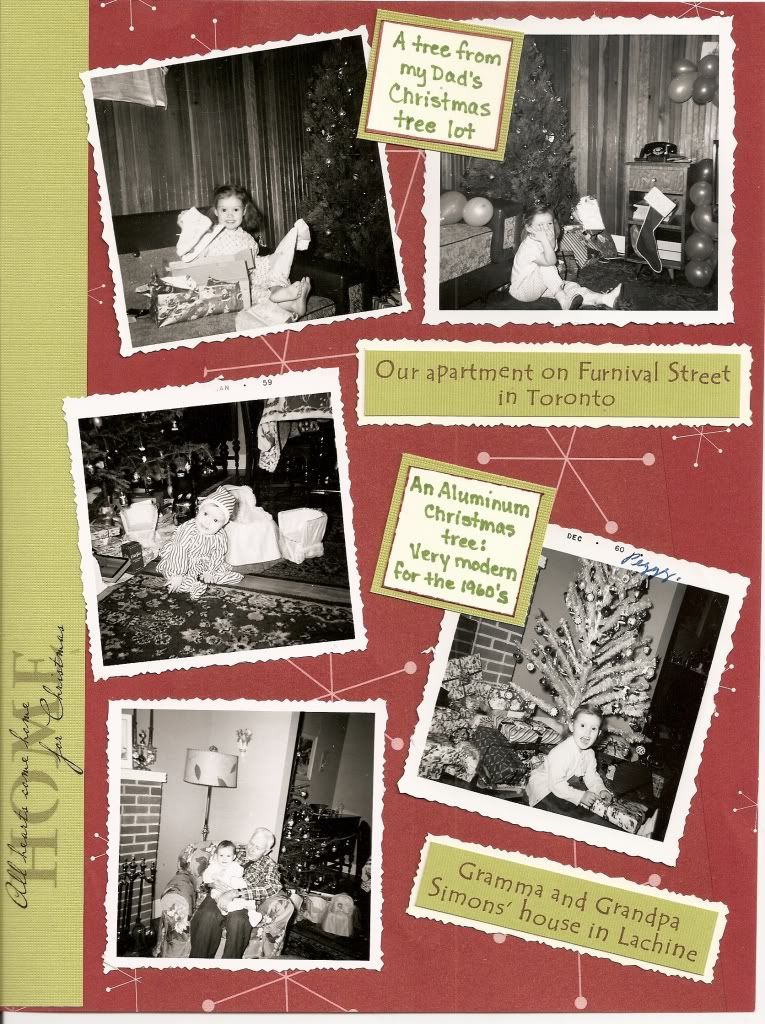
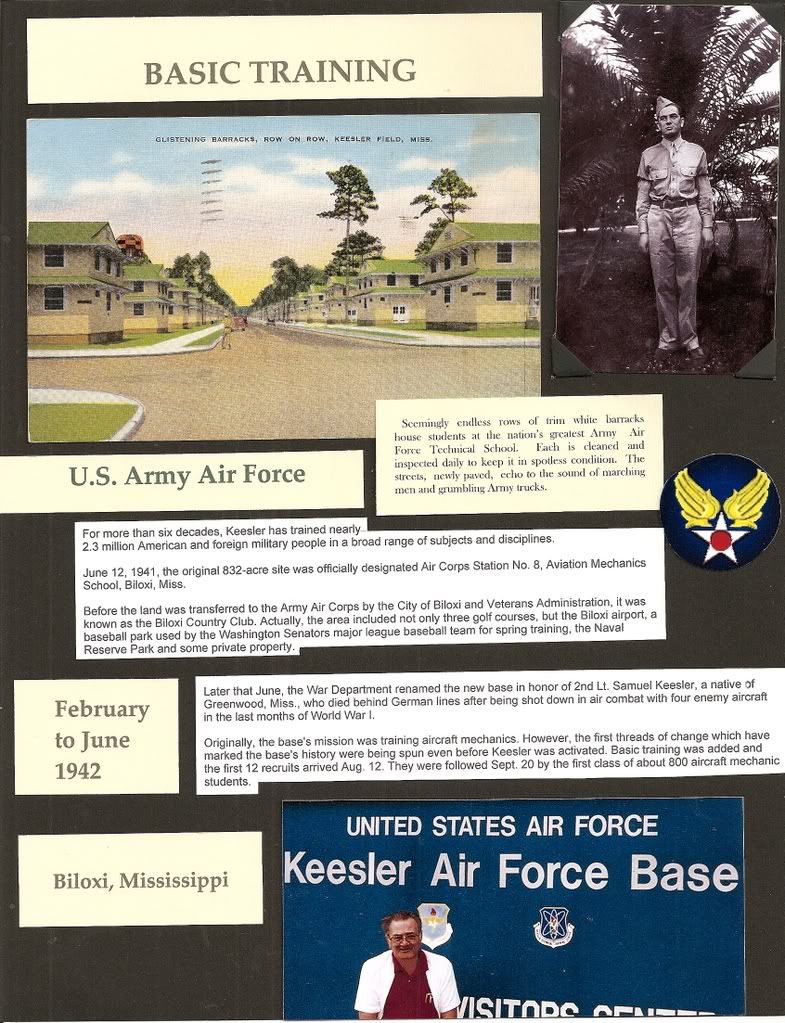
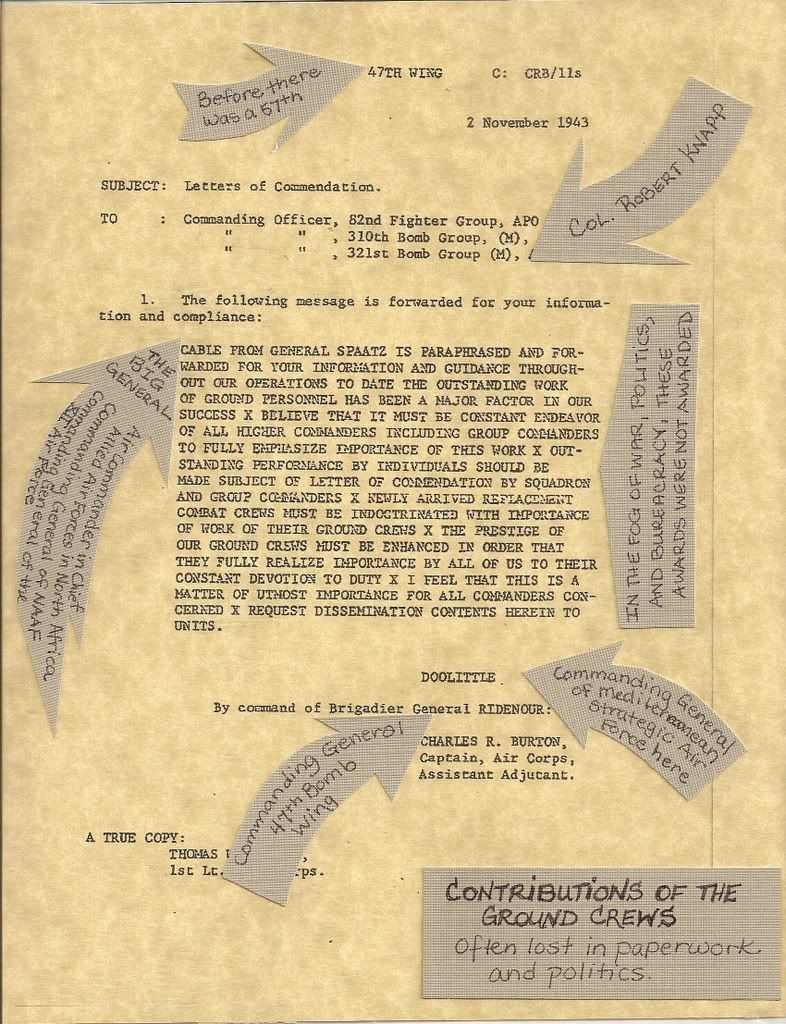
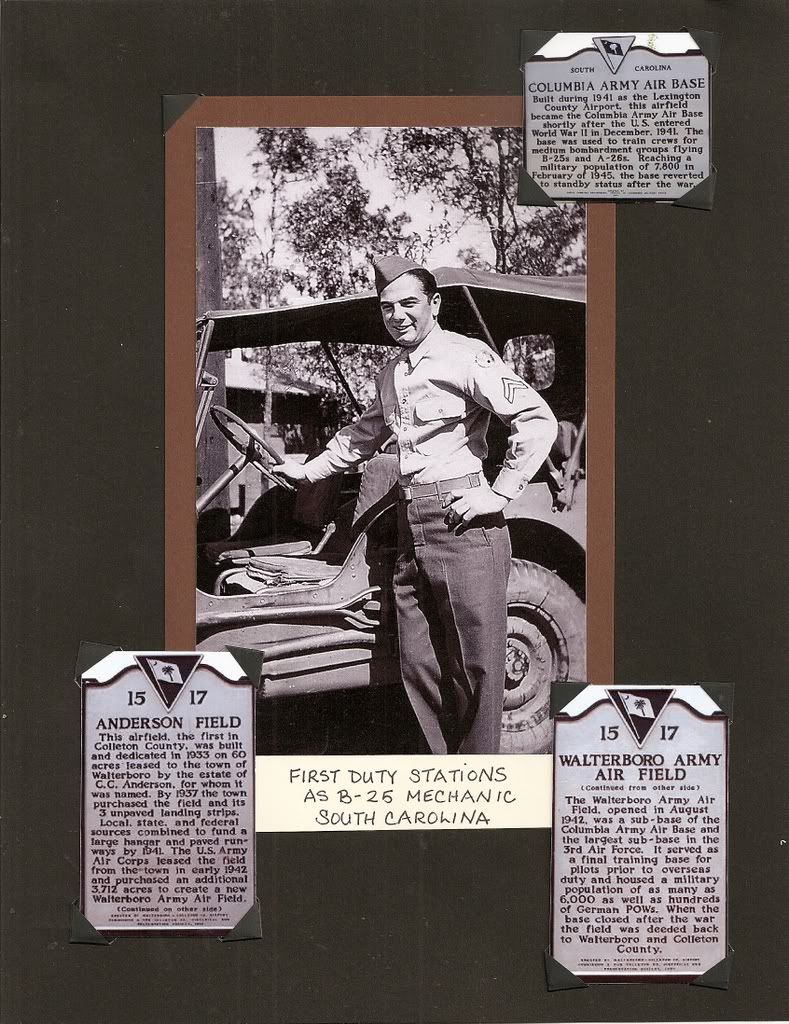
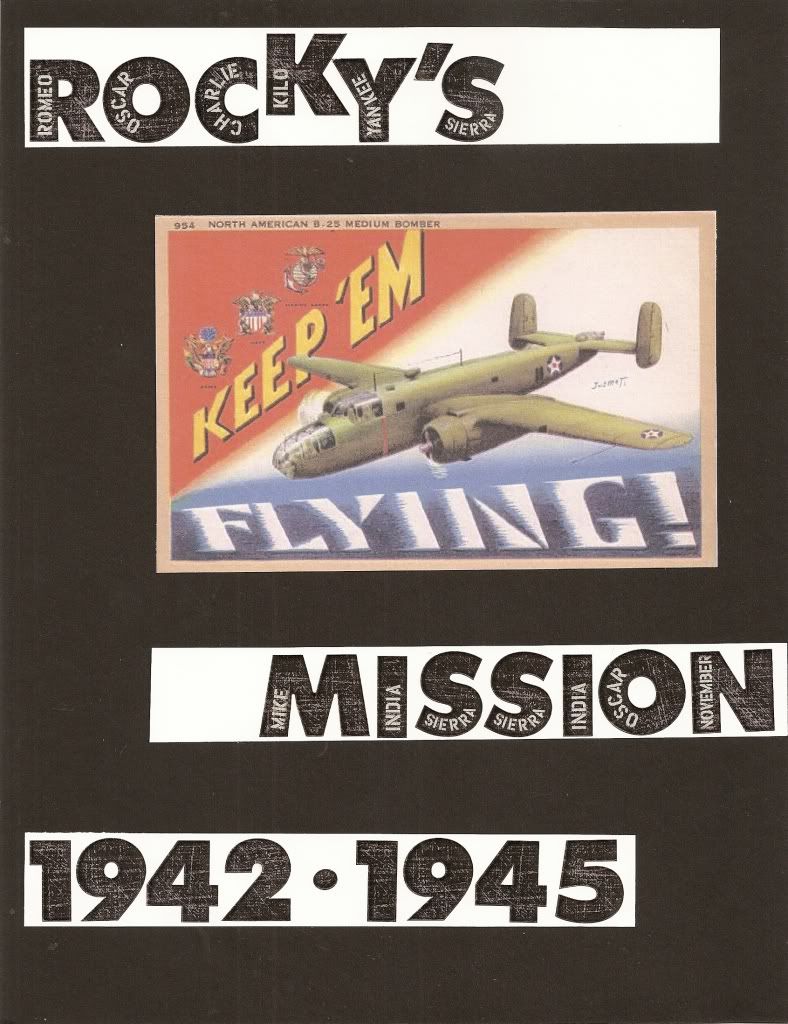
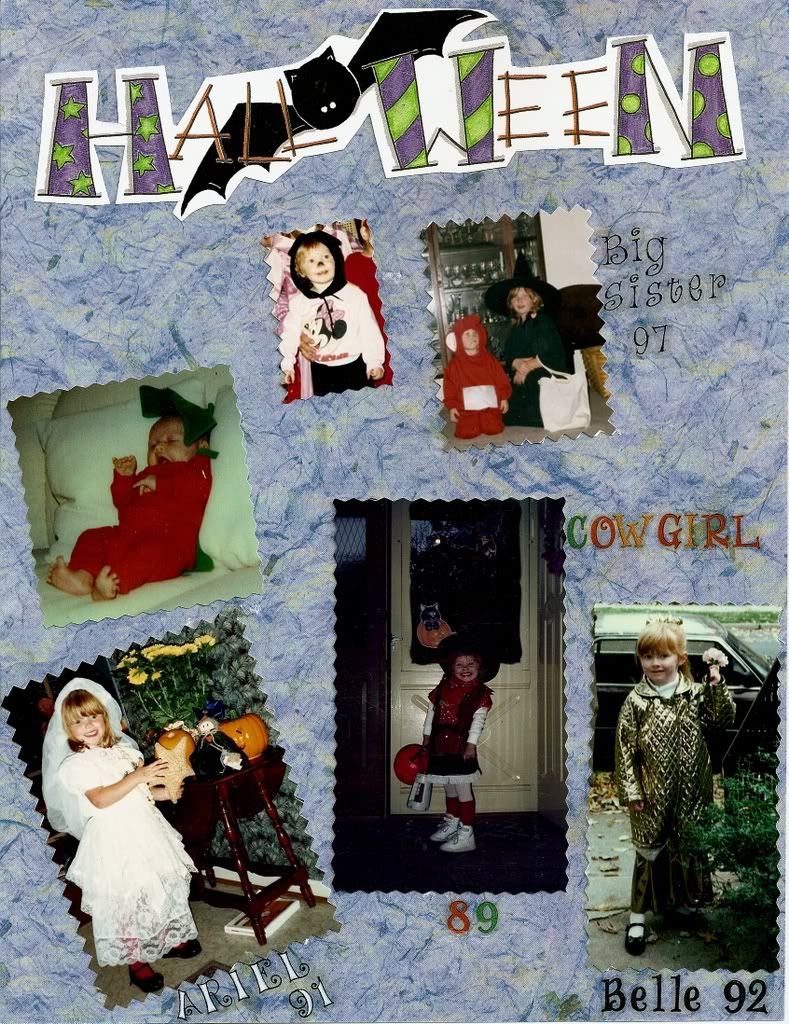
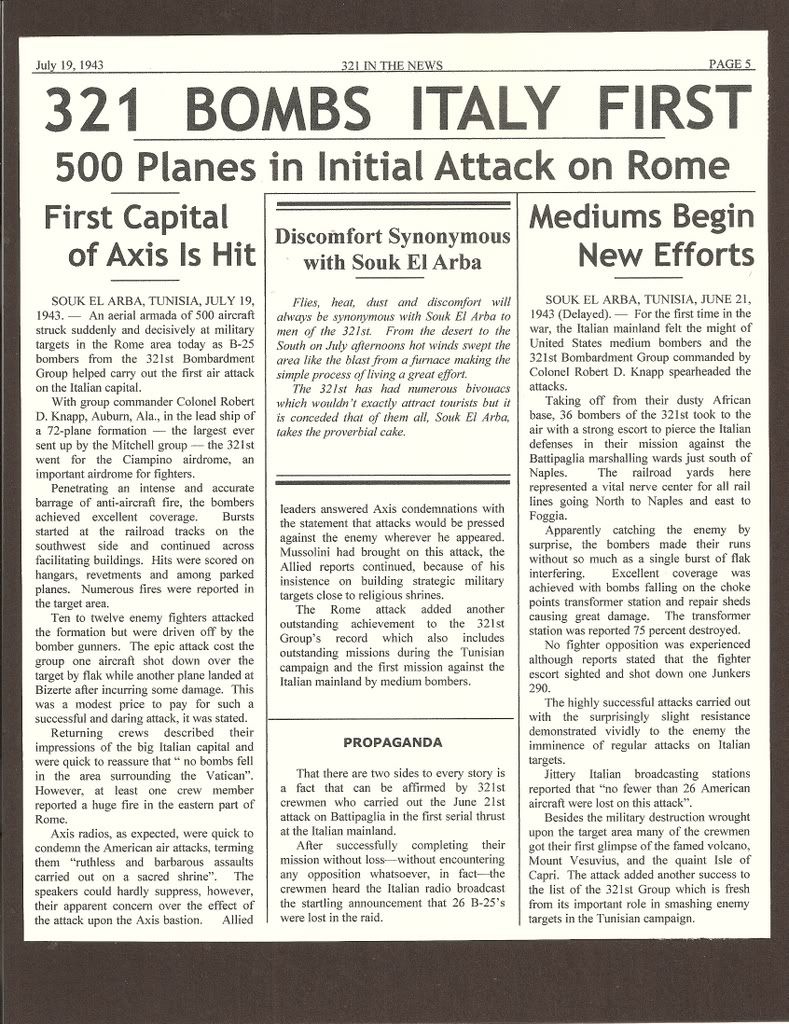
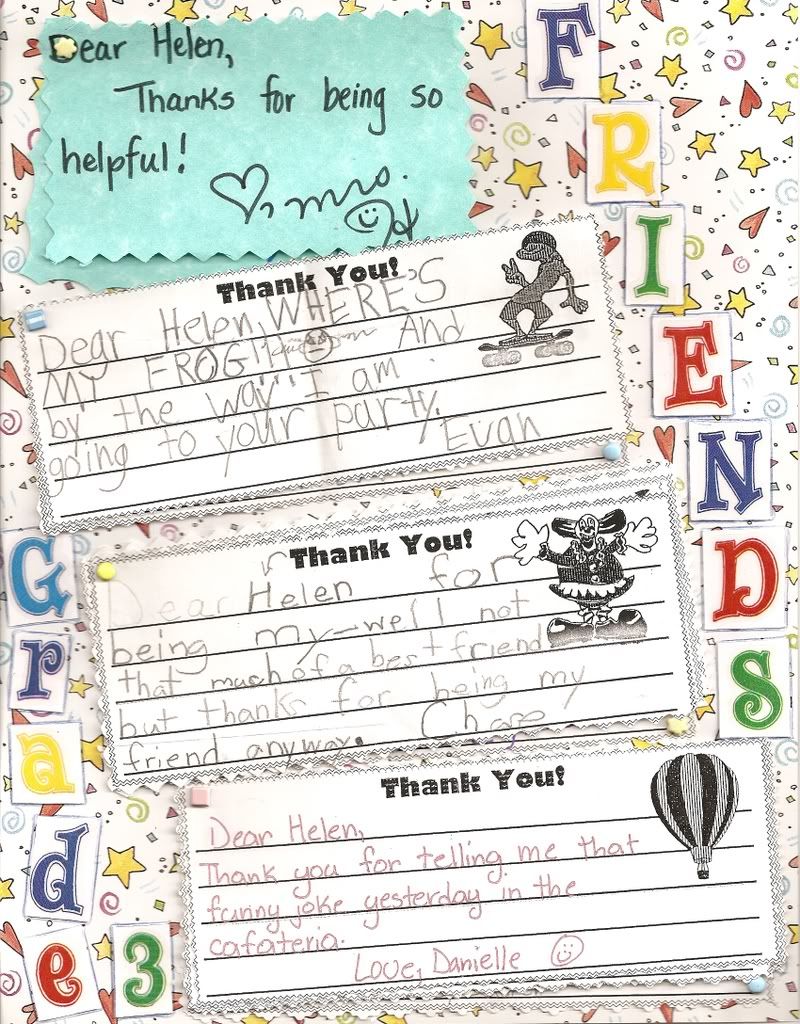
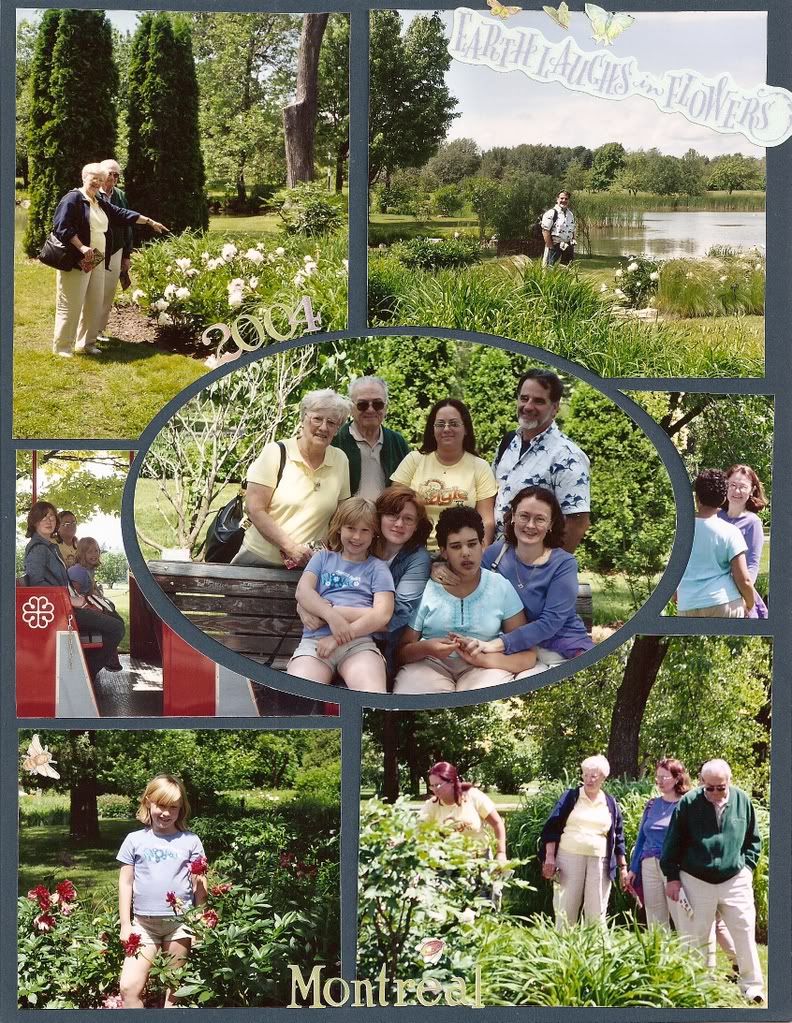
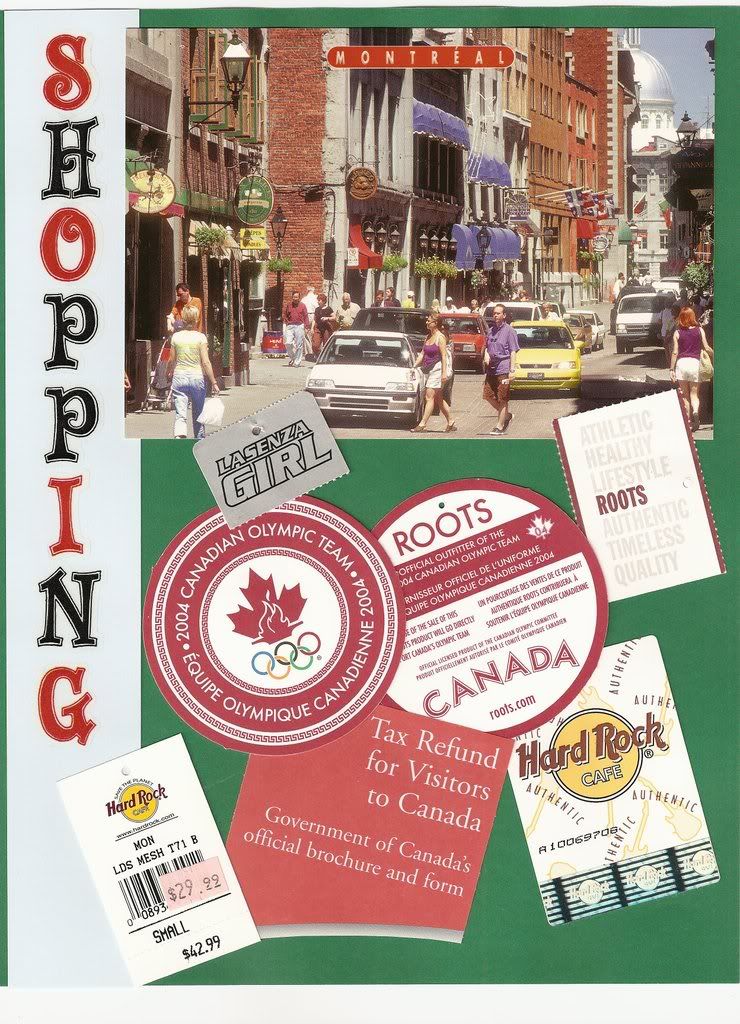
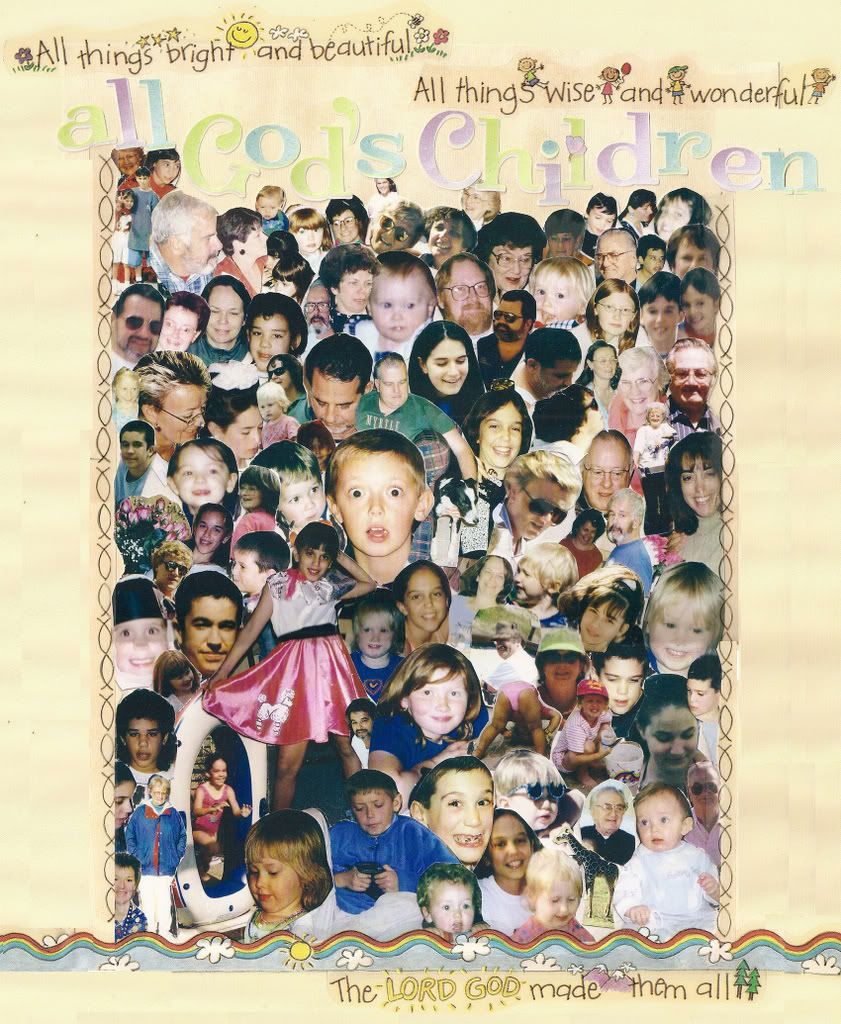
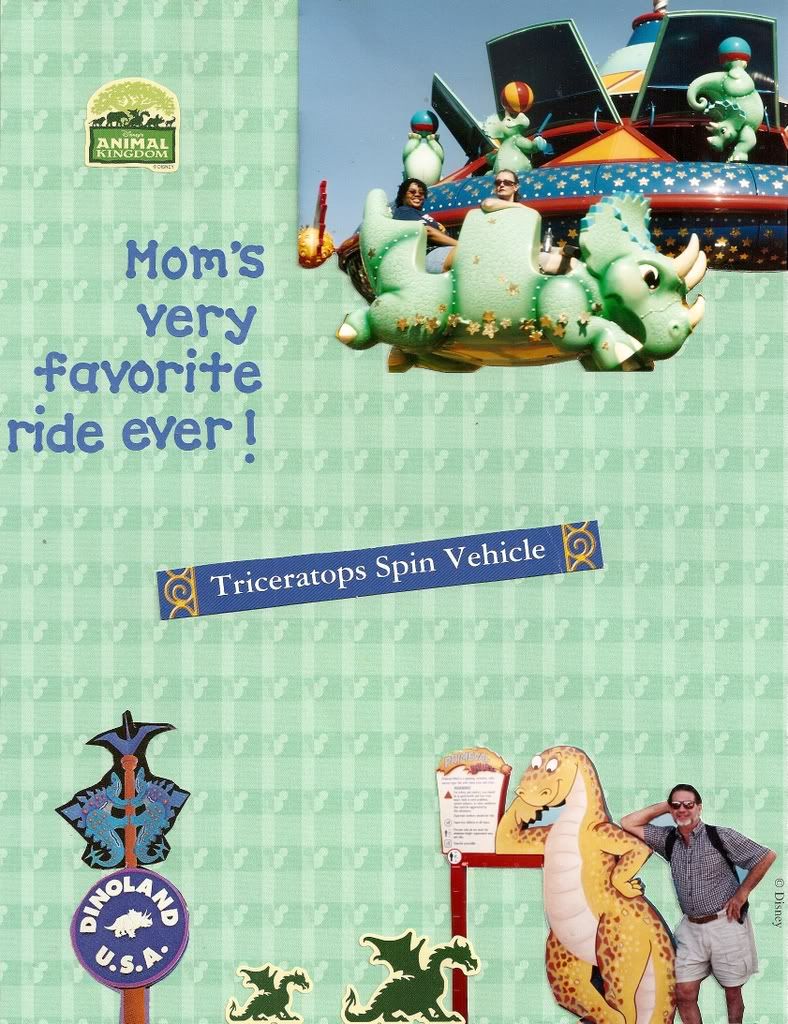
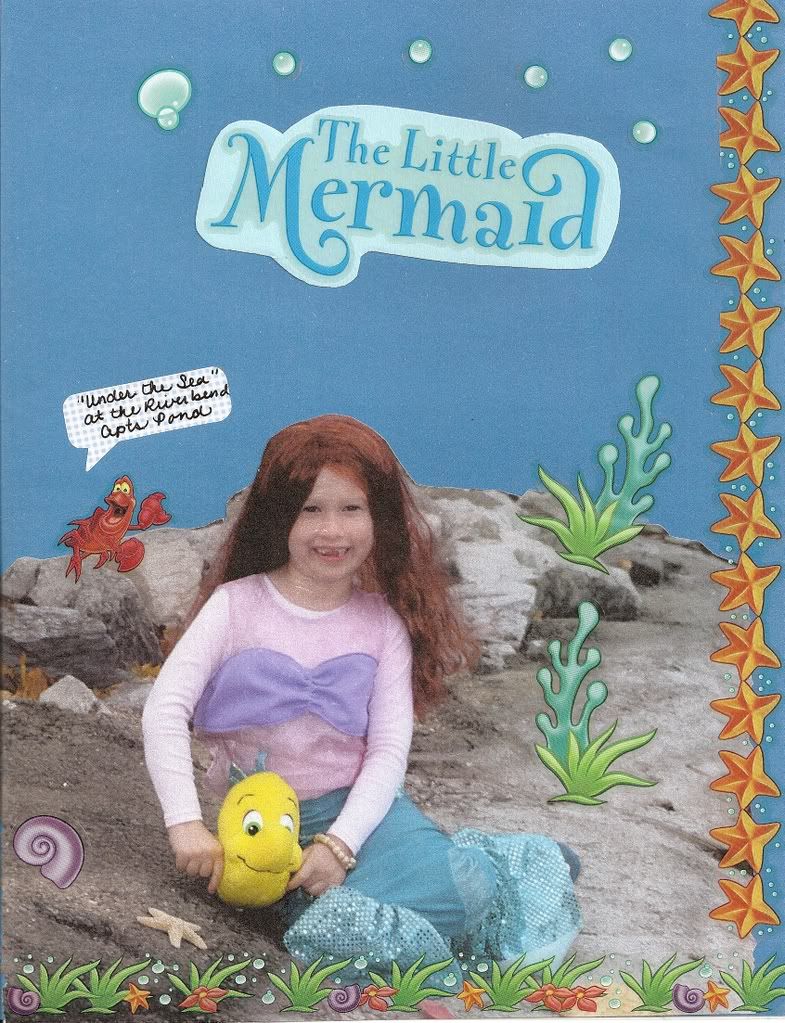
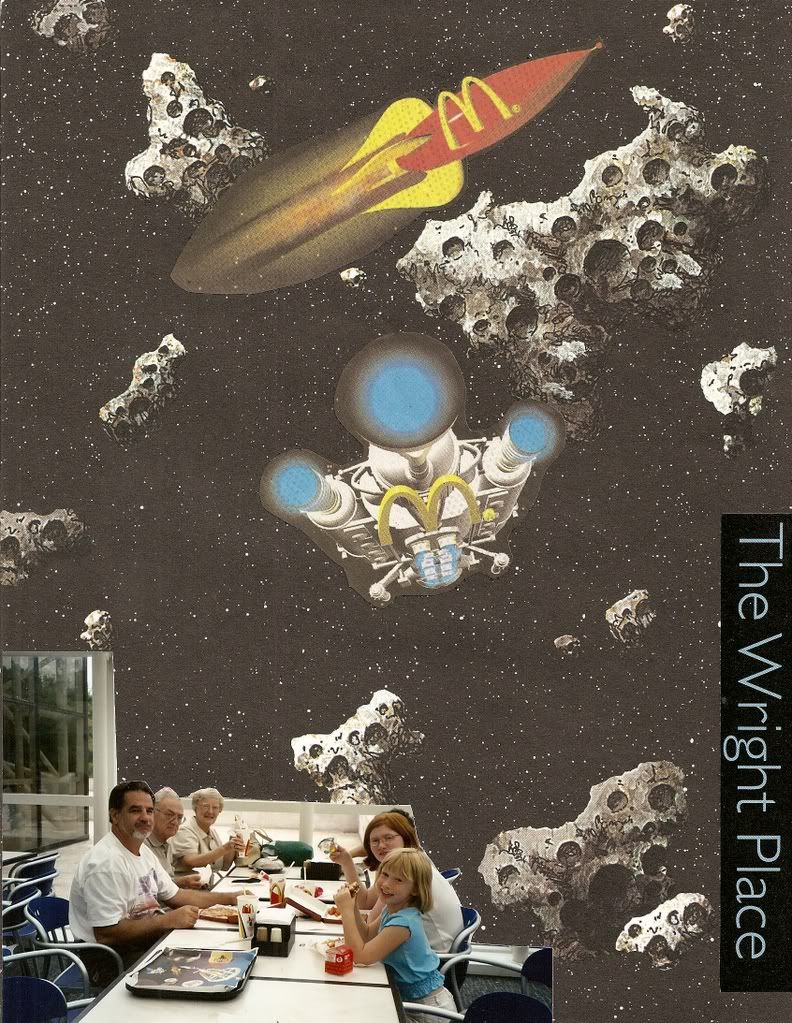
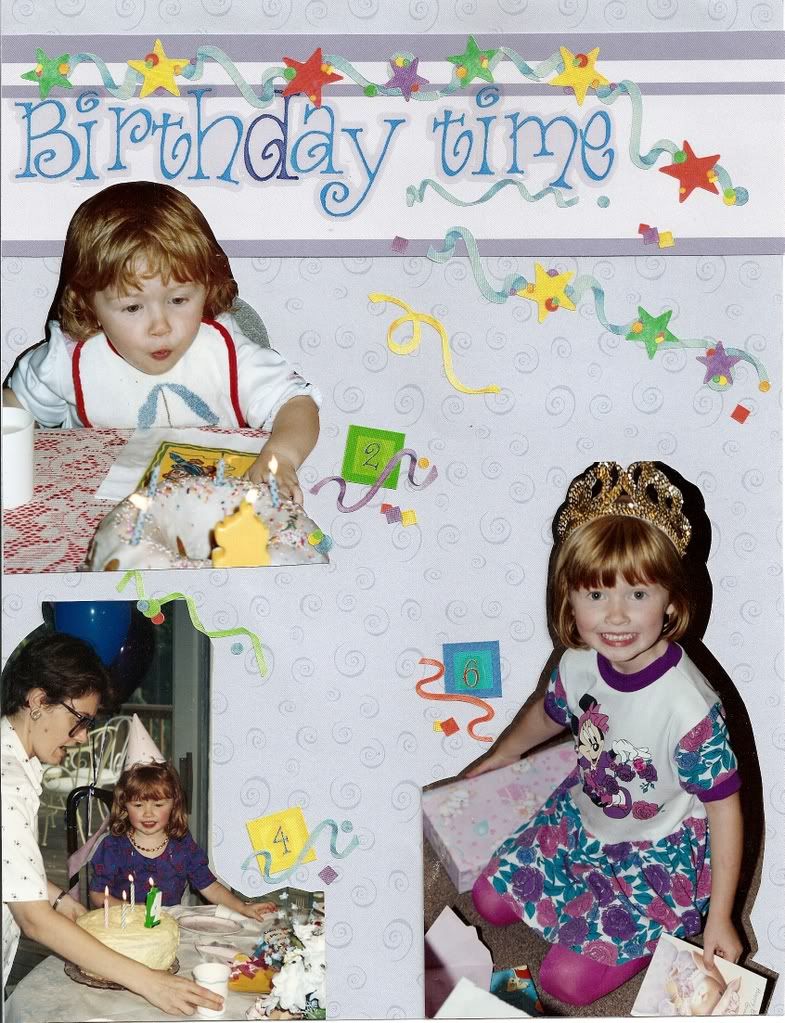
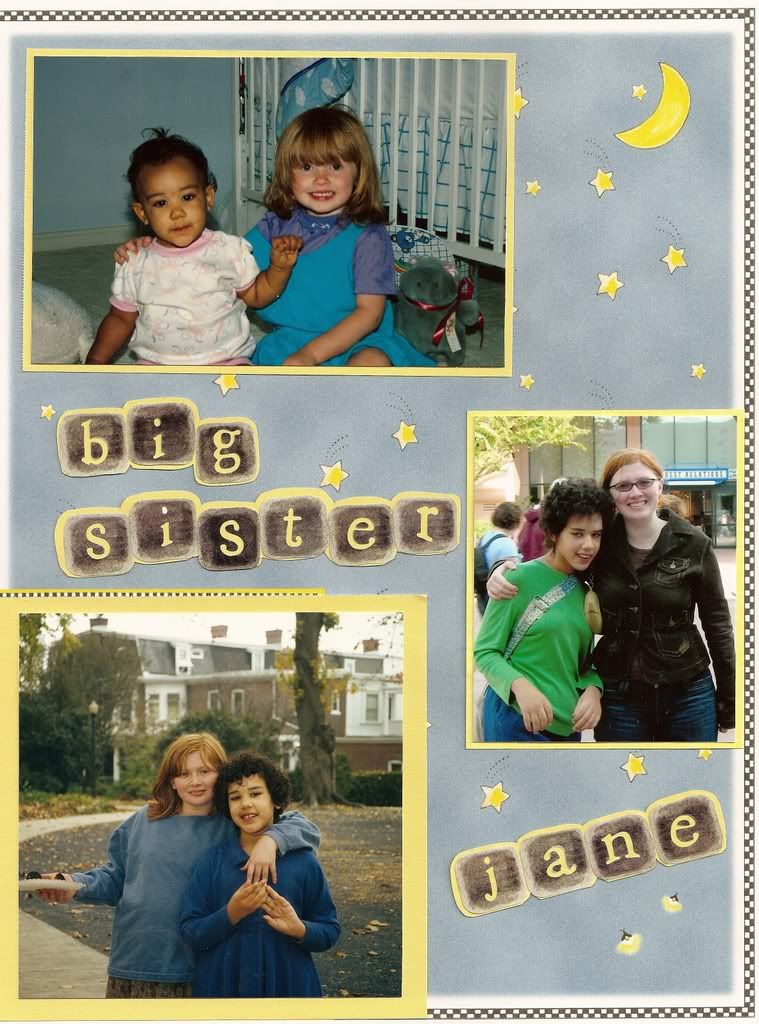
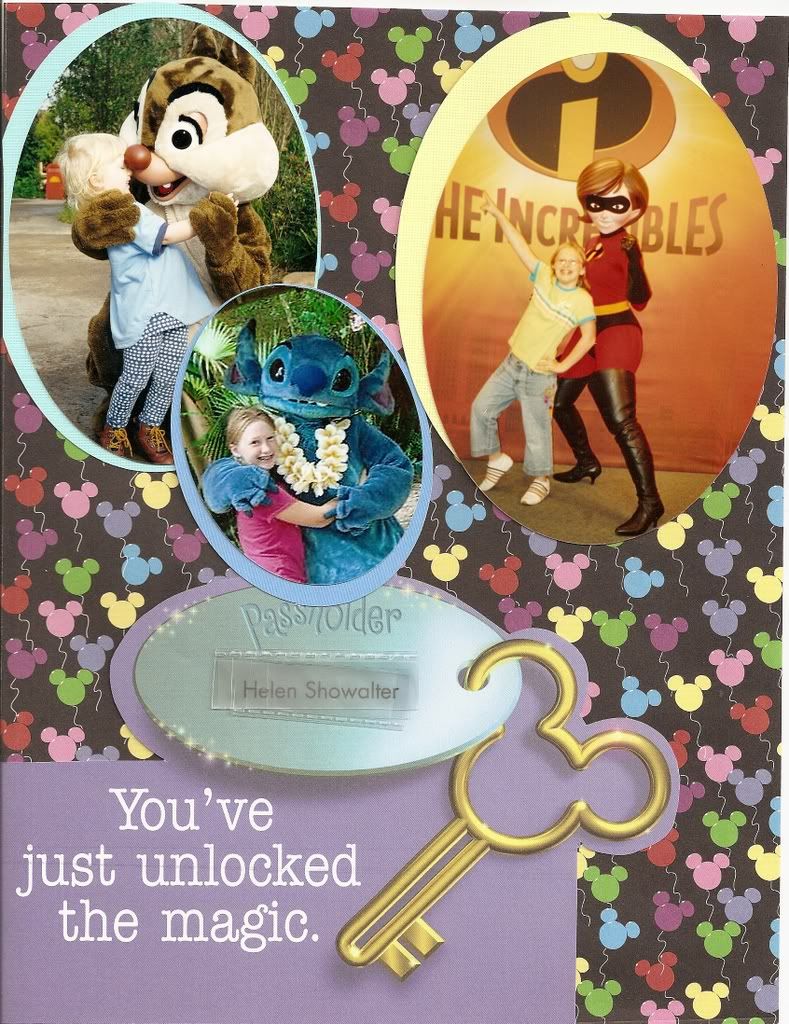
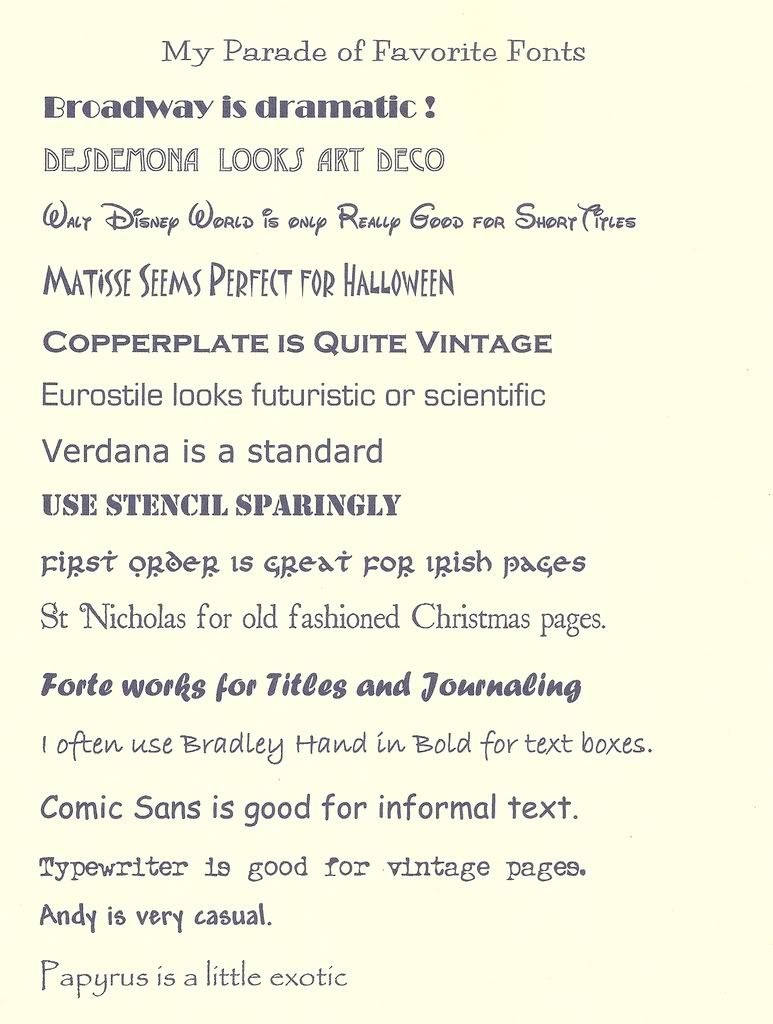
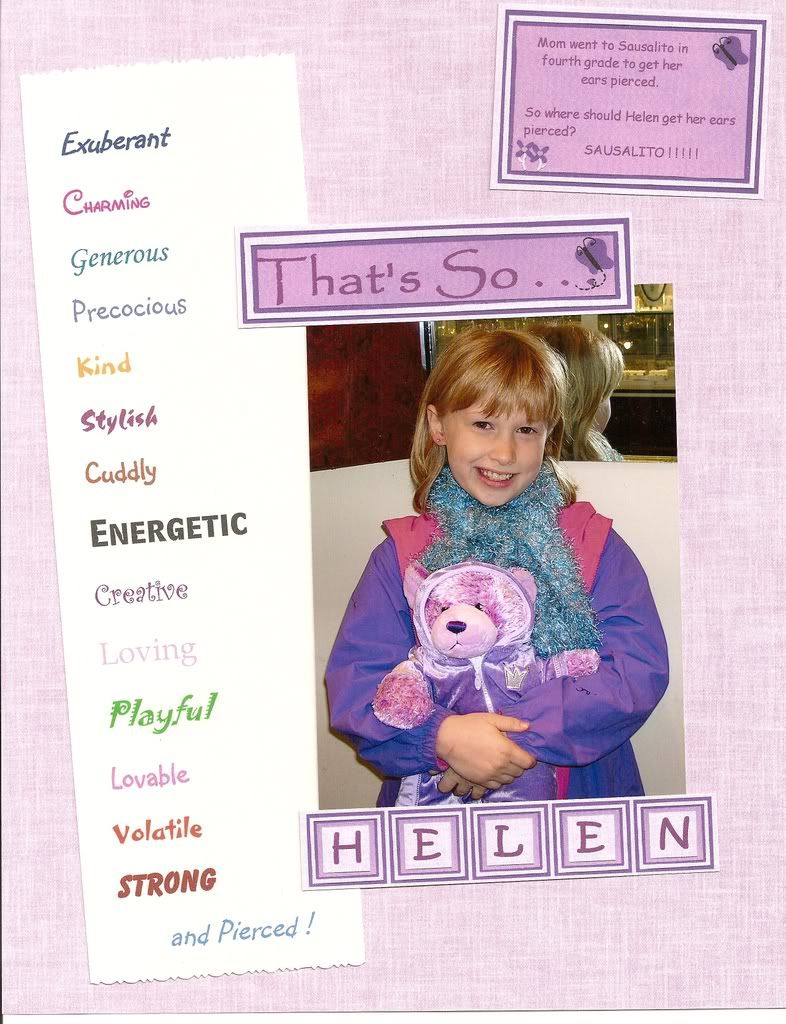
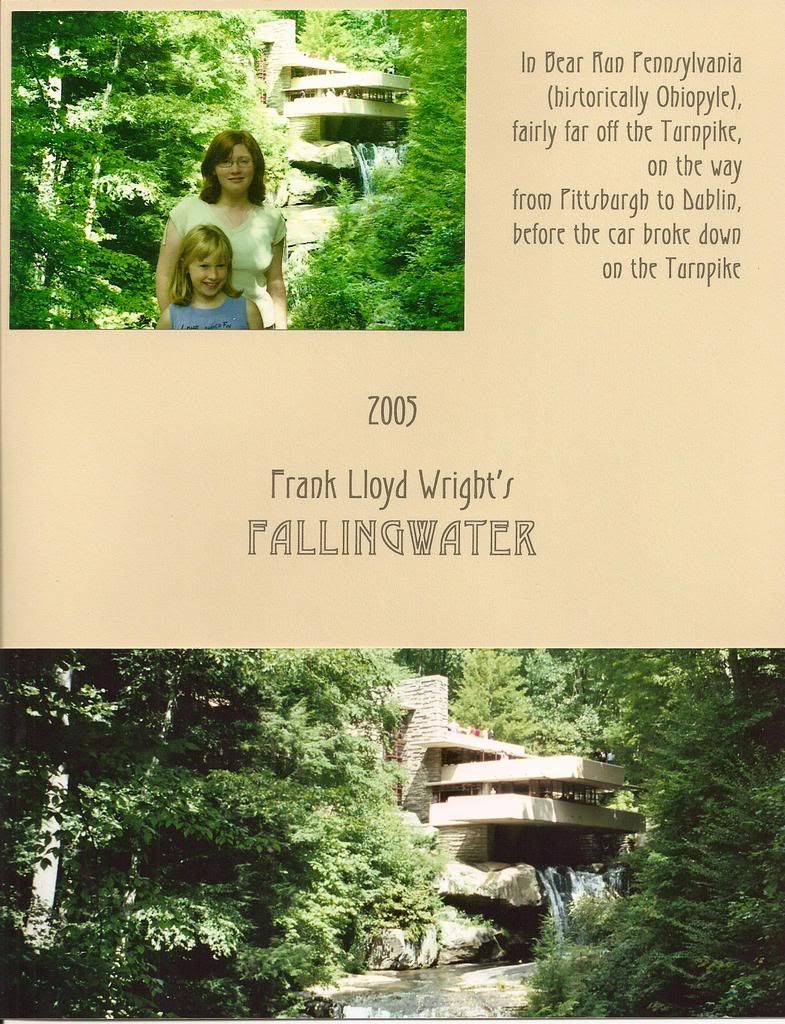
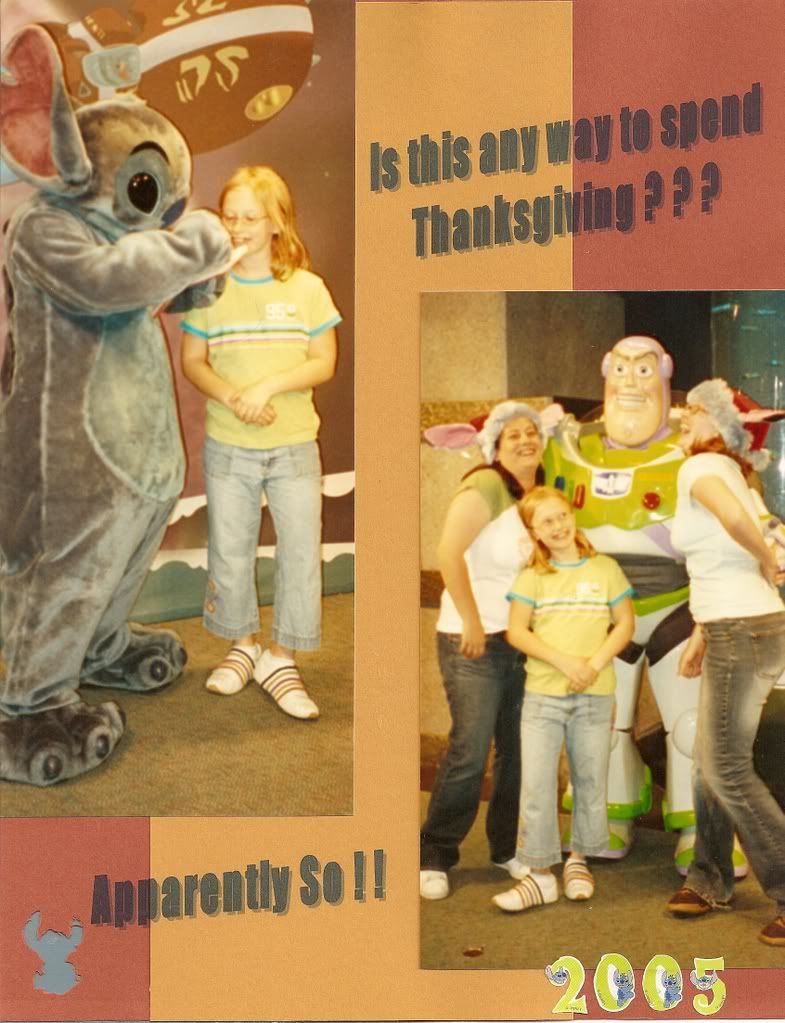
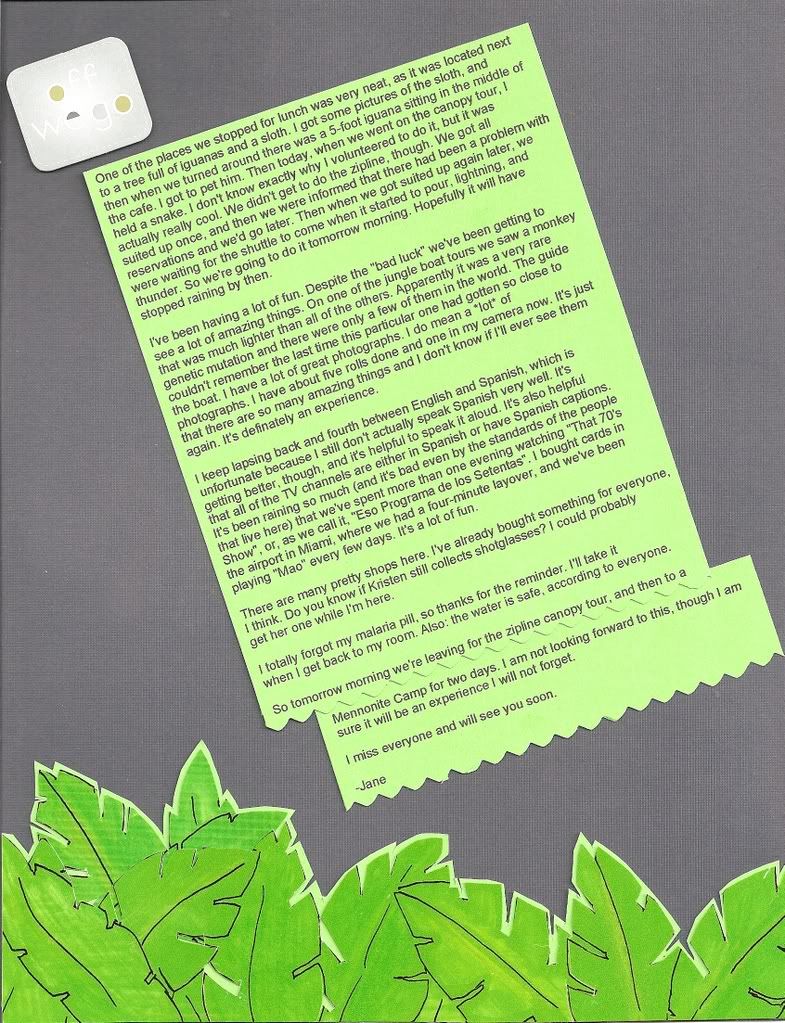
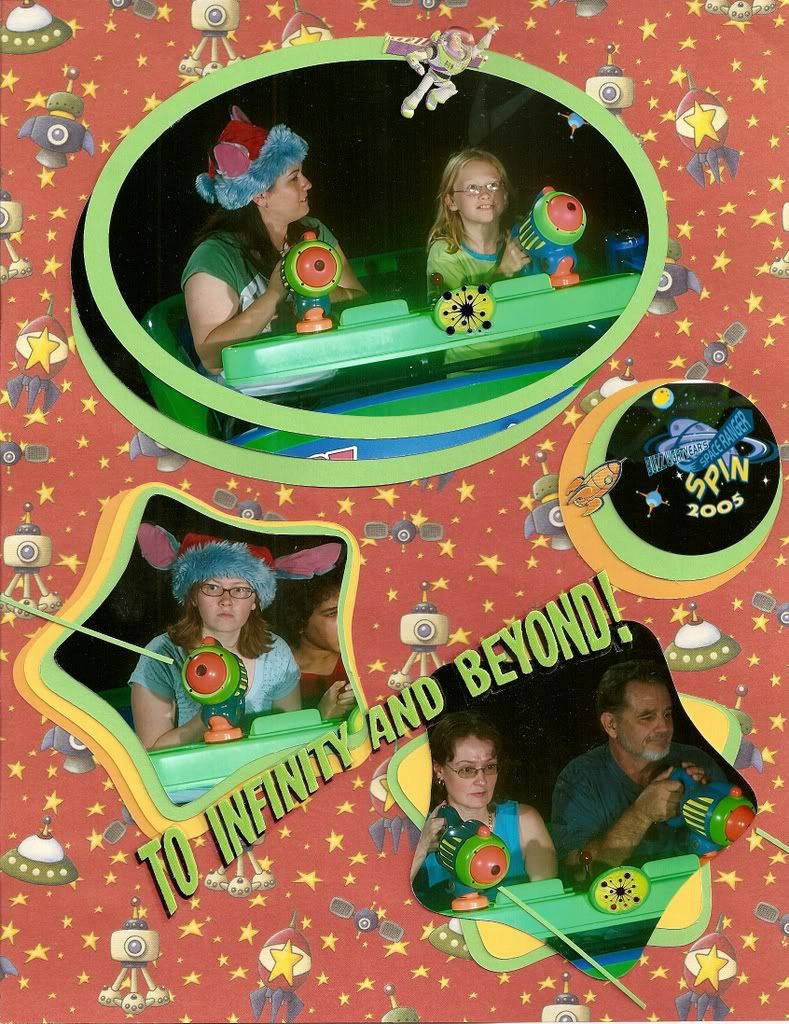
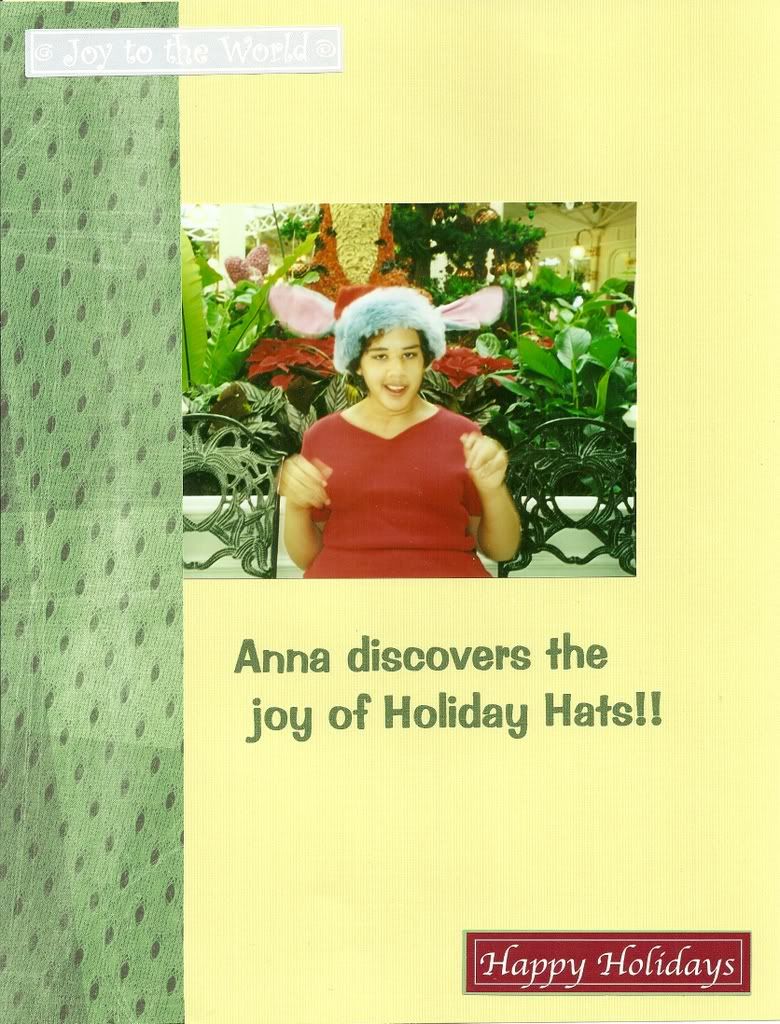
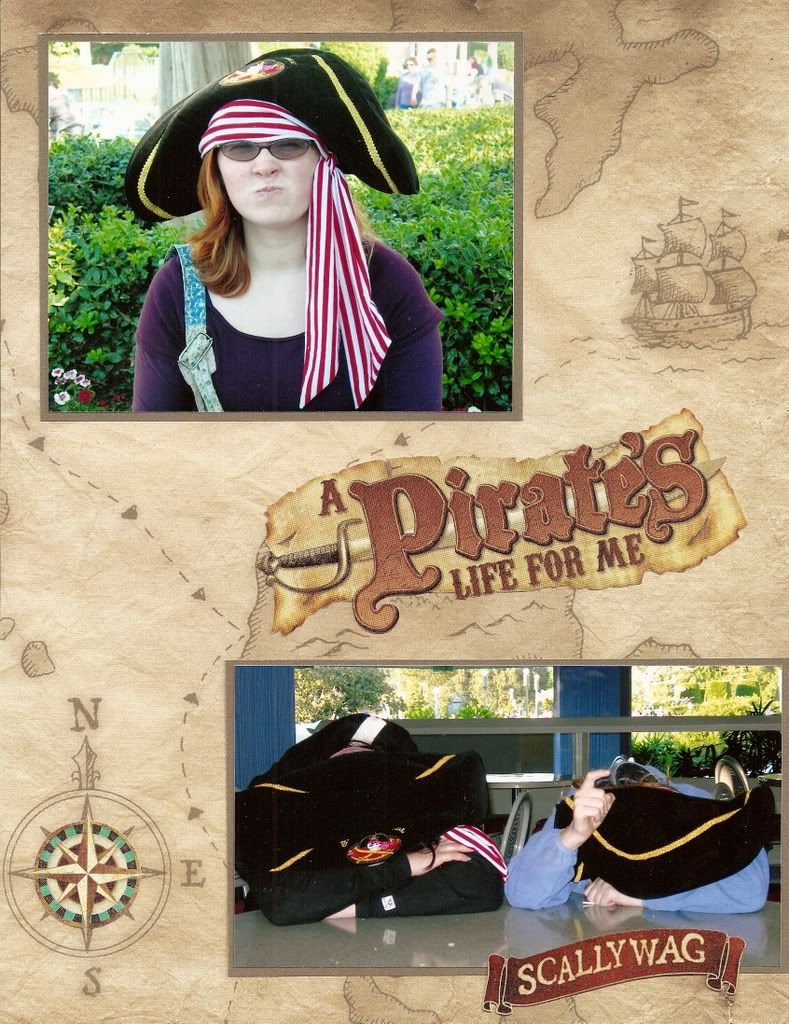
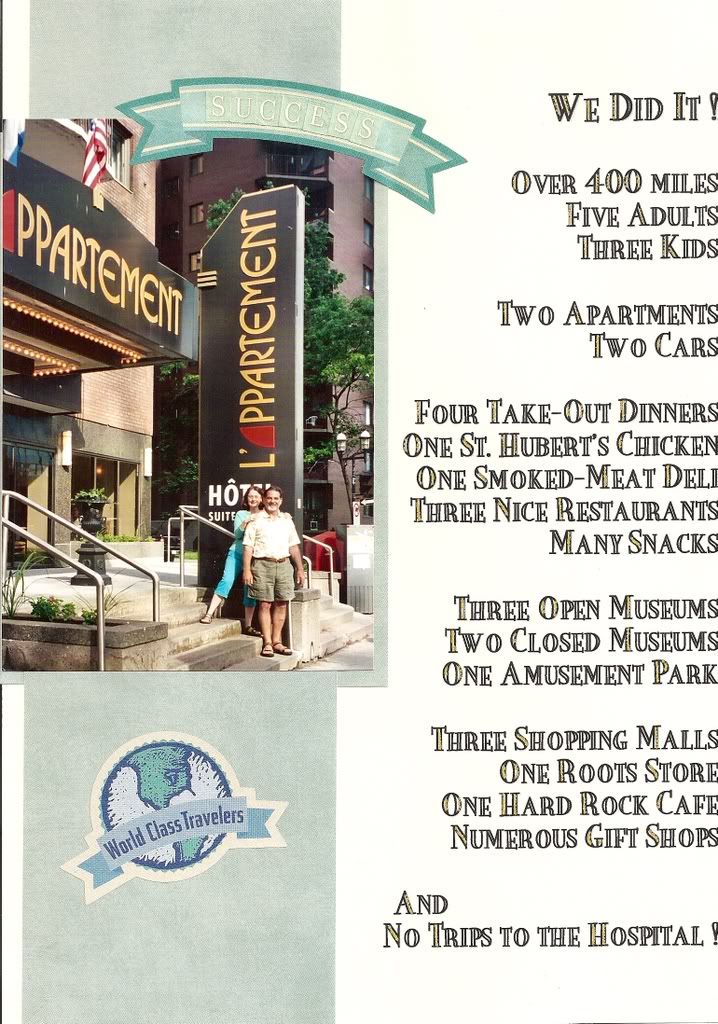
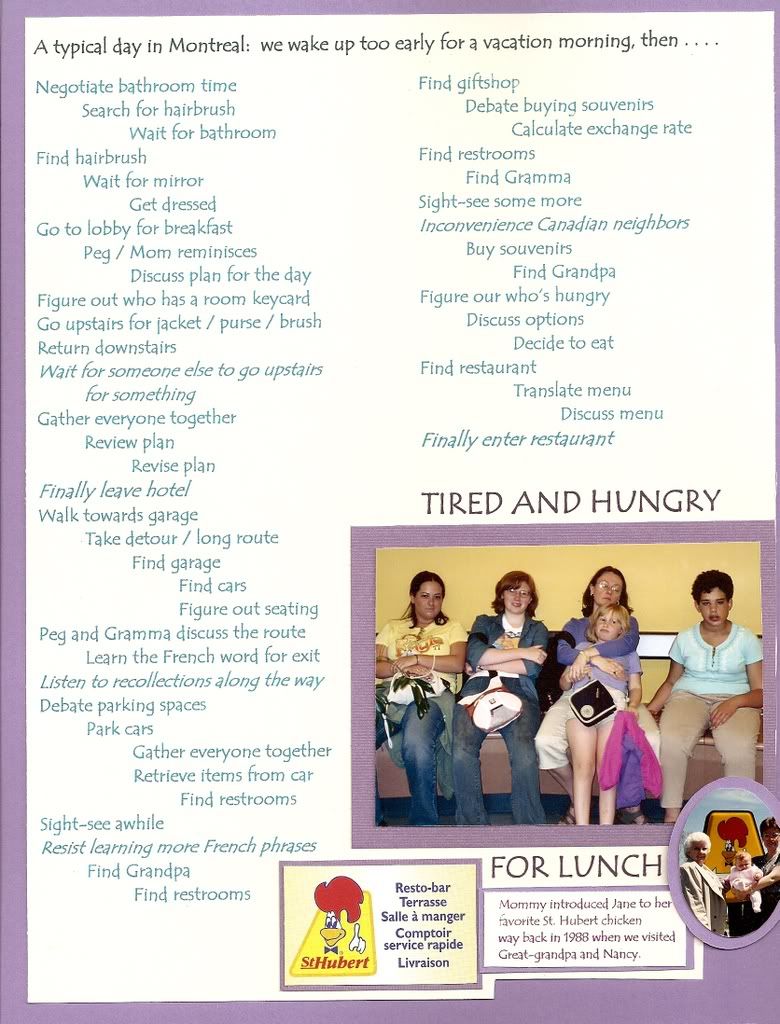
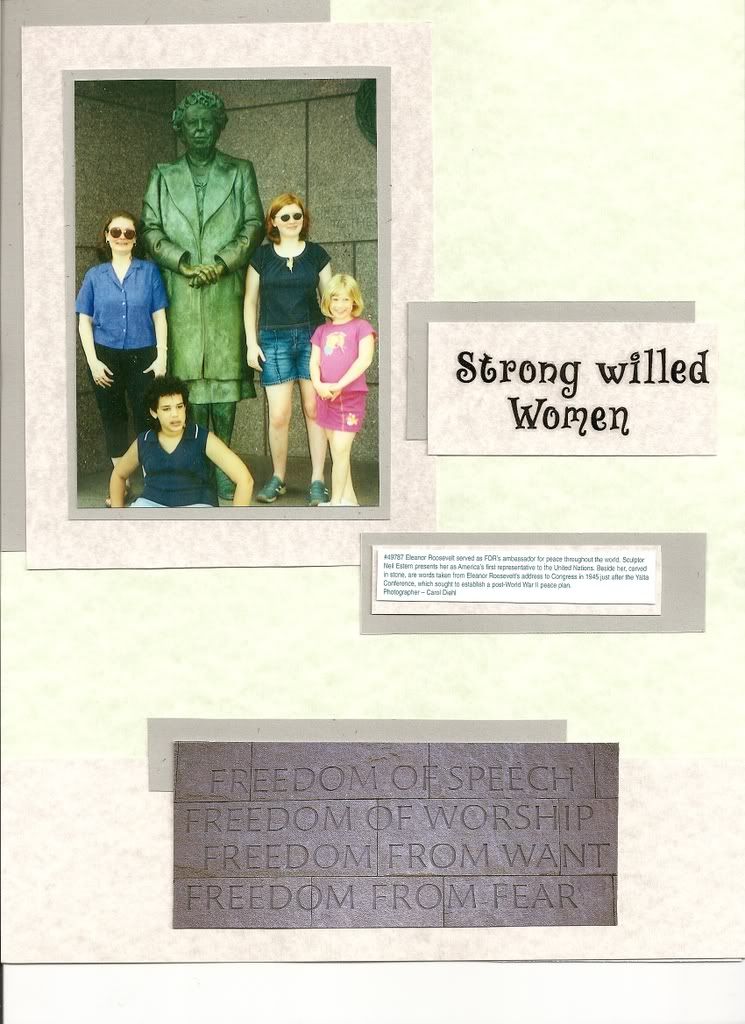
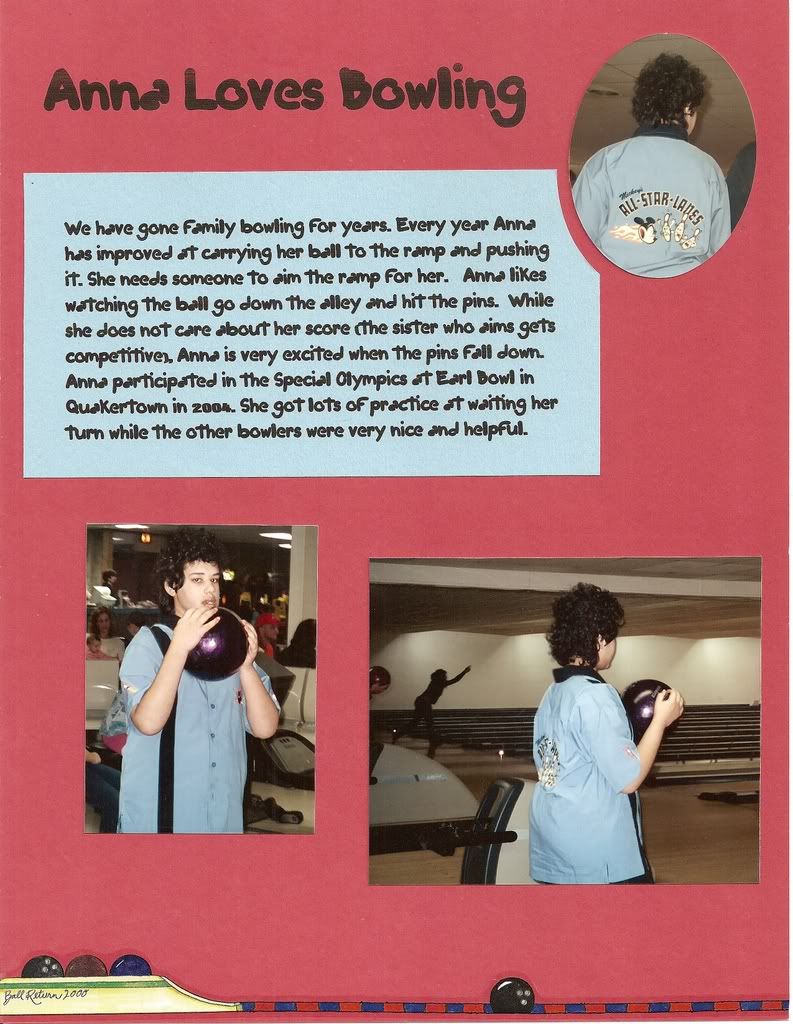
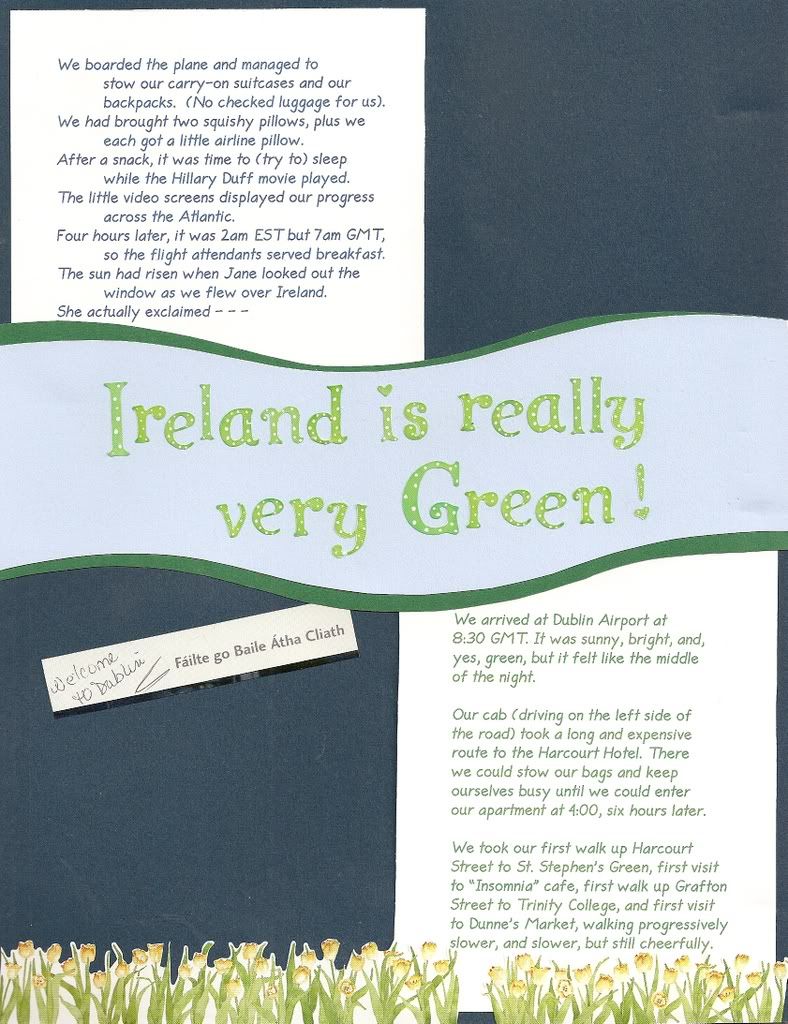
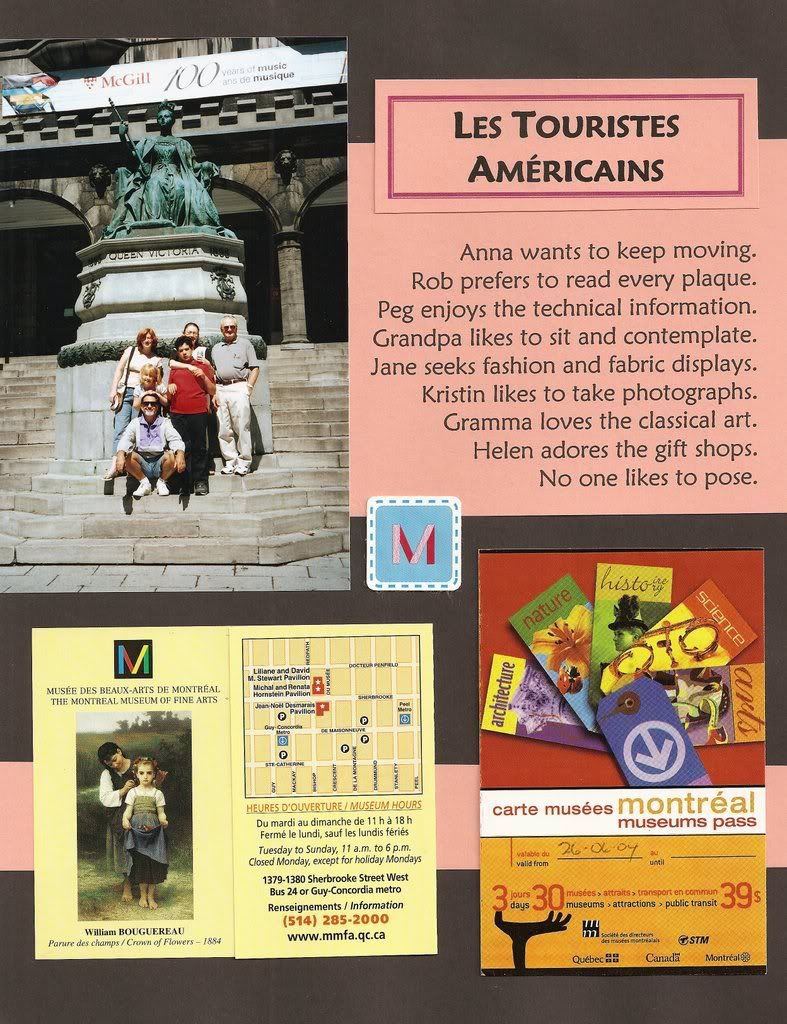
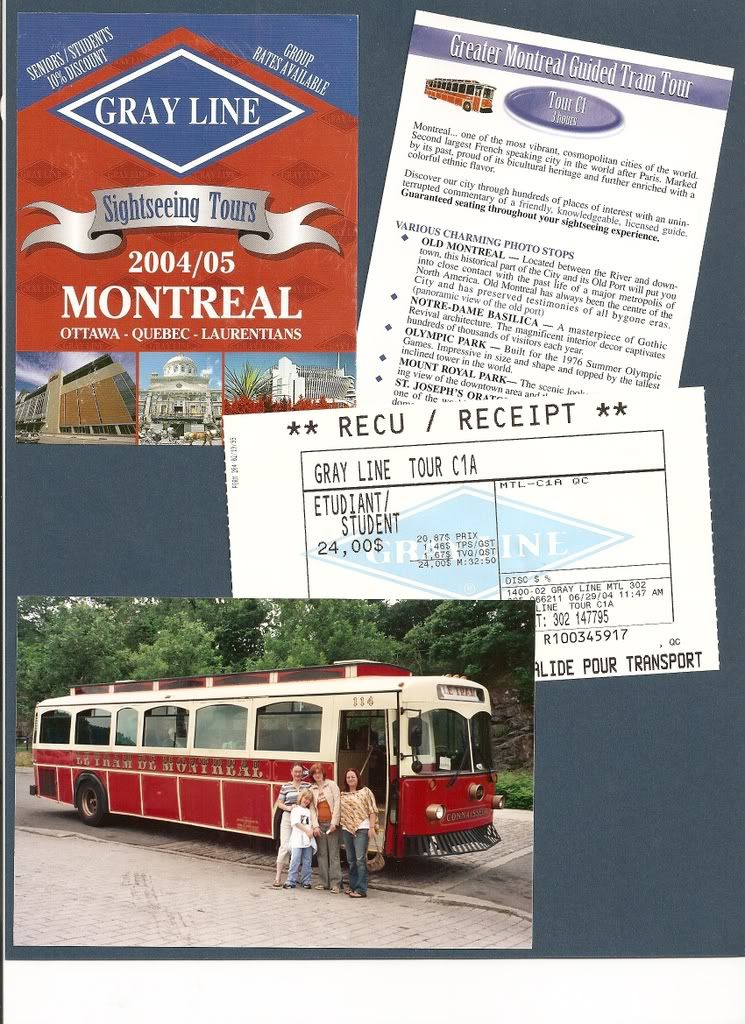
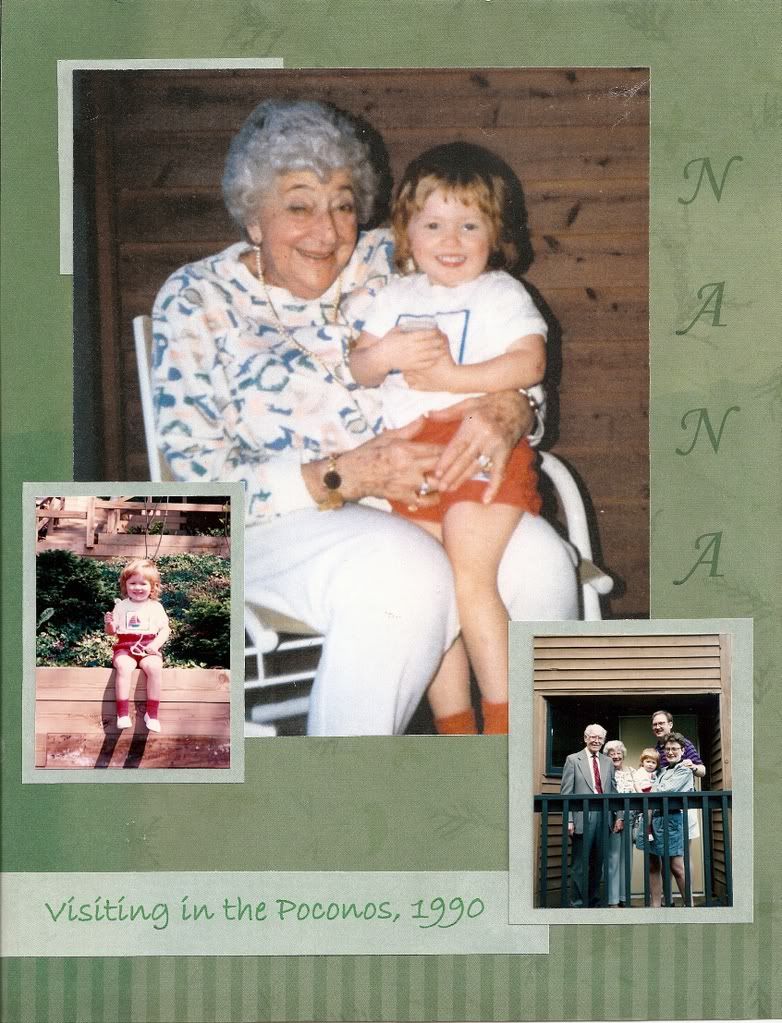
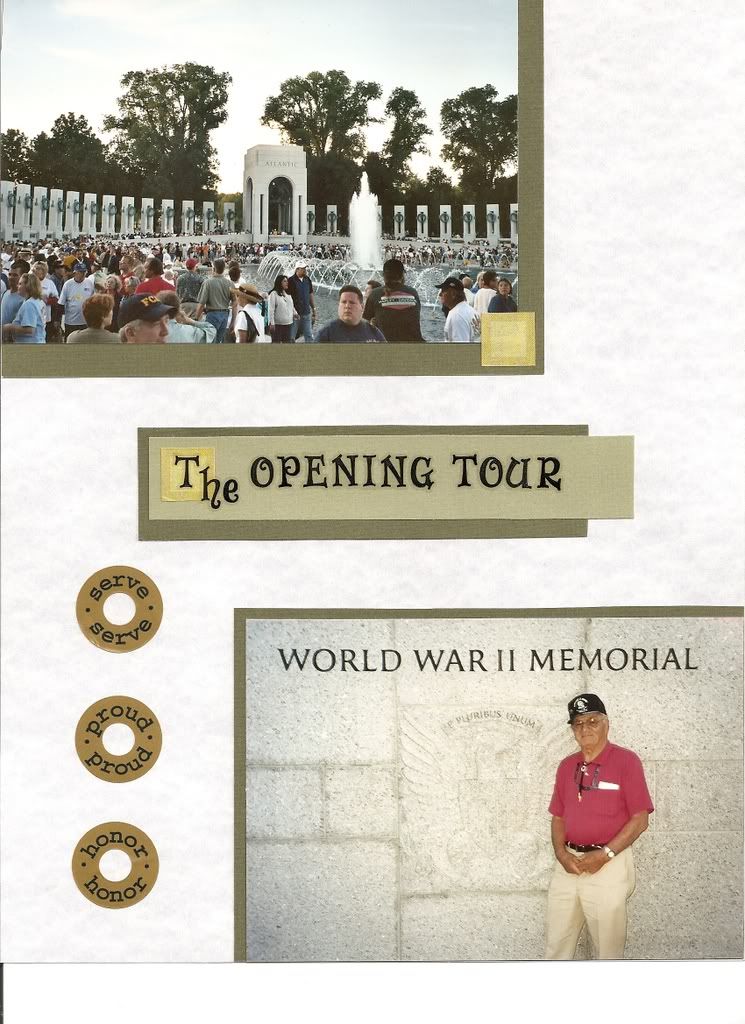
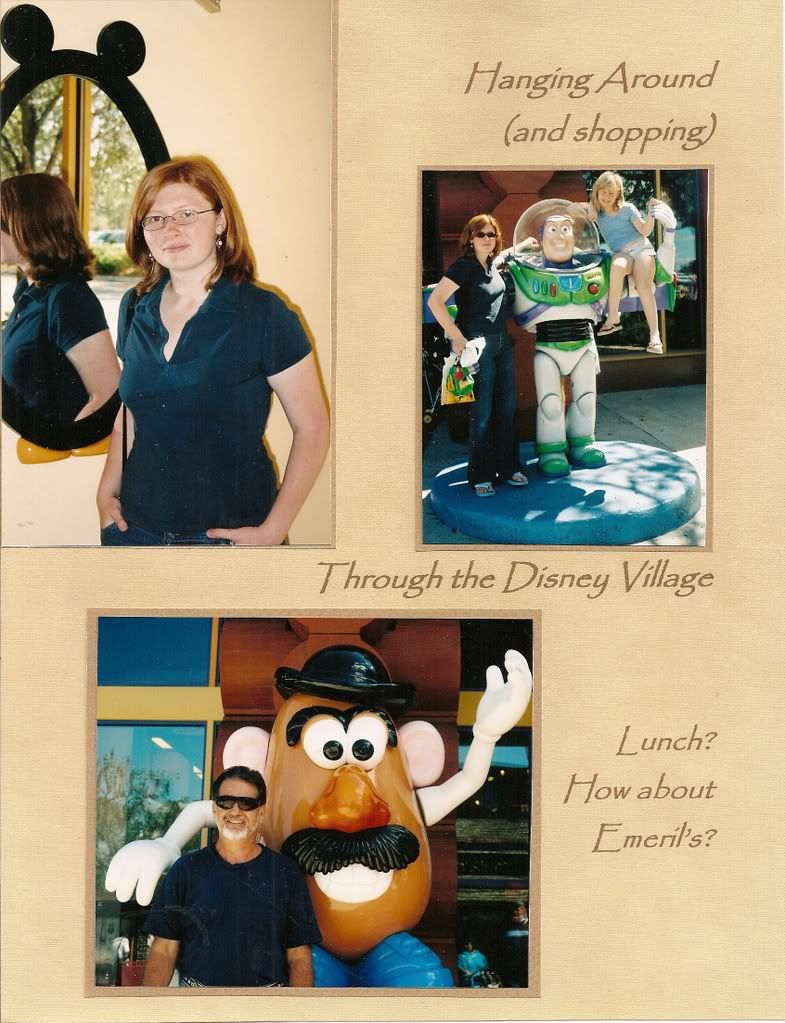
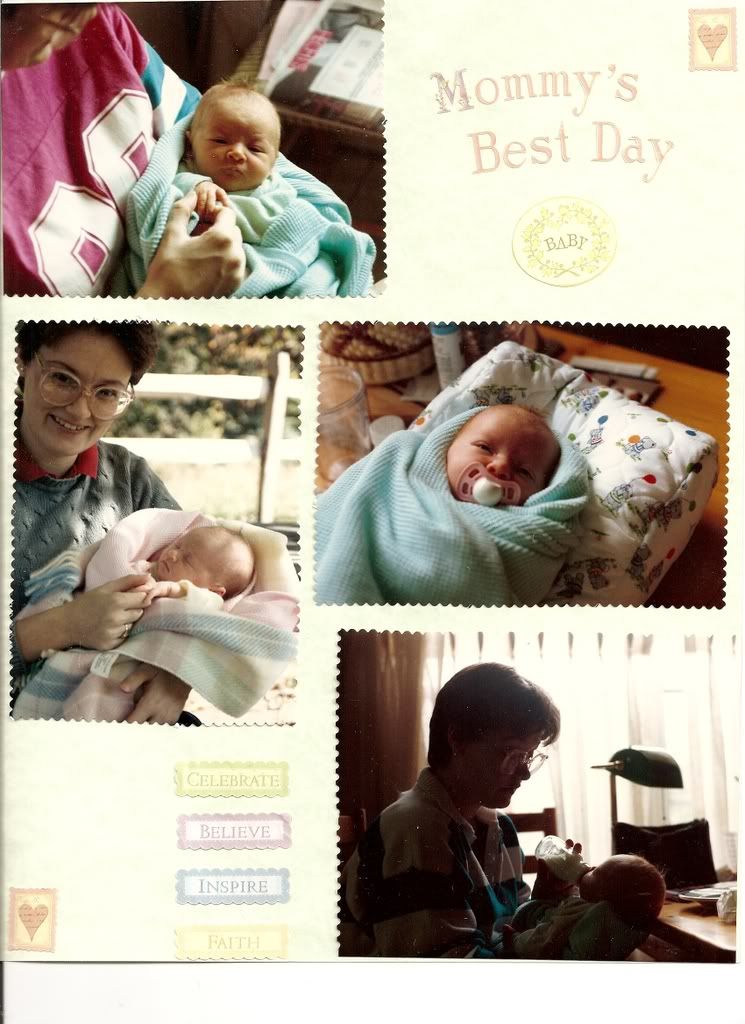